VMware Workstation Player Update Tips – 17.0.0 to 17.5.0 – unlock macOS VMs
Coming soon post here…
===
Tips To Note:
Crucial point ONE is:
Resuming/continuing the update process[after the first restart prompt], of the hypervisor VMware App, is exactly the same steps as you start the update process before.
Crucial point TWO is:
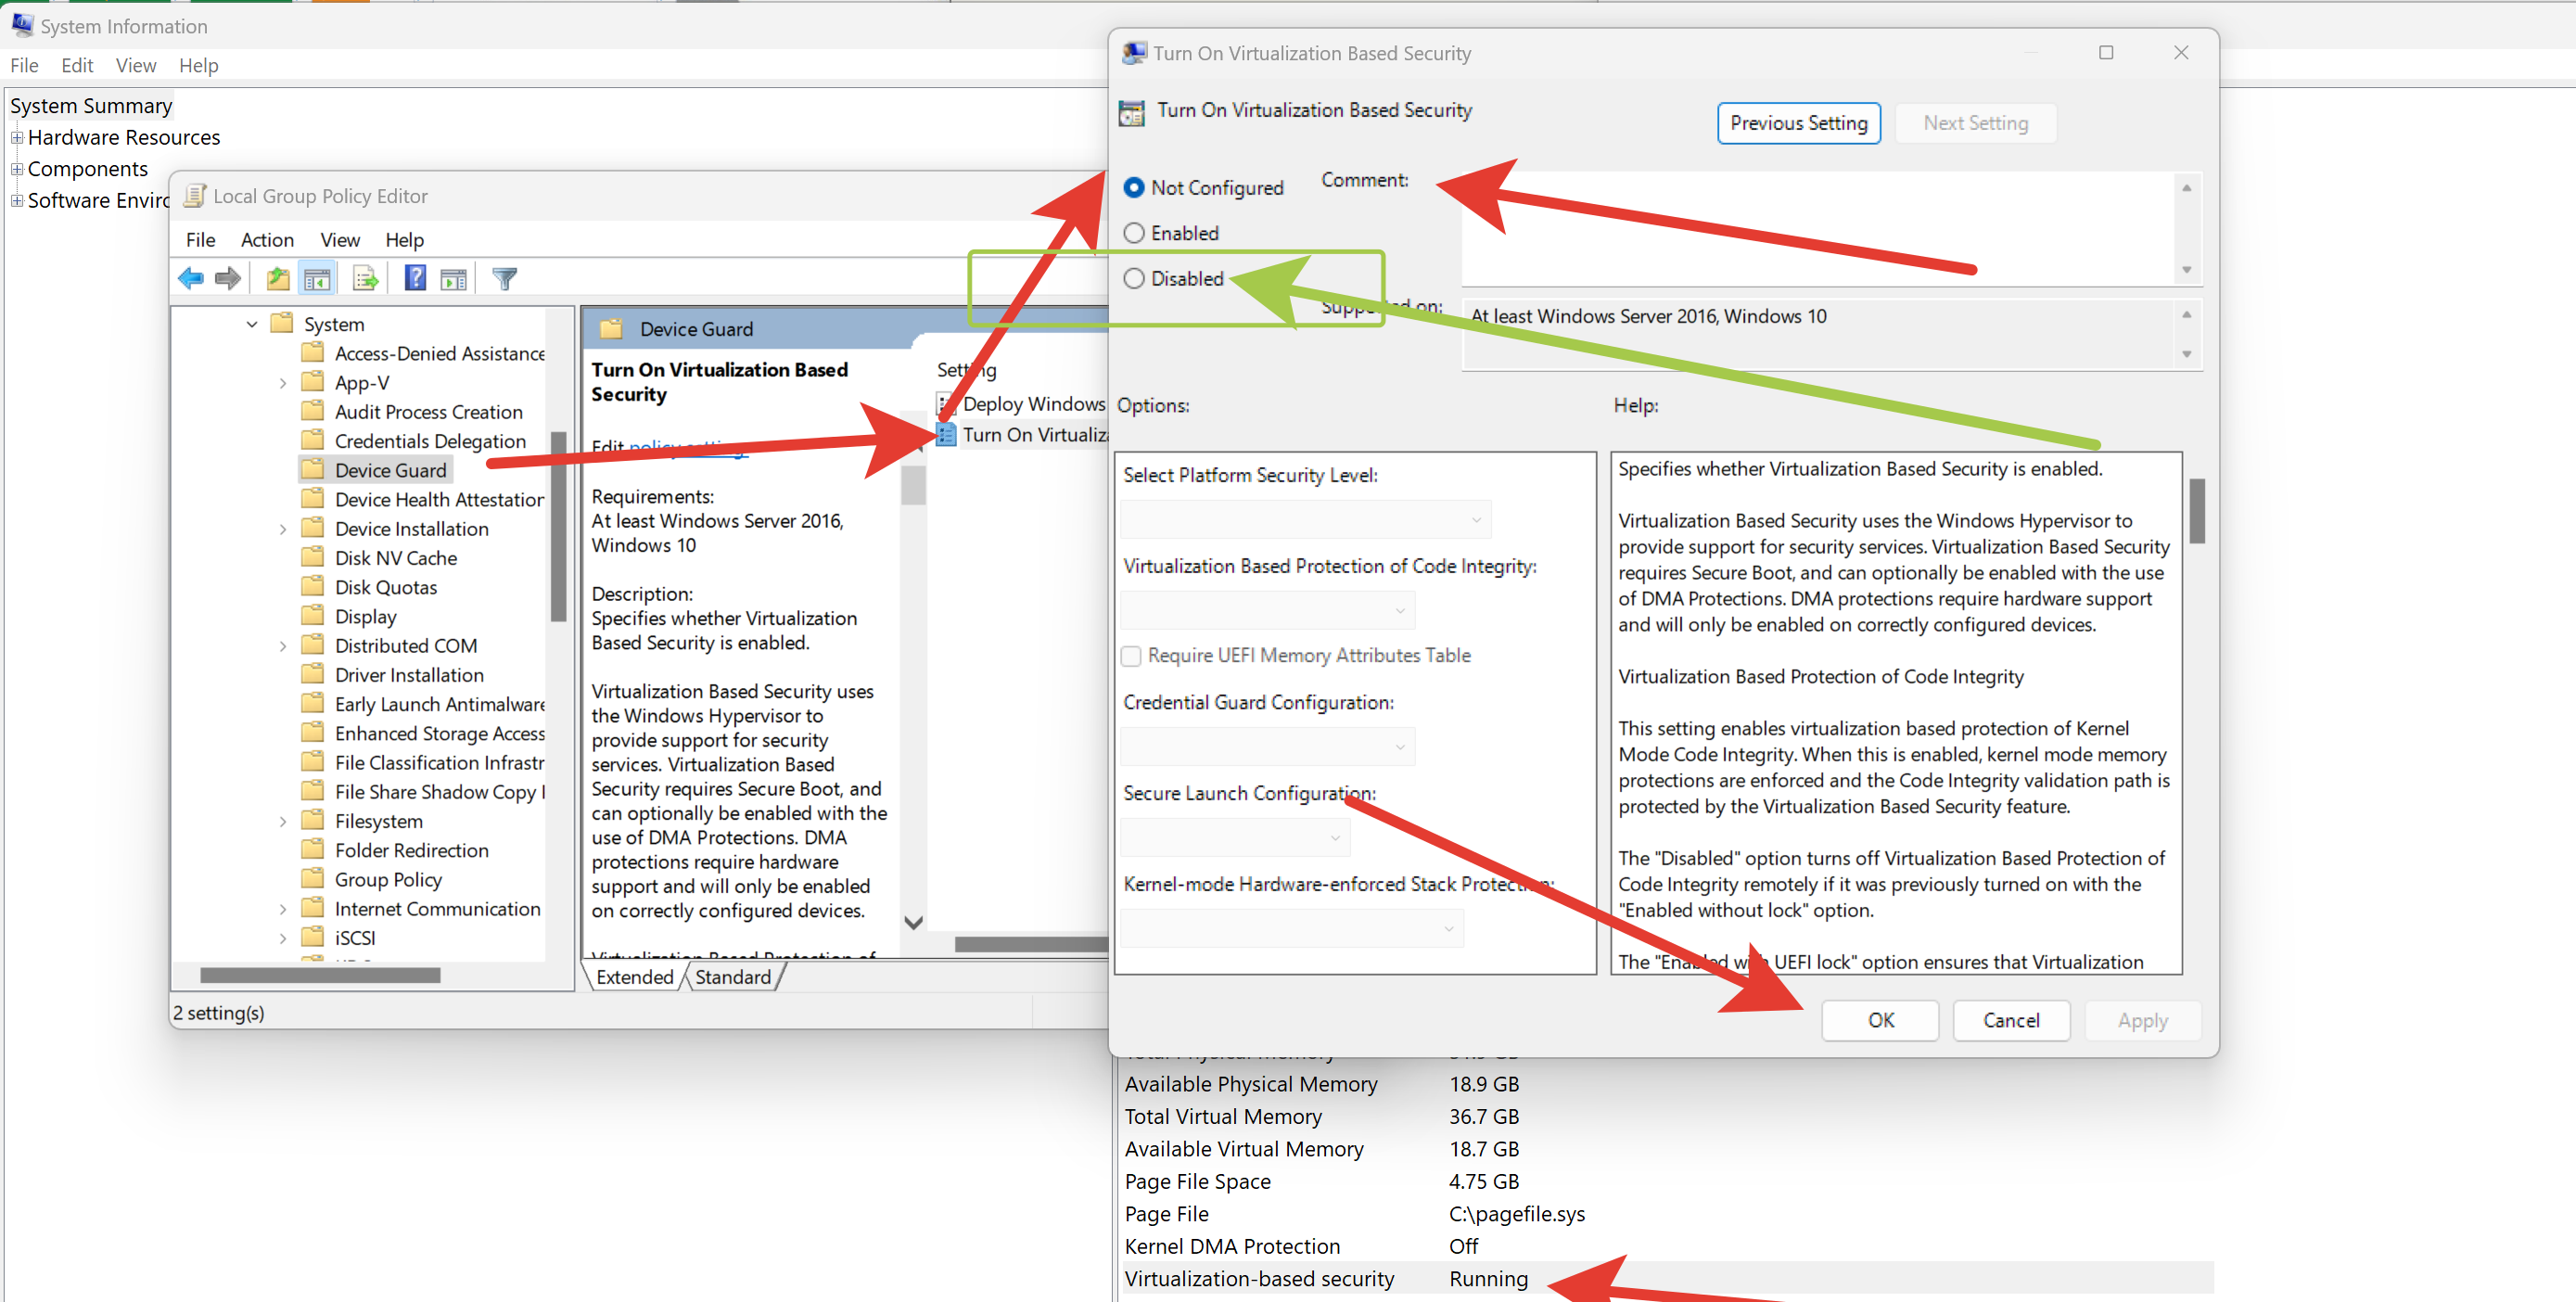
Disable Anti-Virus temporarily – for me disable AVG Anti-Virus.
Ignoring Security Alerts, for running check.exe and unlock.exe patch unlocker files. After all is done, re-enable your Anti-Virus Software.
Result:
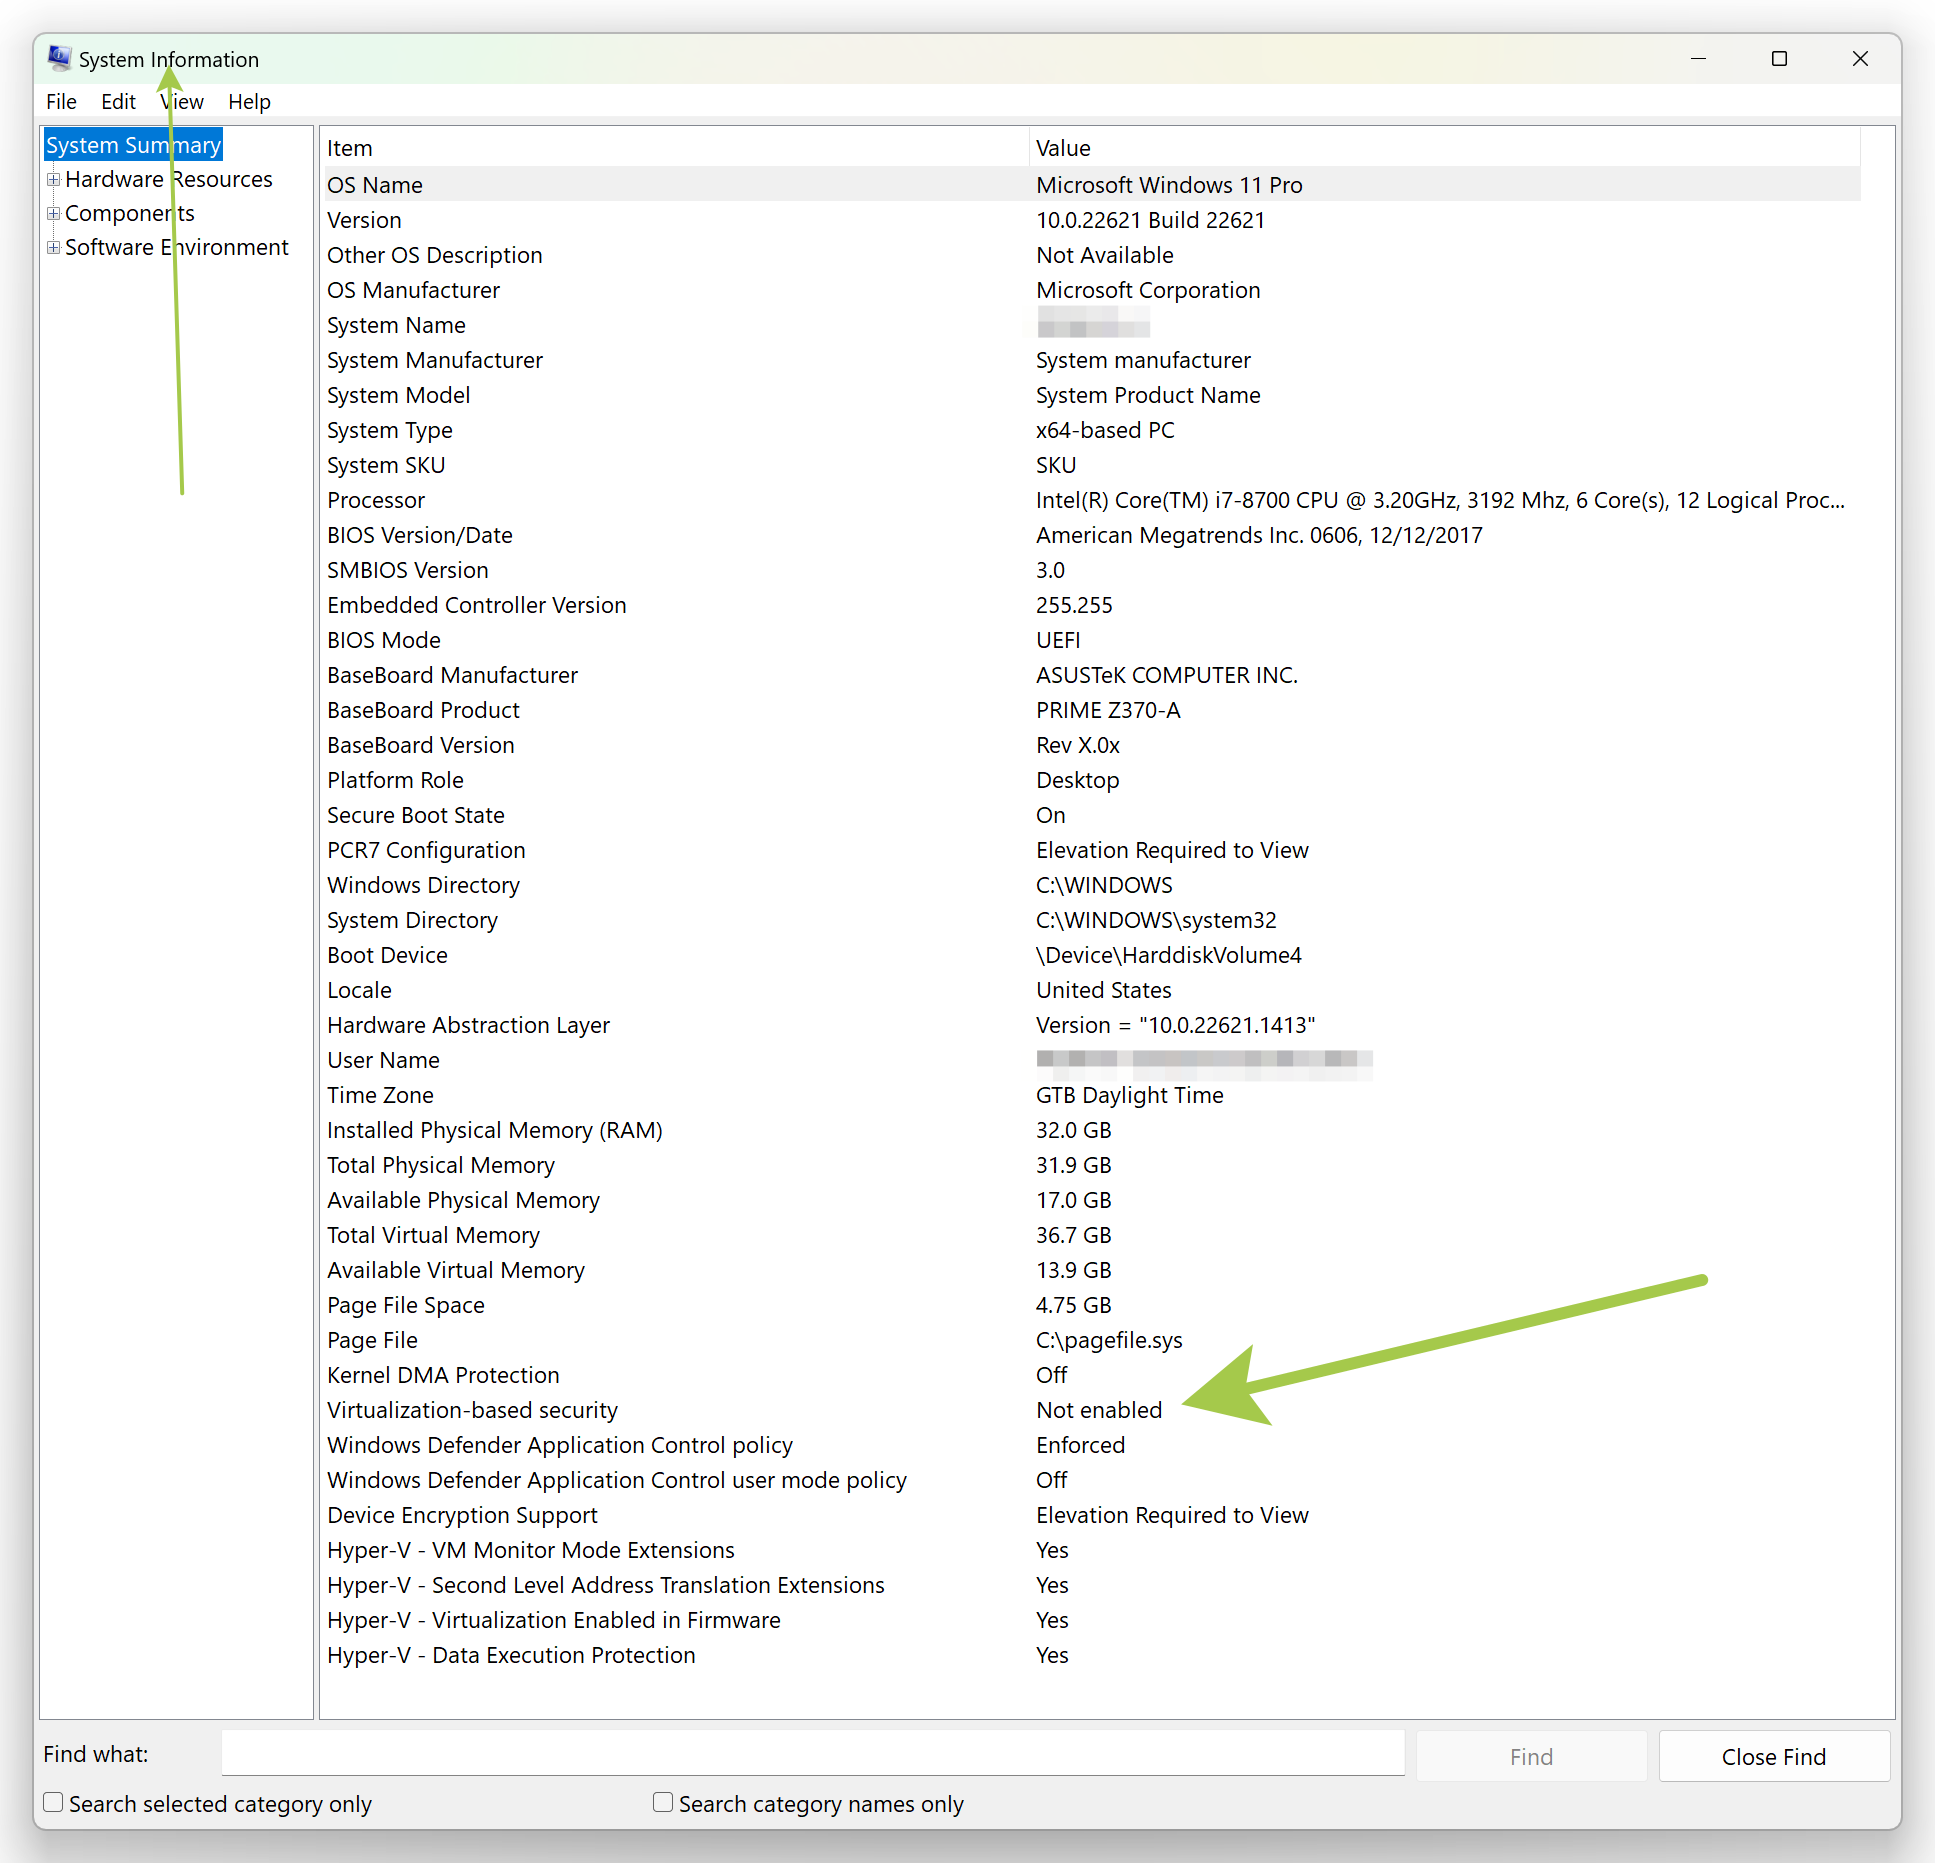
I can now browse and search the web, Google, and YouTube on a macOS VM in a Windows Host PC.
I could install Xcode and Apple Developer Tools. Or update Ventura OS to Sonoma OS – if the processor is 8-gen intel and up.
===
===
VMware Workstation Player Update Tips – 17.0.0 to 17.5.0
My Tech WP Blog – coming soon post/article for this video – check back here in a few days for the complete post: https://www.leonidassavvides.com/blog/2023/11/vmware-workstation-player-update-tips-17-0-0-to-17-5-0-unlock-macos-vms/
http://www.LeonidasSavvides.com/blog/
https://www.leonidassavvides.com/blog/2023/11/create-macos-sonoma-14-x-iso-without-a-mac-computer-and-free/
Unlocked VMware for MacOS VMs in Windows hosts or Linux hosts:
https://github.com/DrDonk/unlocker
https://github.com/DrDonk/unlocker/releases/tag/v4.2.7
https://github.com/DrDonk/unlocker/releases/download/v4.2.7/unlocker427.zip (used this zip in the demonstration here)
MacOS Sonoma 14.1 or Ventura 13.6 ISO image or VMware image (This is a third-party website)
https://filecr.com/windows/macos-sonoma-image-for-vmware/?id=844930904000
https://filecr.com/search/?query=macOS%20ventura%20iso
https://filecr.com/search/?query=macOS%20sonoma%20iso
=======================================
Donate/Make-A-Payment
https://www.paypal.me/lsepolis123
https://www.patreon.com/lsepolis123
https://www.buymeacoffee.com/lsepolis123
https://www.ko-fi.com/lsepolis123
Our Merchandise
http://odysseasphoto.gallery/html/our-merch.html
Social Media Networking
Facebook
https://www.facebook.com/leonidas.e.savvides
Twitter
https://twitter.com/lwdlse
Instagram
https://www.instagram.com/leonidassavvides/
YouTube Channel
https://www.youtube.com/channel/UC4HnFOYTvgoFAay9FKNTPYw
Affiliate Links-1
Int’l Prepaid/Cashback Cards
https://app.rewire.to/signup/?code=NR8H
https://revolut.com/referral/leonidpwlv!DEC1AR
https://wise.com/invite/ata/leonidass19
CY-EU
I love saving with sKash; it is instant, easy & effortless! I have been saving on my groceries, fuel, coffee & all my other daily purchases… Up to 10% every time!
Register to sKash & get a €10 Welcome vouchers to get a taste of saving.
You can thank me later!
https://skash.com/I6yy5
Affiliate Links-2
Envato – The world’s largest creative marketplace
Envato Placeit
https://1.envato.market/c/2617455/629767/10168
Envato Elements
https://1.envato.market/c/2617455/298927/4662
Envato Market
https://1.envato.market/c/2617455/275988/4415
Affiliate Links-3
Join Canva with my link and get rewards! If you ever need to create a graphic, poster, invitation, logo, presentation – or anything that looks good — give Canva a go.
https://www.canva.com/join/gyt-gmc-twm
Editing Software: Adobe Premiere Pro / Windows 11 Pro
===
