Host OS: Windows 11 Pro
Guest OS: Windows 11 Pro DEVELOPMENT VM BY MICROSOFT
Guest OS: downloaded from here free Dev Version valid ~3 mo: VMware version:
https://developer.microsoft.com/en-us/windows/downloads/virtual-machines/
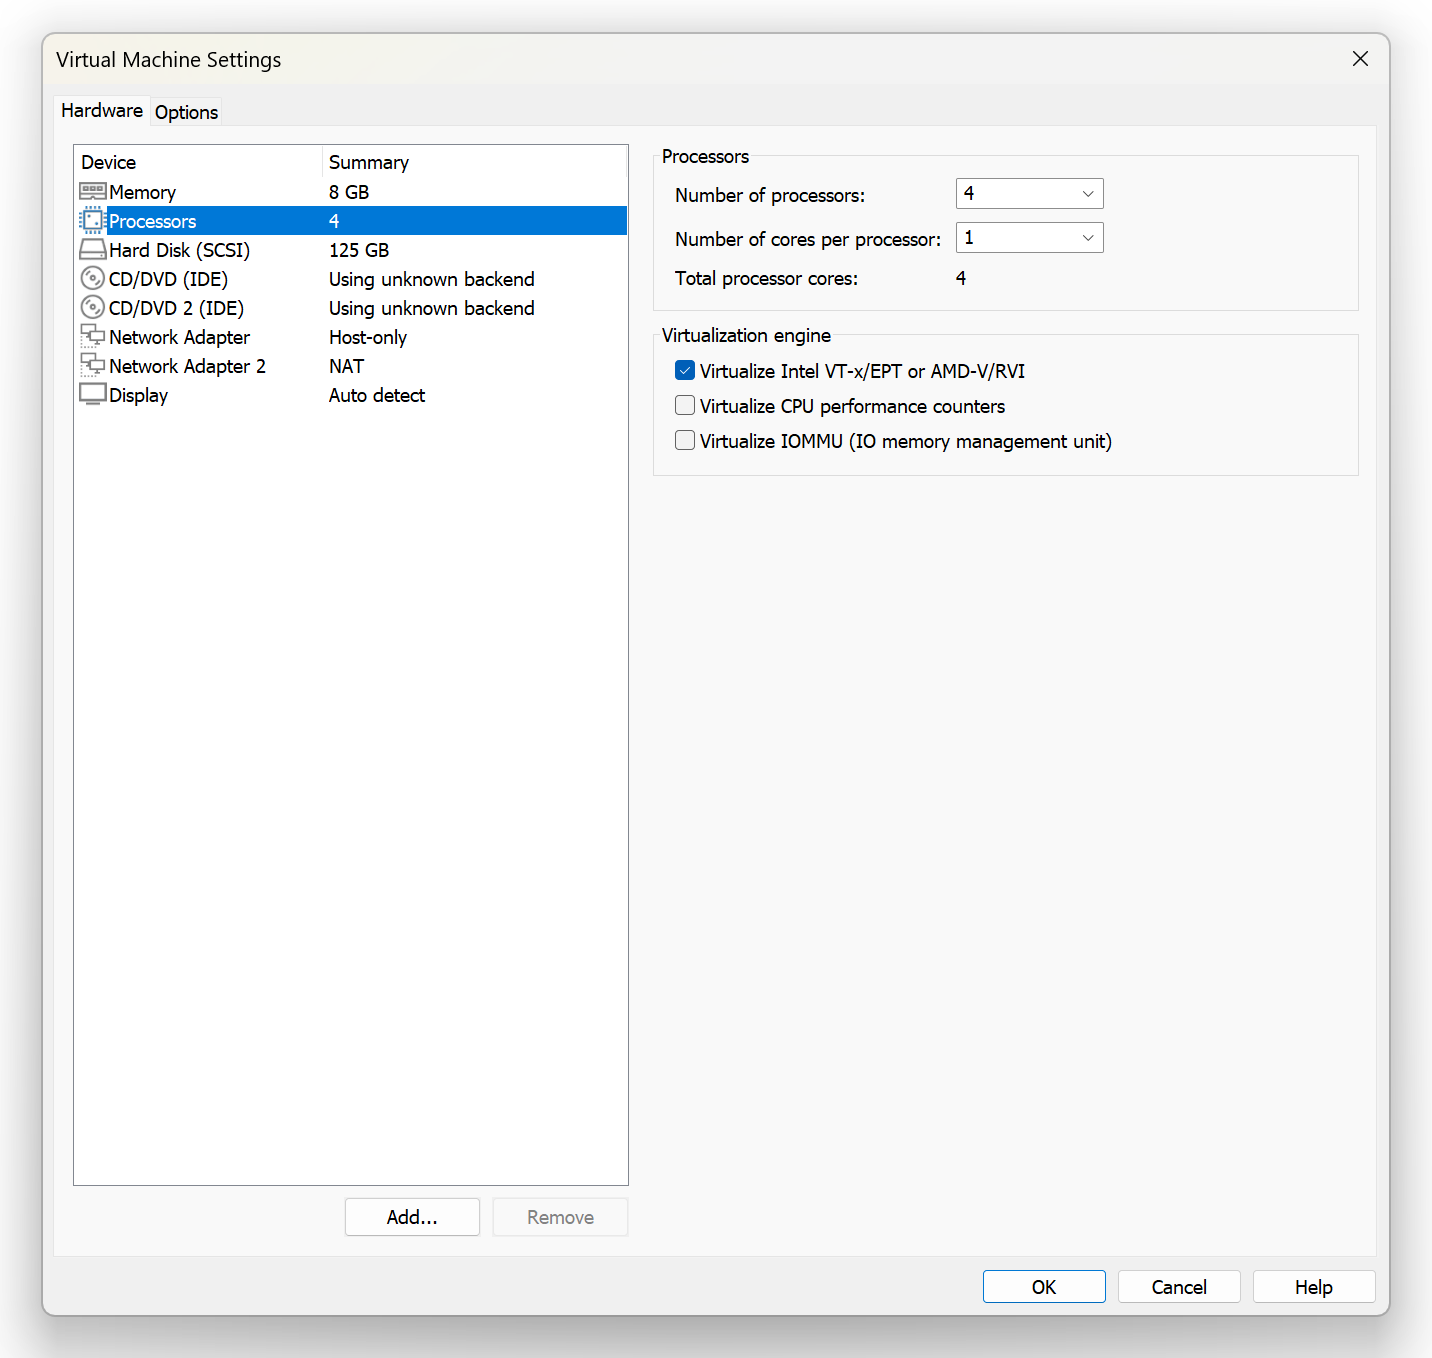
After having downloaded unzipped and imported to VMware Workstation Pro 17.0.2.
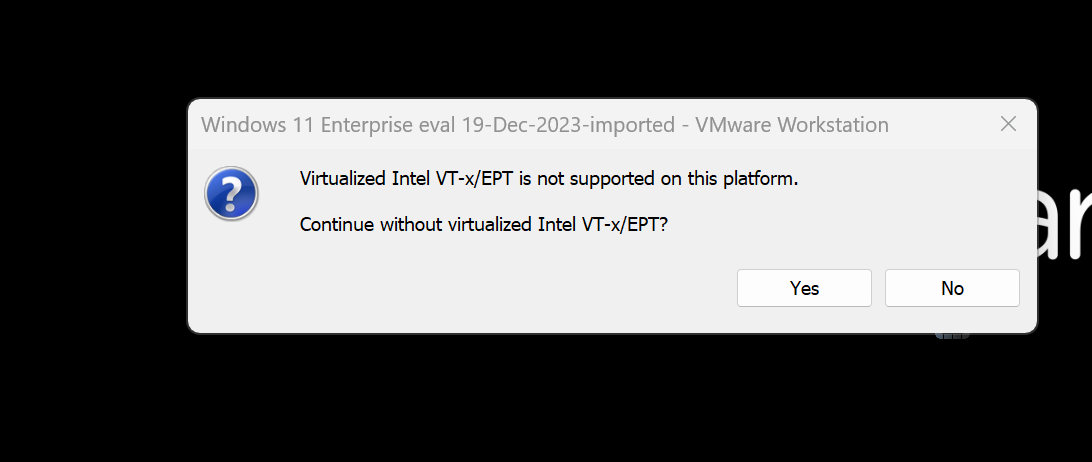
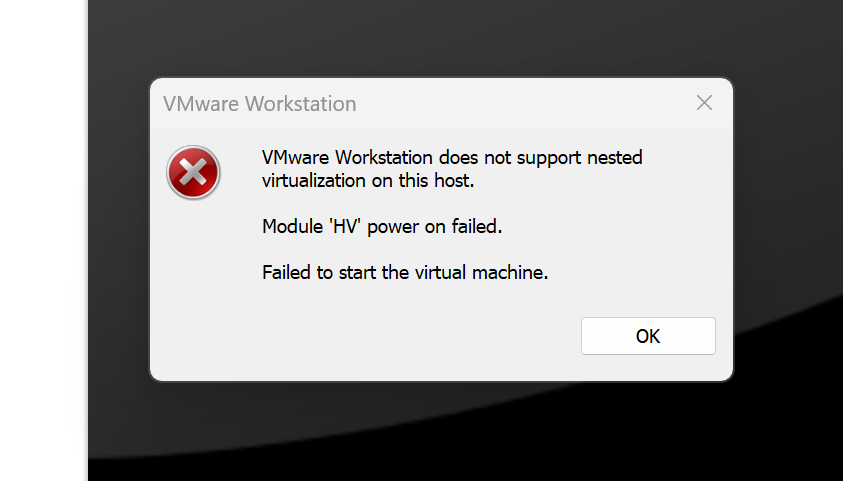
Nested Virtualization problems followed by solution:
SOLUTIONS TO TRY OUT
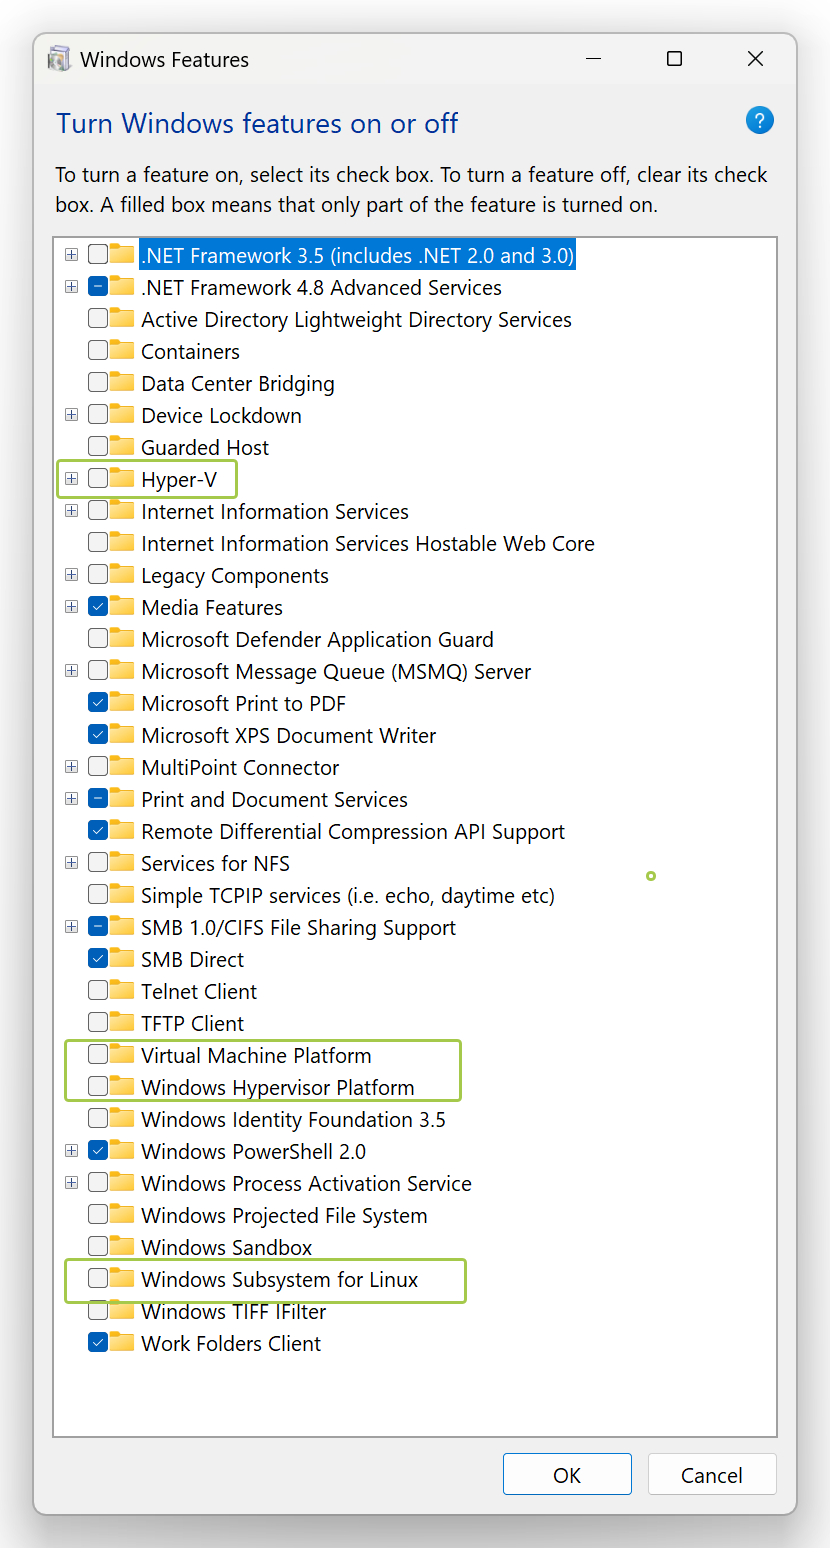
SOLUTION STEP-1
Go to HOST OS: Turn Windows Features On or Off ENSURE THESE 4 GREEN CIRCLED ARE UNCHECKED – IF NOT UNCHECK, AND SAVE AND RESTART.
IF Nested Virtualization problems CONTINUE GO TO STEP 2
===
SOLUTION STEP-2 [After Step-1 still not working]
The process to turn off virtualization-based Security:
Below are steps that can be followed to turn off virtualization-based Security for Windows 10 Home & Pro:
For Microsoft Windows 10 Pro & above:
Go To: Edit group policy ( gpedit.msc )
Go to Local Computer Policy > Computer Configuration > Administrative Templates > System
Double-click on Device Guard on the right-hand side to open.
Double Click on “Turn On Virtualization Security” to open a new window
It would be “Not Configured”, Select “Disable” and click “OK”
Close the Group Policy Editor.
Restart the system
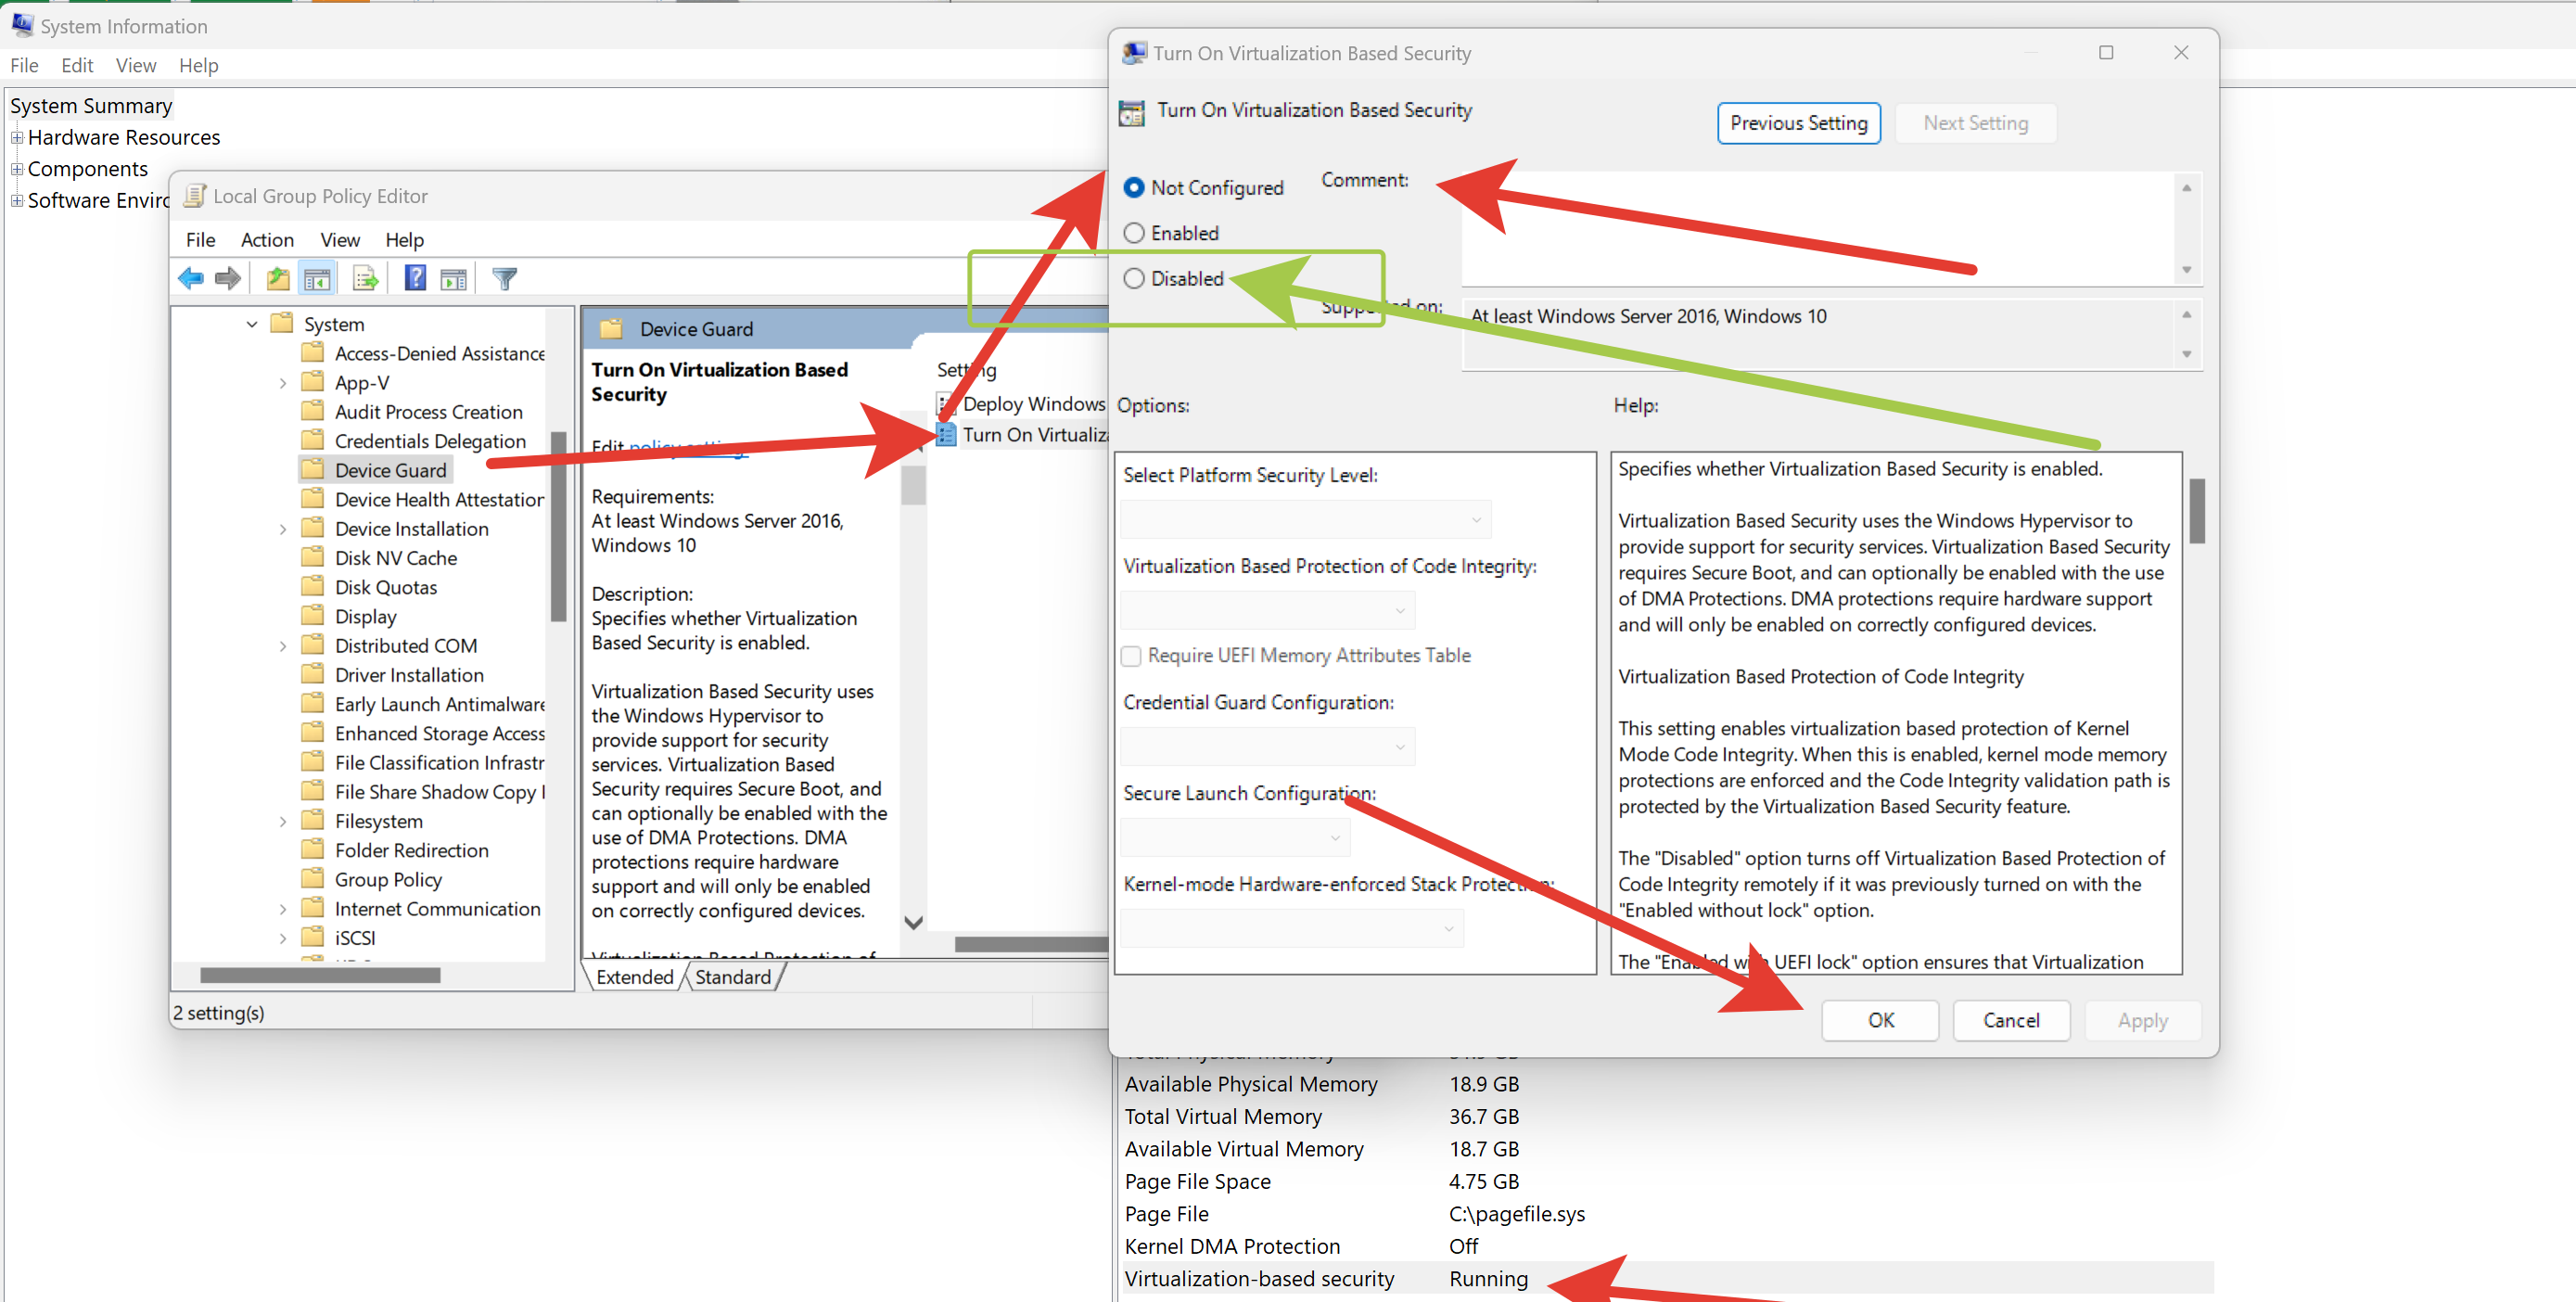
TO BECOME:
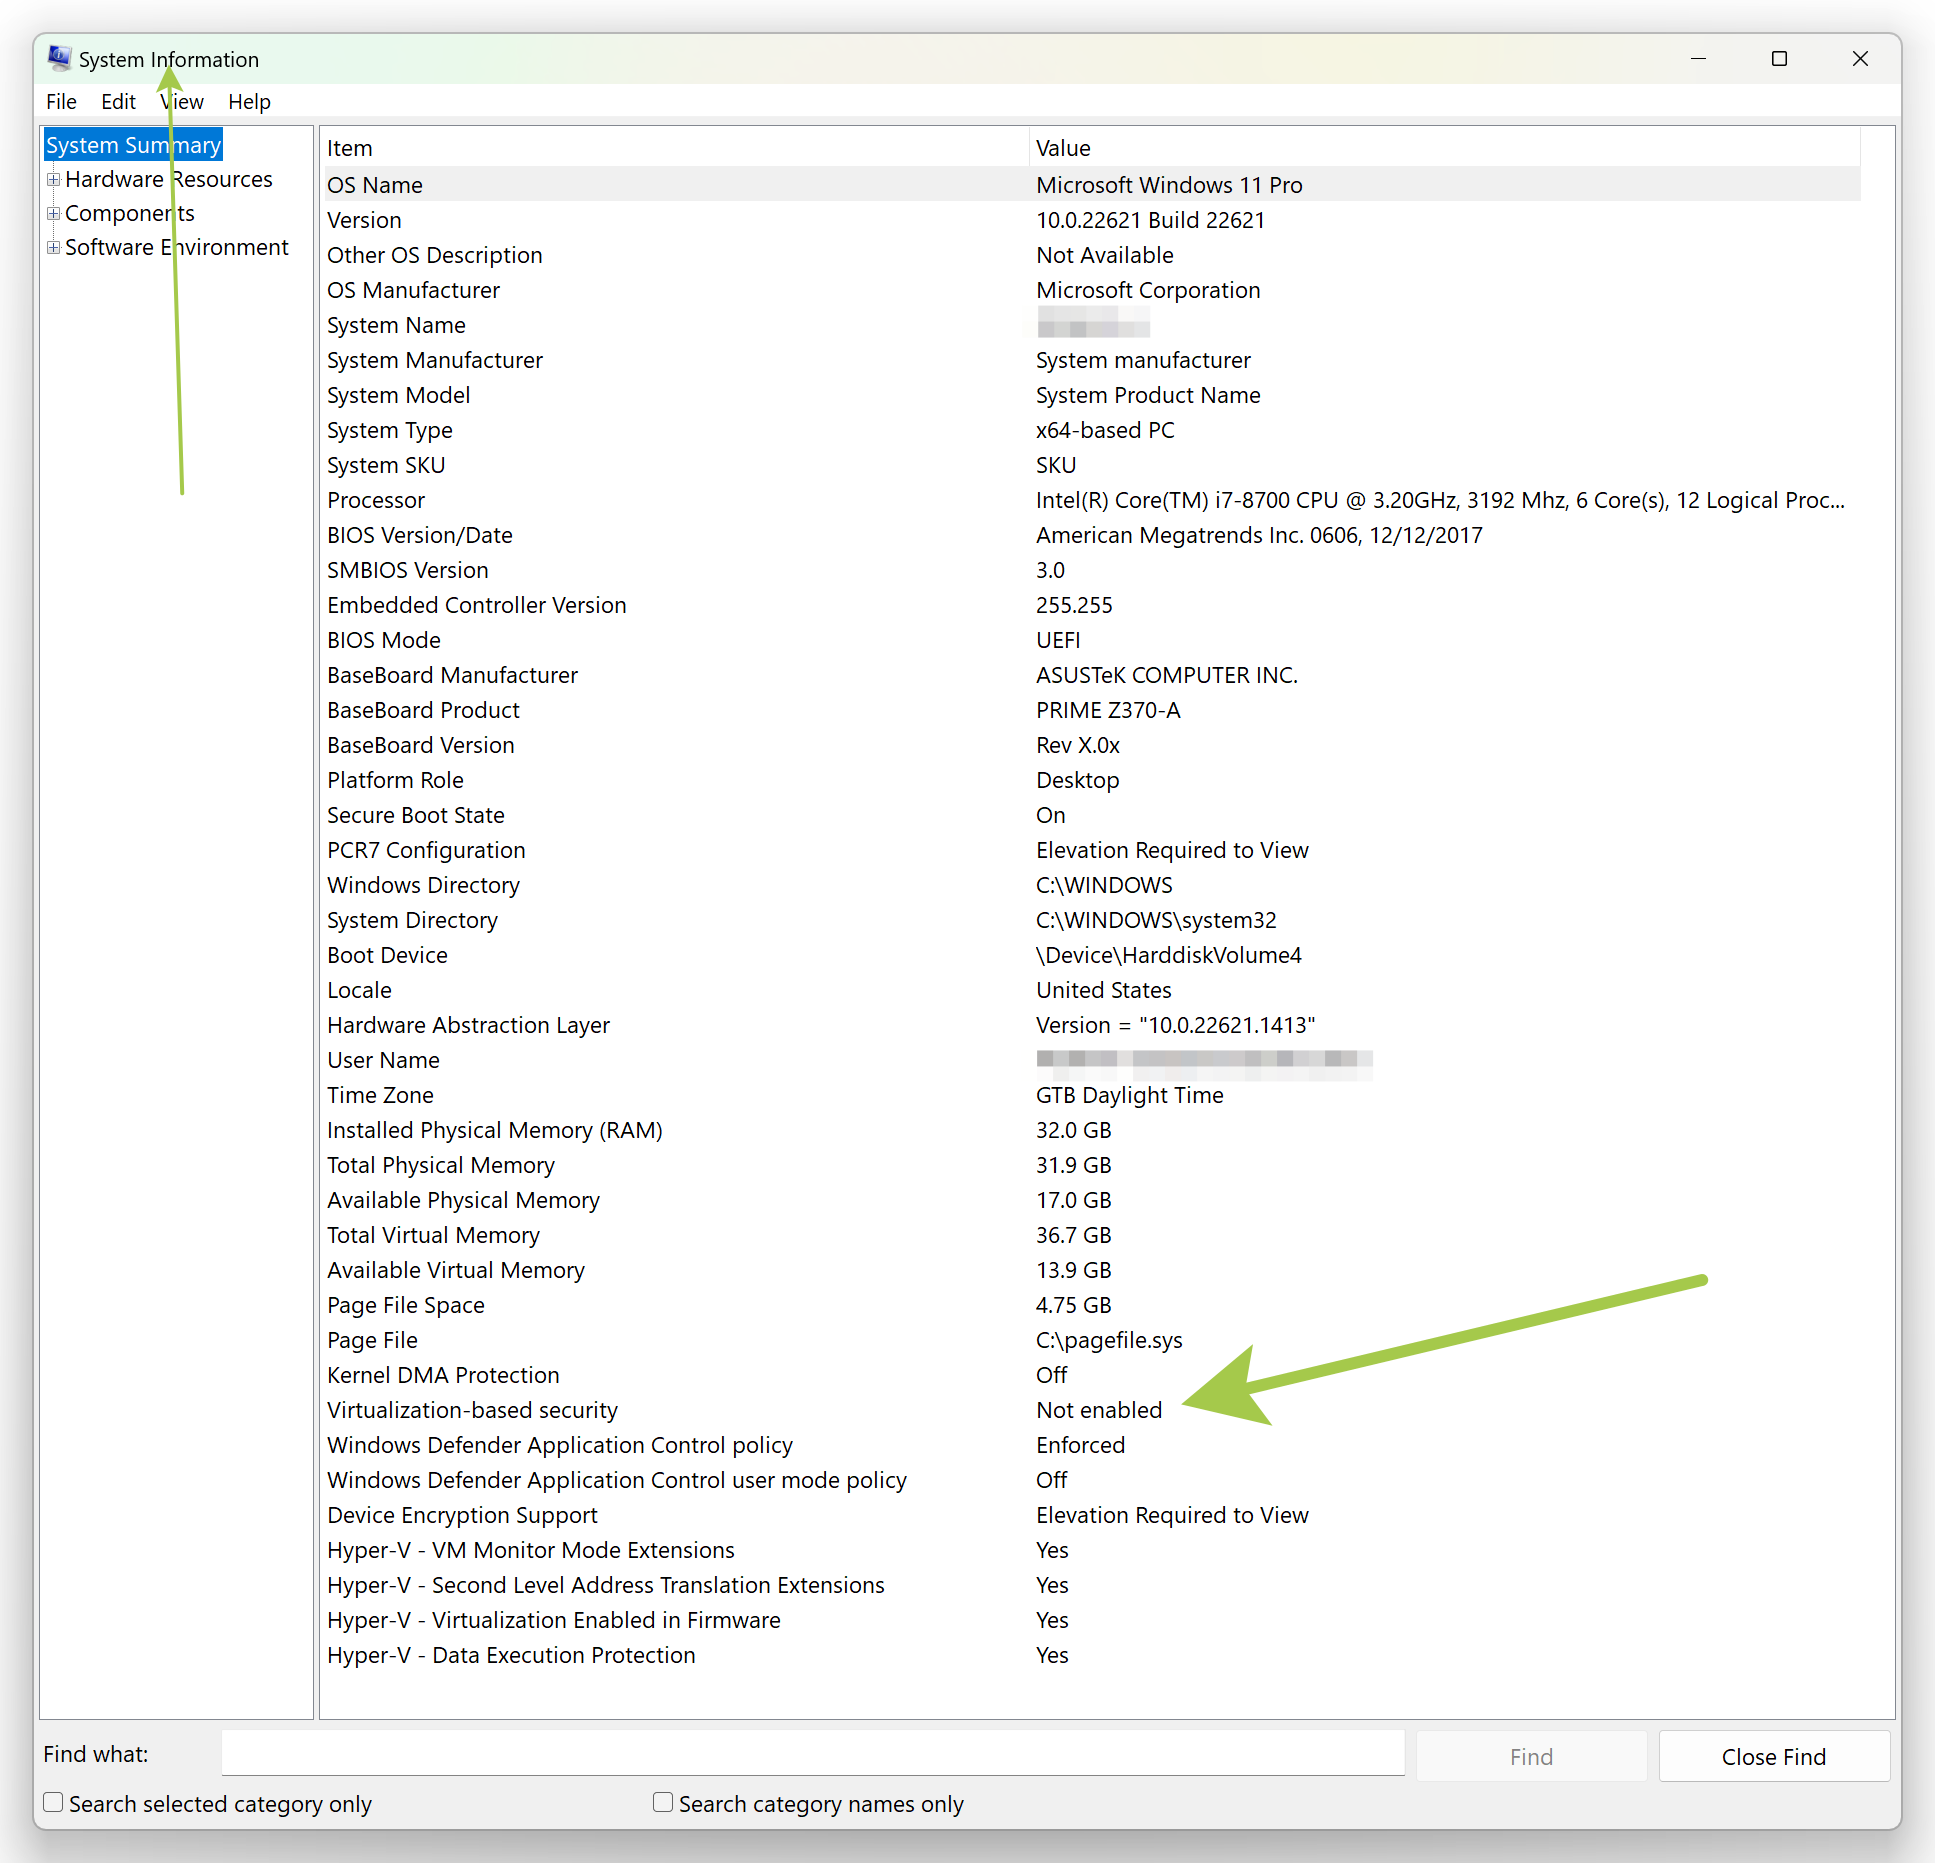
If you still having problems put in the article comments and I will reply soon!