For Windows 24H2 go here. For 23H2 Continue.
SOLVED PROBLEMS BY READING THIS ARTICLE:
- Download Windows-11-Pro.iso [All versions & Workstations] from Microsoft
- My PC from eBay.com a hp z640 – default language: de-de, change to us-en
- Bypass Restrictions of Win-11 Pro for WS: upgrade 22H2 to 23H2 *
- After upgrading from 22H2 to 23H2, Win-11 Pro for Workstations, some minor updates may be needed
- Buy Cheap Software keys – Windows 11/10 Pro for Workstations, Windows 11 Pro, Home, etc. **
* Instructions given – This method DOES NOT USE 3rd Party Tools. It does use the Official Windows11.iso from the Microsoft website – download, and some CLI commands – All Safe === All Microsoft…!!!!!!!!!!!!!!!!!!!!!!!!!
** Windows 11/10 Pro for Workstations can be installed on any PC, but to make use of all of its functions and power needed Workstation PC, eg. Intel XEON processor, ECC RAM, Professional Graphics card…etc.
1- Download Windows-11-Pro.iso [All versions & Workstations] from Microsoft
https://www.microsoft.com/software-download
Please go to:
https://www.microsoft.com/software-download/windows11
After in the 3rd section of:
Download Windows 11 Disk Image (ISO) for x64 devices
Choose in the drop-down menu: Windows 11 (multi-edition ISO for x64 devices)
Press the button “Download now”
And after in the appeared Section: Select the product language:
English (United States)
Press the button “Confirm”
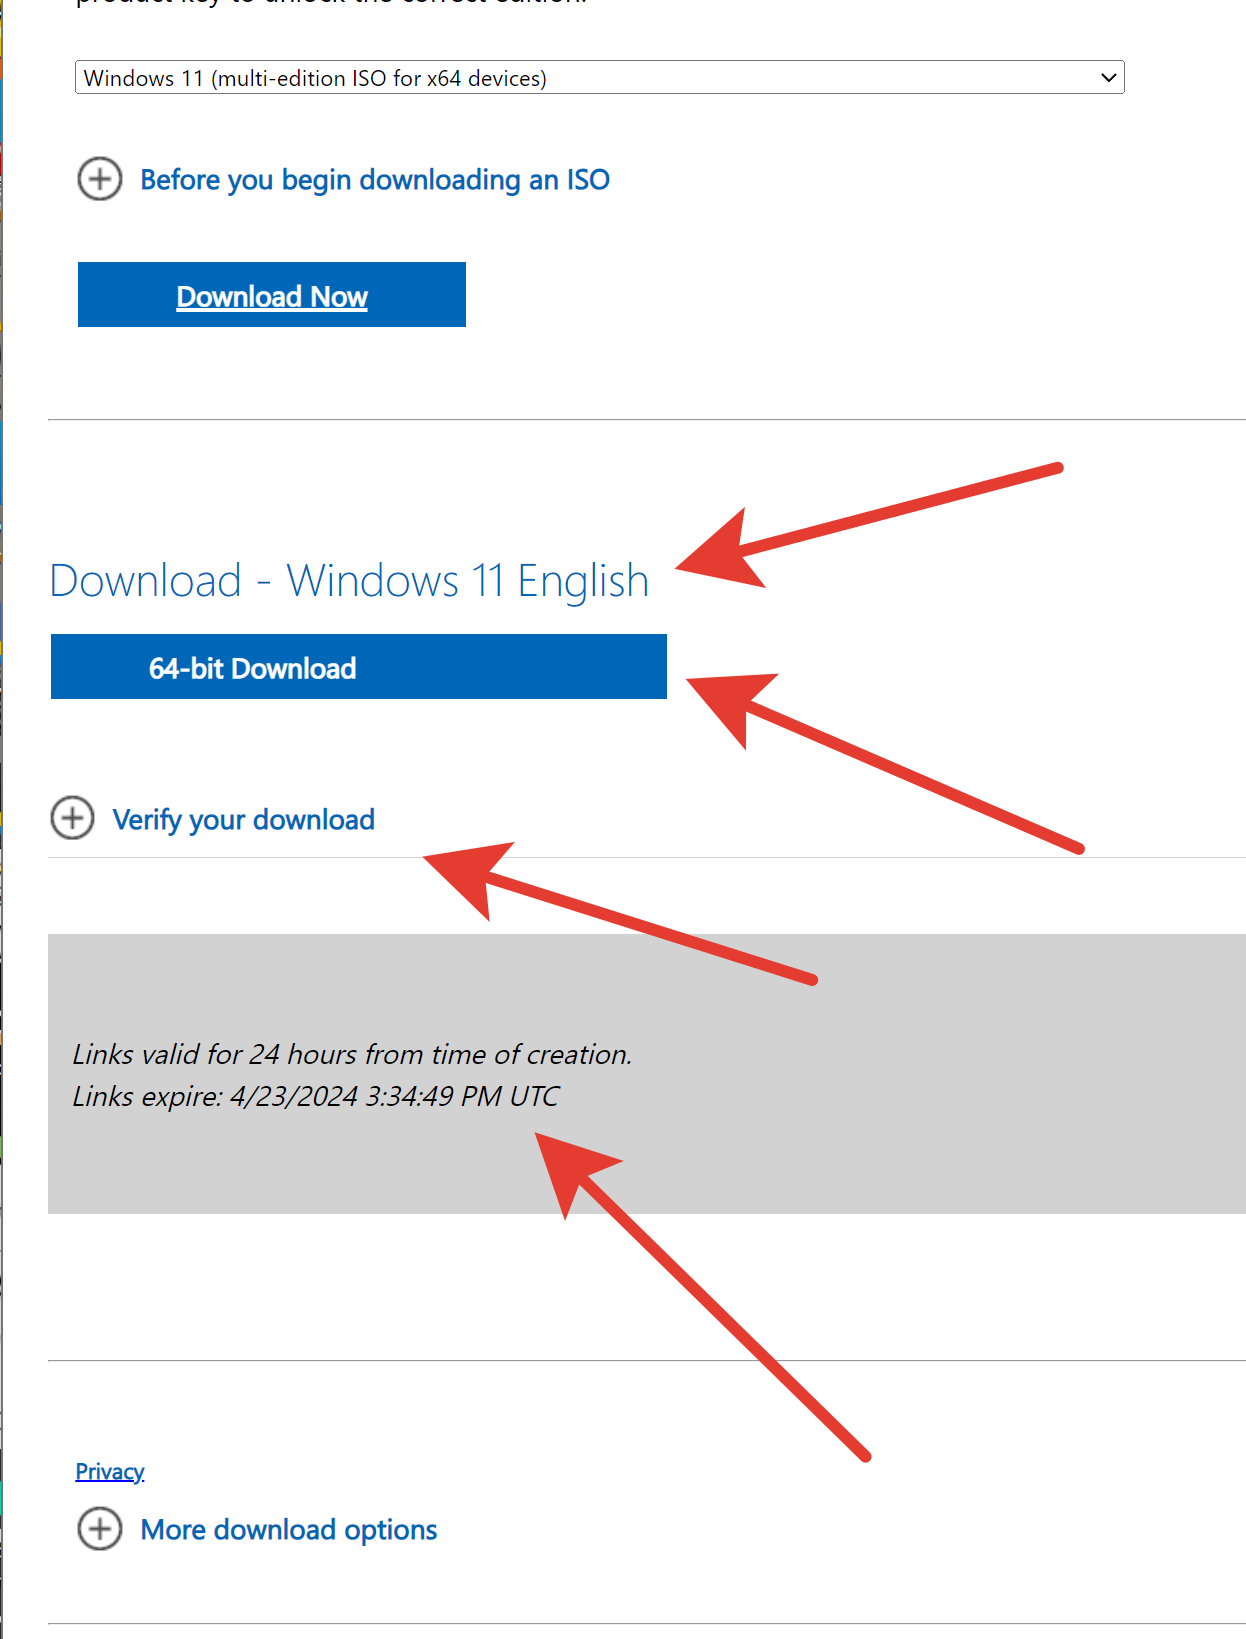
The Section “Download – Windows 11 English” appears
Press the button “64-bit Download”
Save the file in the prompt as: Win11_23H2_English_x64v2.iso
Repeat the Process but this time – we do this because the eBay PC has a base language of German so needs German ISO to upgrade:
And after in the appeared Section: Select the product language:
German
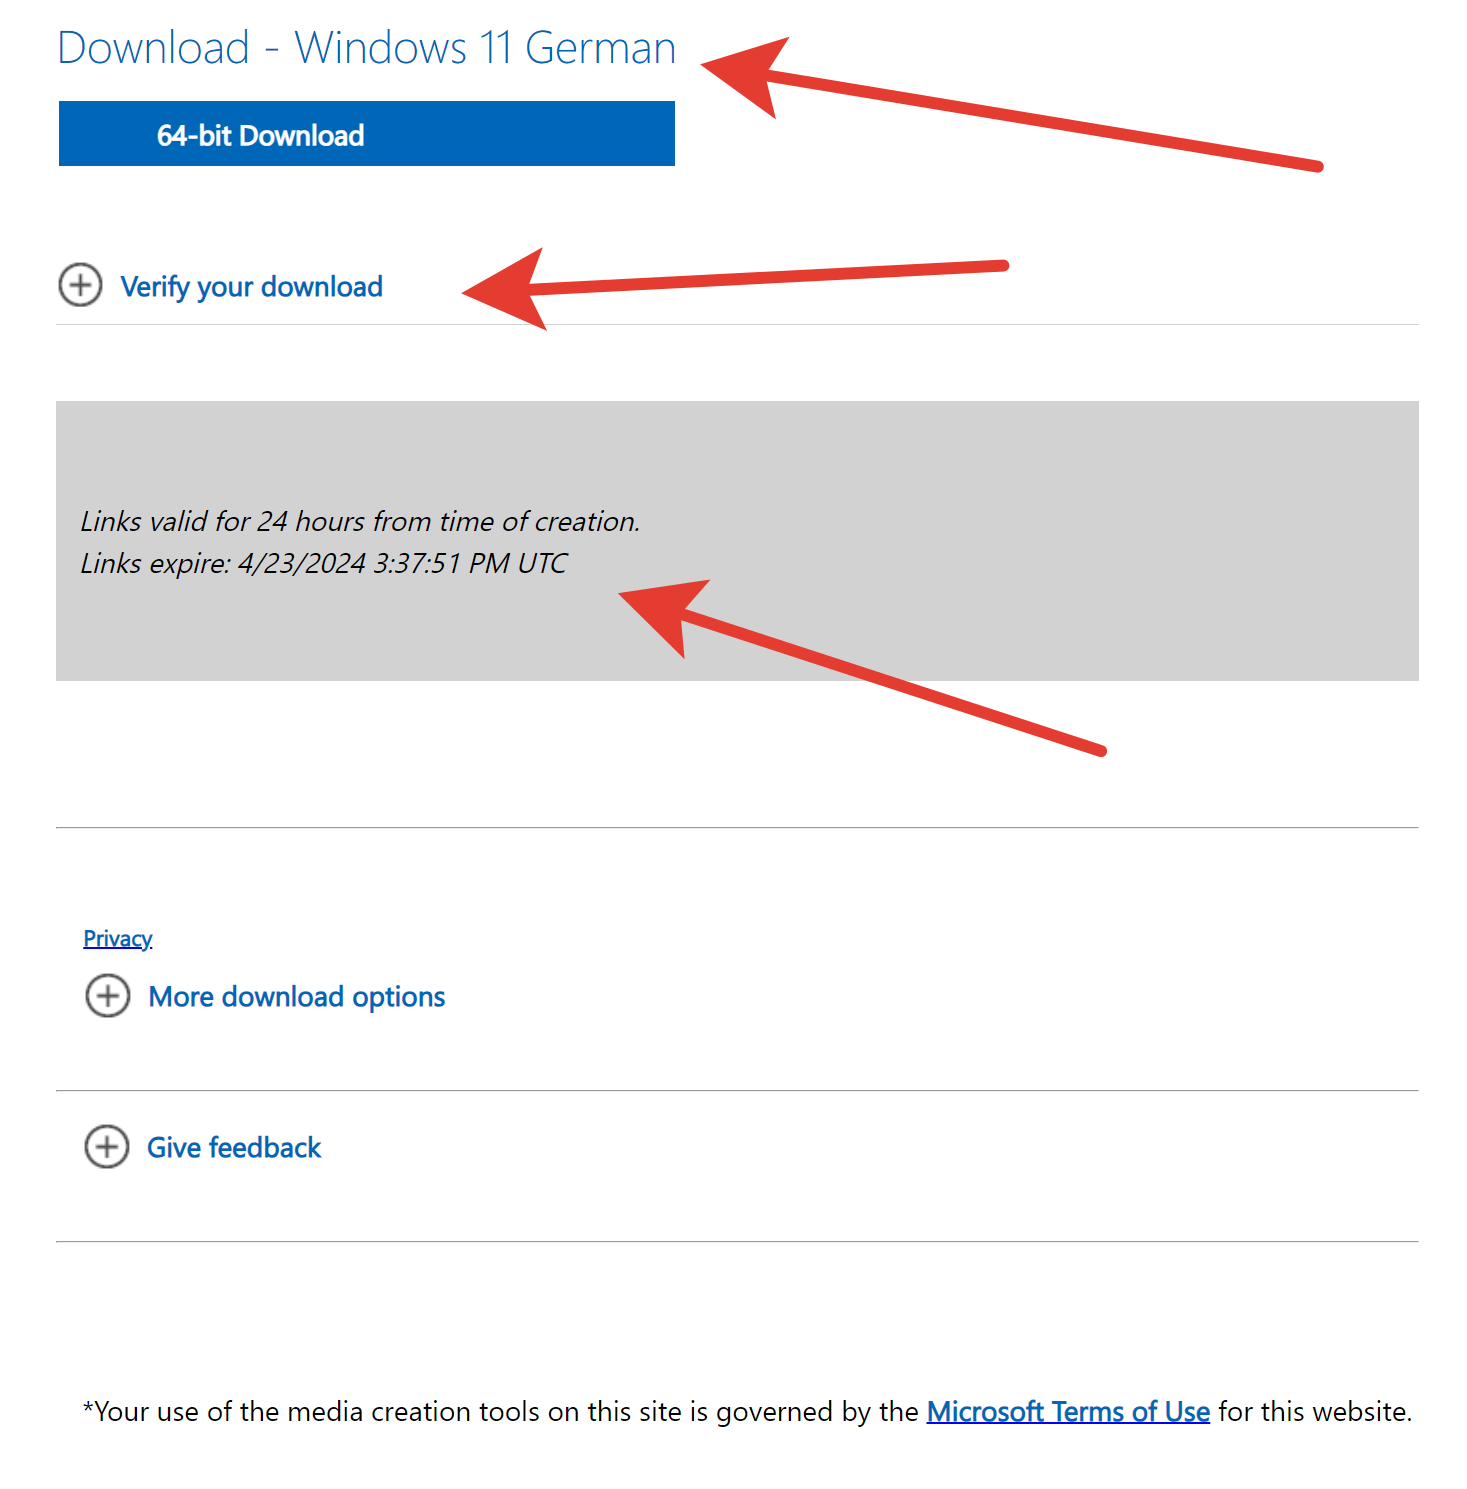
The Section “Download – Windows 11 German” appears
Press the button “64-bit Download”
Save the file in the prompt as: Win11_23H2_German_x64v2.iso
Note-1: these downloads e.g. Win11_23H2_German_x64v2.iso can be used for installing or upgrading any flavor of Windows 11 like:
Windows 11 Home, Windows 11 Pro, Windows 11 Pro for Workstations,…
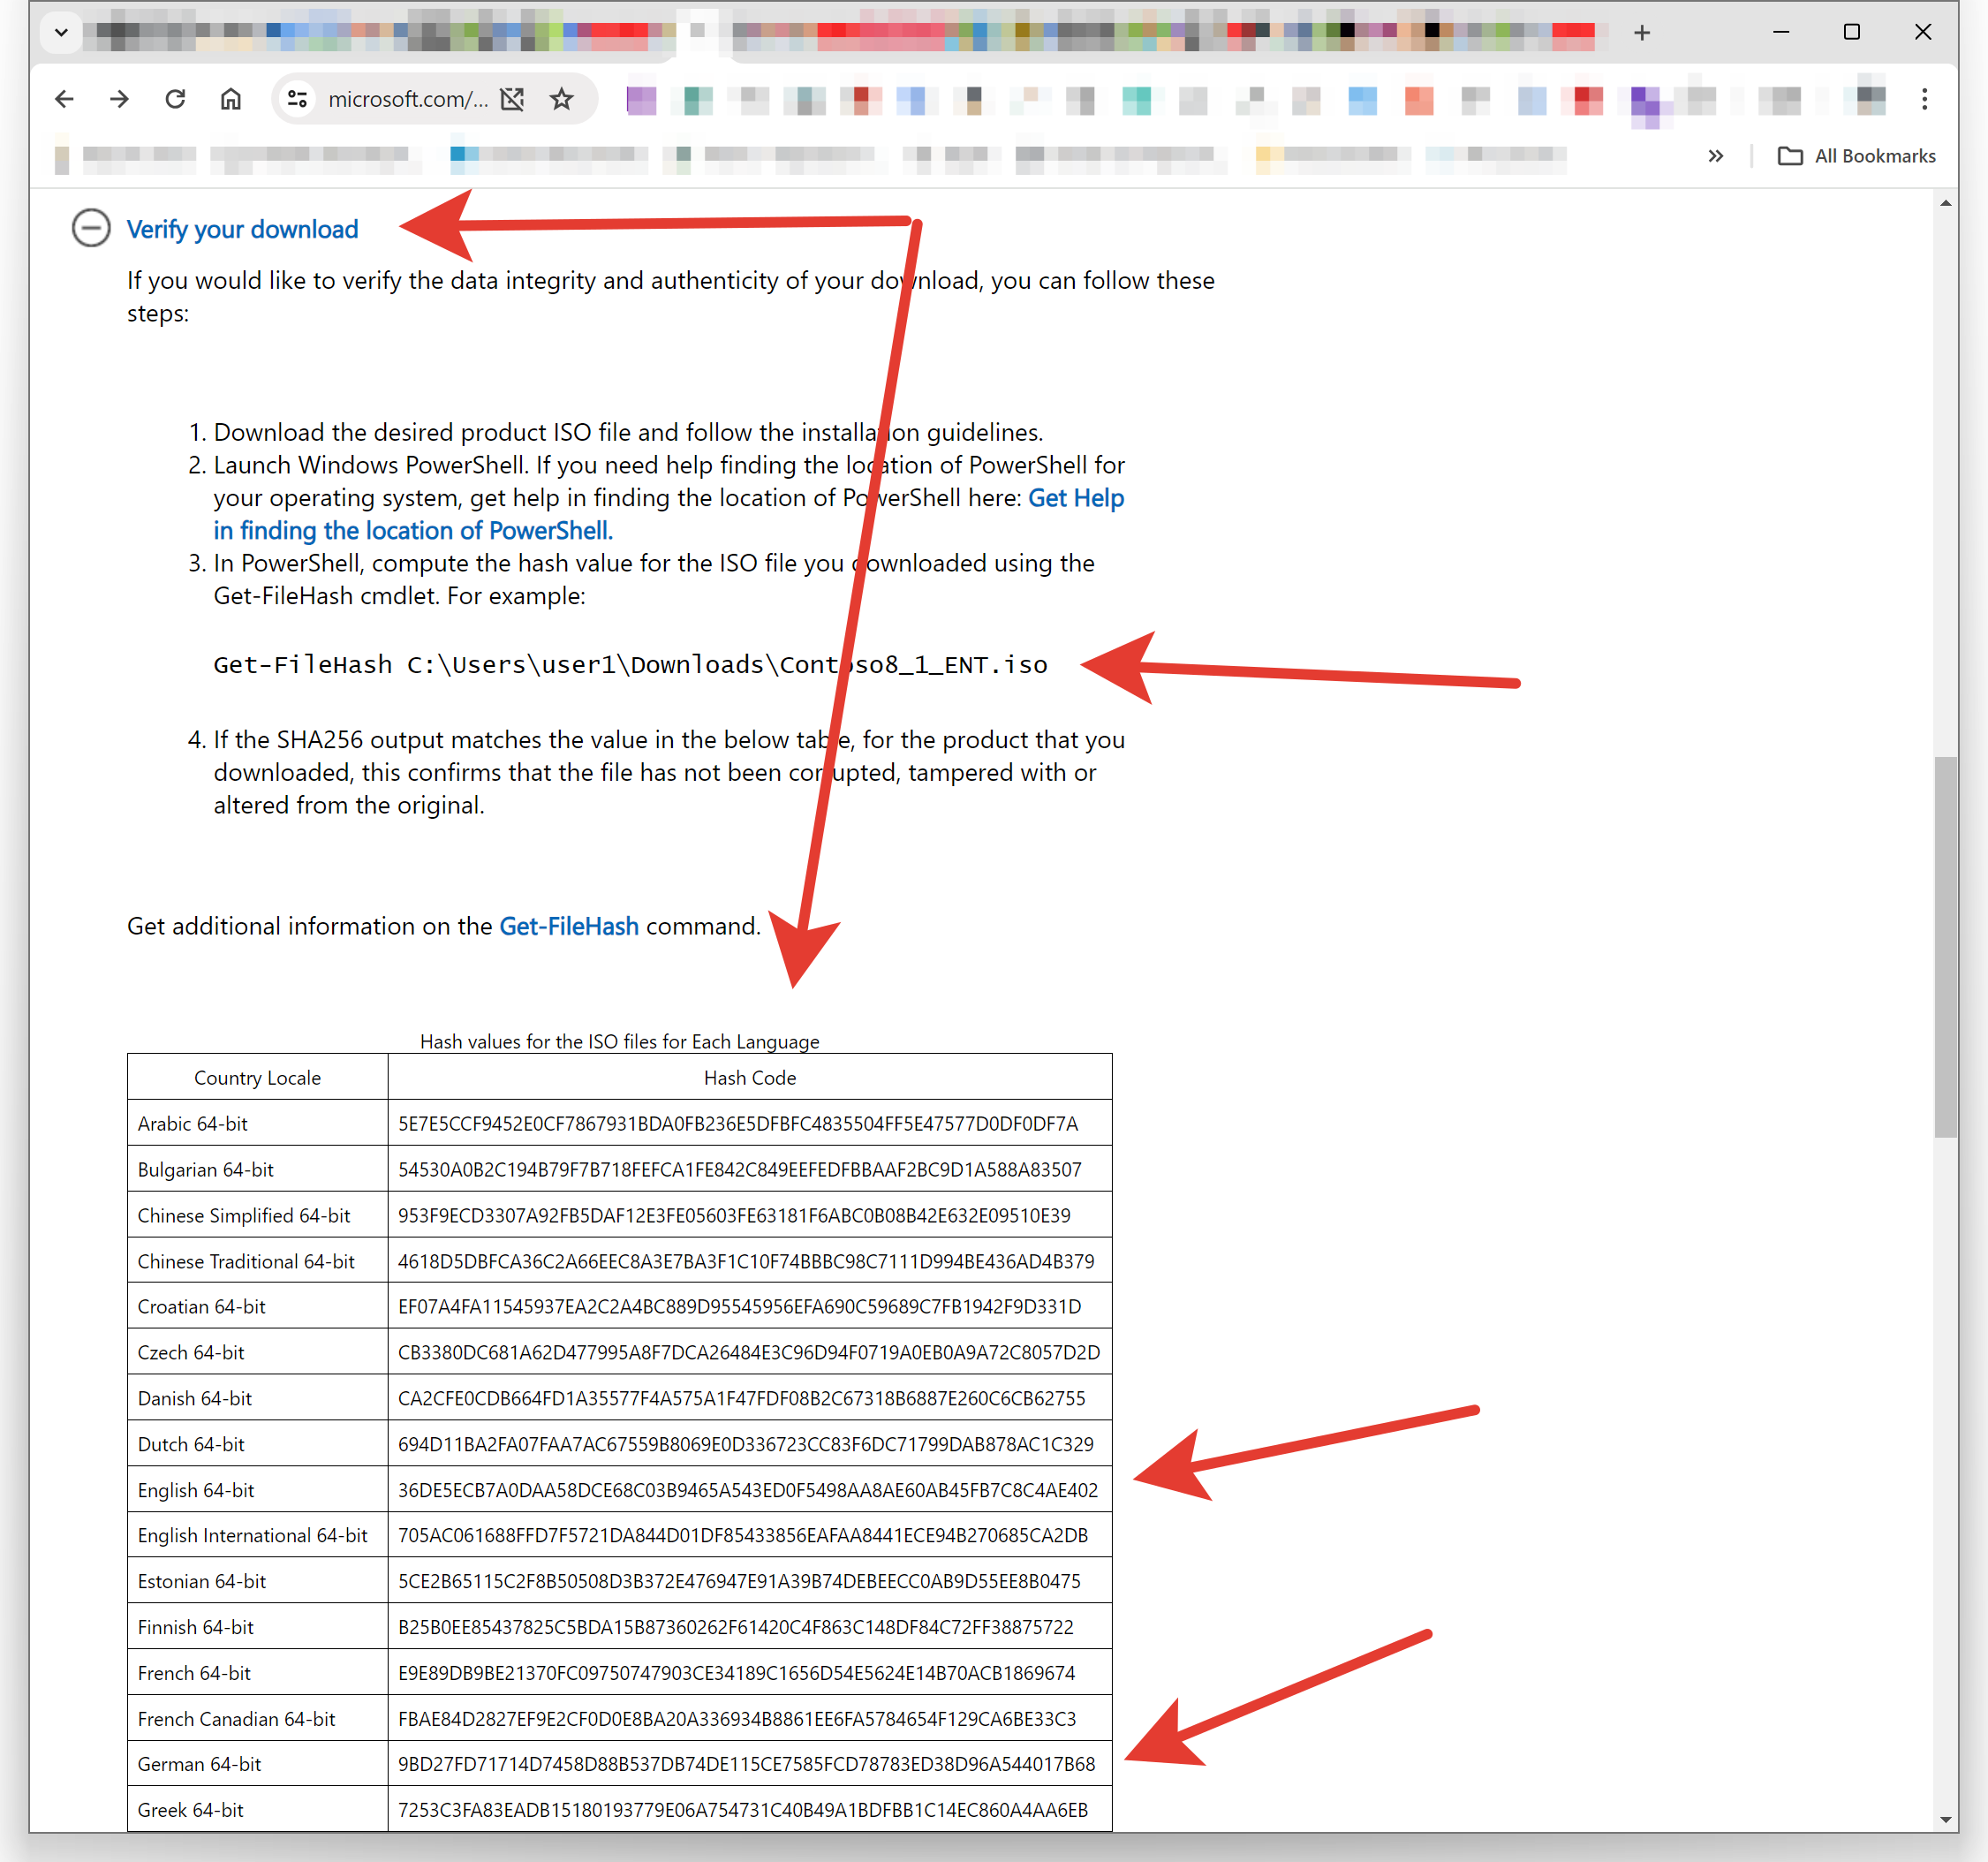
Note-2: Verify your download always to be sure indeed download is from the origin of Microsoft:
Press Verify your download
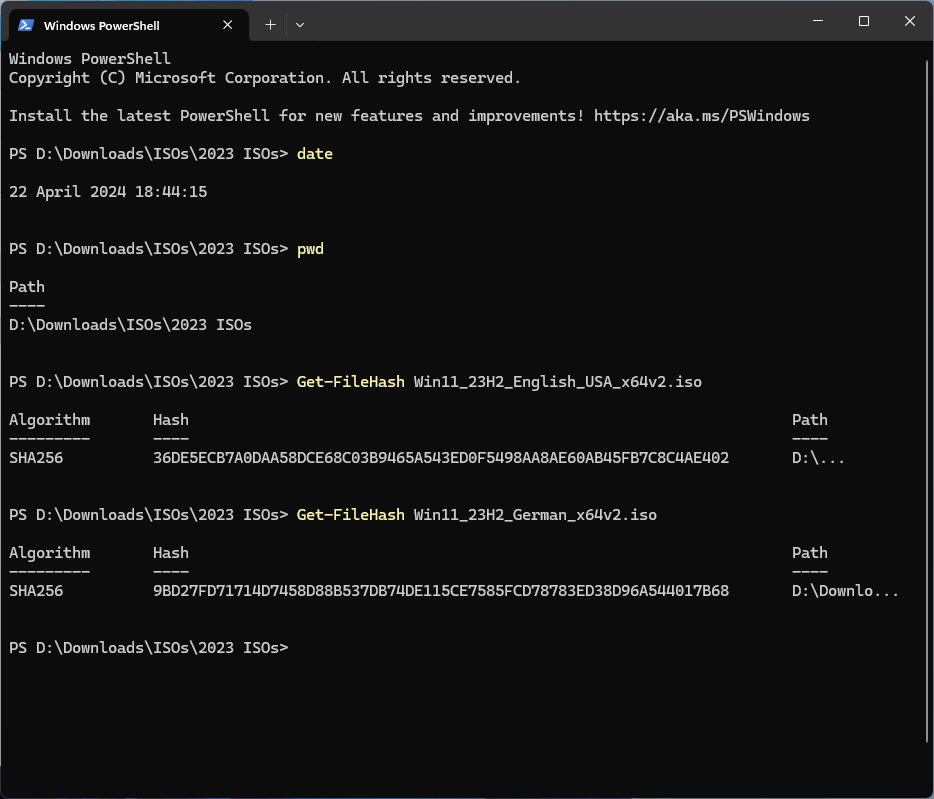
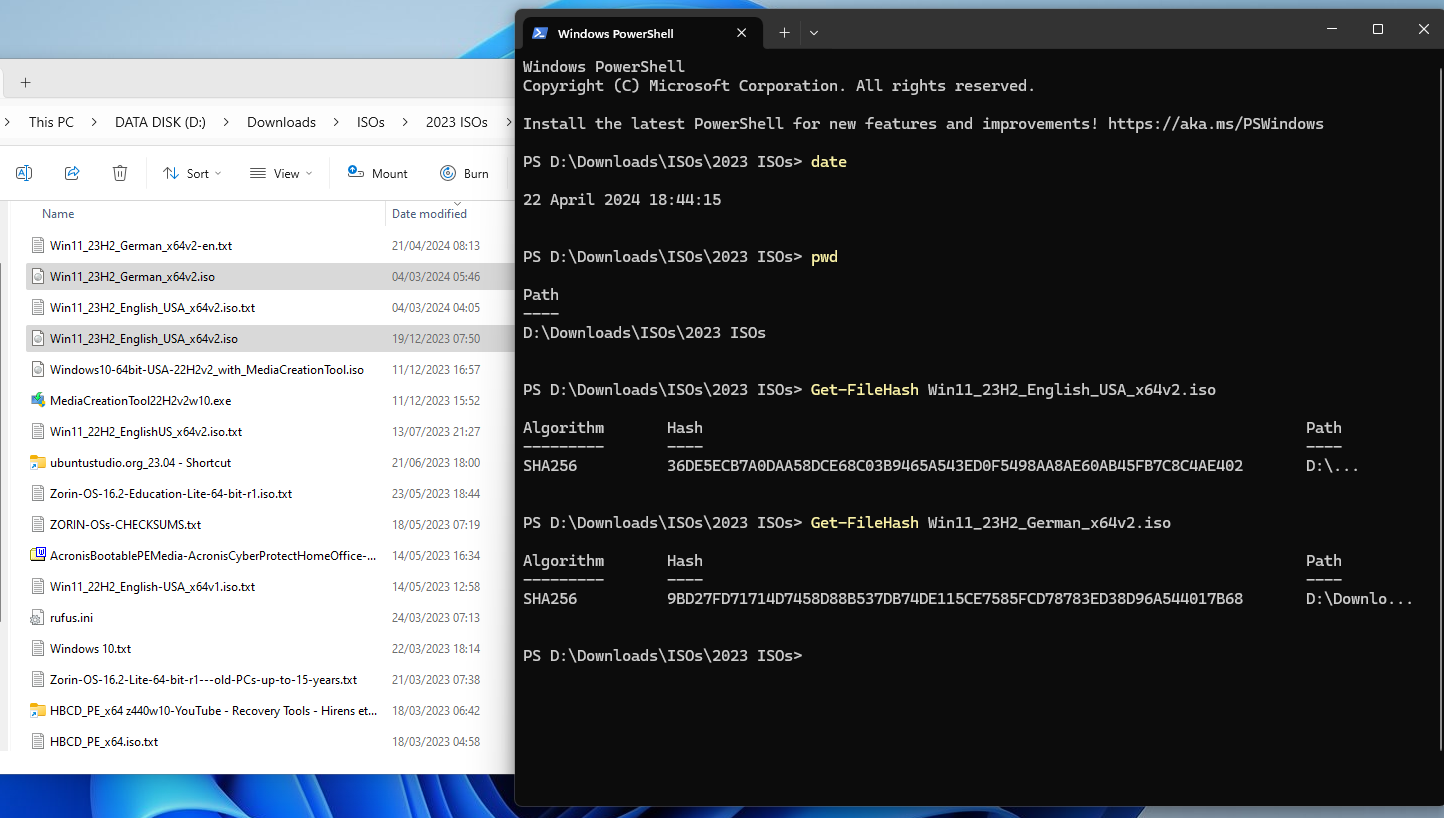
As described go to the CLI CMD PROMPT or PowerShell and type as shown in the pictures below:
Windows PowerShell
Copyright (C) Microsoft Corporation. All rights reserved.Install the latest PowerShell for new features and improvements! https://aka.ms/PSWindows
PS D:\Downloads\ISOs\2023 ISOs> date
22 April 2024 18:44:15
PS D:\Downloads\ISOs\2023 ISOs> pwd
Path
D:\Downloads\ISOs\2023 ISOs
PS D:\Downloads\ISOs\2023 ISOs> Get-FileHash Win11_23H2_English_USA_x64v2.iso
Algorithm Hash Path
——— —- —-
SHA256 36DE5ECB7A0DAA58DCE68C03B9465A543ED0F5498AA8AE60AB45FB7C8C4AE402 D:…PS D:\Downloads\ISOs\2023 ISOs> Get-FileHash Win11_23H2_German_x64v2.iso
Algorithm Hash Path
——— —- —-
SHA256 9BD27FD71714D7458D88B537DB74DE115CE7585FCD78783ED38D96A544017B68 D:\Downlo…PS D:\Downloads\ISOs\2023 ISOs>
====
Now compare the SHA256 CHECKSUM with Microsoft web site at
https://www.microsoft.com/software-download/windows11 .
If they match you are good to proceed.
====
2- My PC from eBay.com a hp z640 – default language: de-de, change to us-en
If proceed with Upgrade from 22H2 to 23H2:
Normally will run the file setup.exe in the root file structure of the ISO. BEFORE DO THIS the ISO file gets burned on DVD, mounted to a drive, or extracted from ISO to a USB Stick location. You have to do this for both ISOs
Win11_23H2_German_x64v2.iso and Win11_23H2_English_USA_x64v2.iso
There are 2 problems Language should be de-de/German and hardware restrictions.
To bypass the language in the Win11_23H2_German_x64v2.iso extraction replace the folder:
G:\Win11_23H2_German_x64v2-en\sources\de-de
with
Win11_23H2_English_USA_x64v2\sources\en-us\
We proceed as follows: copy the Win11_23H2_English_USA_x64v2\sources\en-us\ to G:\Win11_23H2_German_x64v2-en\sources\
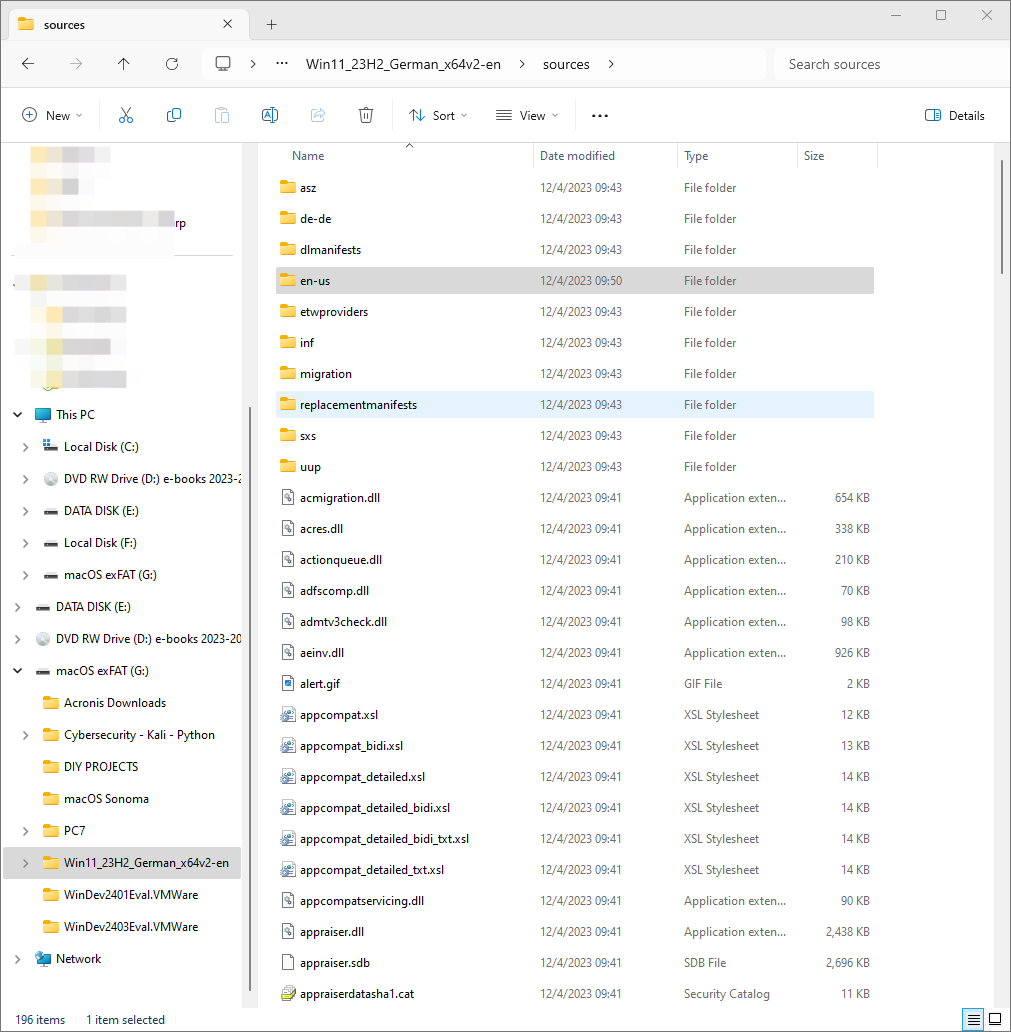
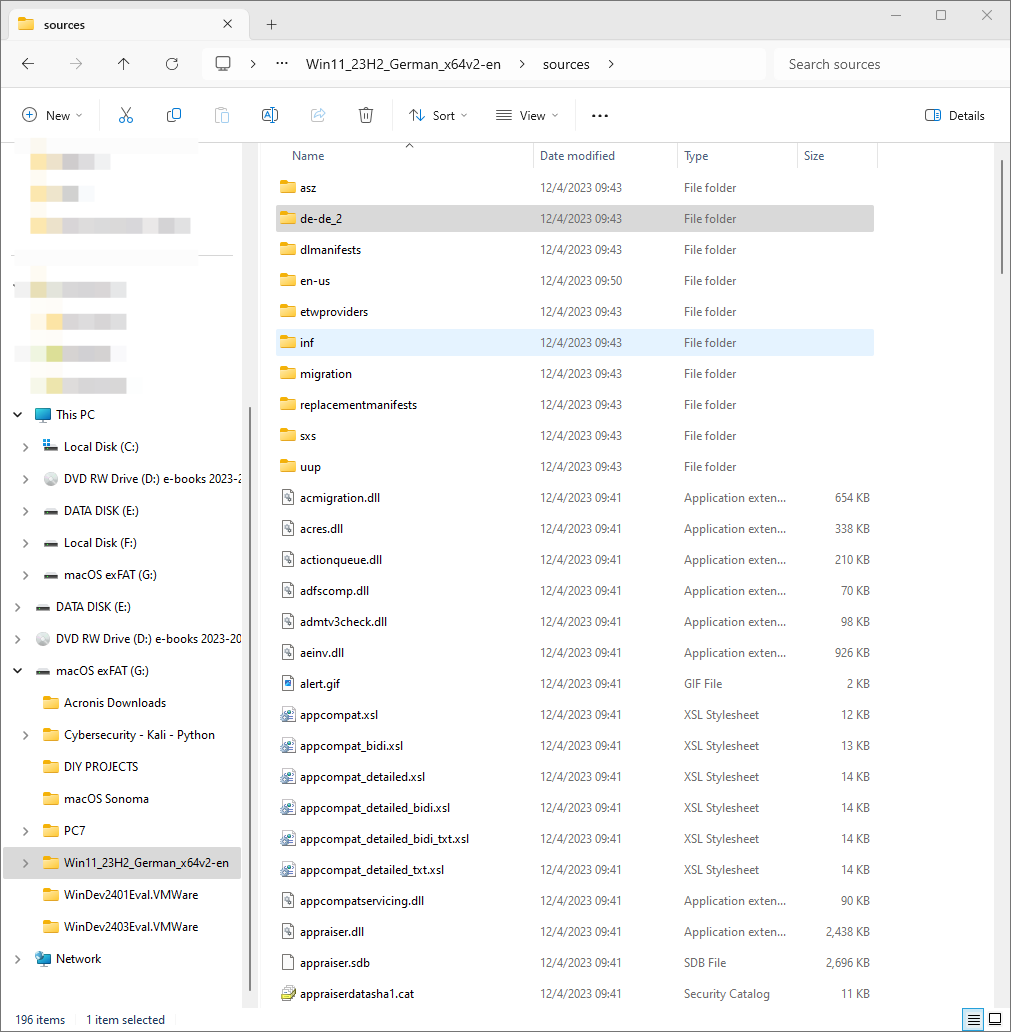
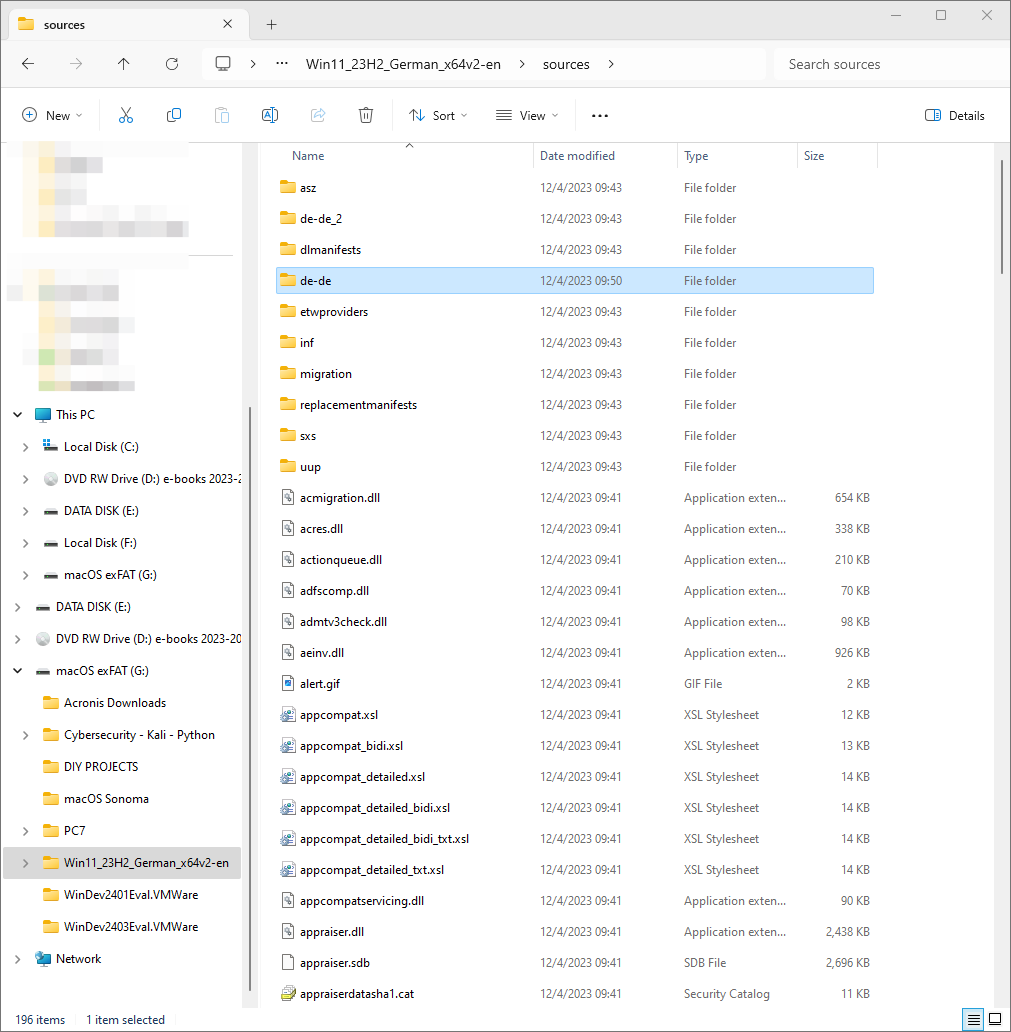
Rename the:
G:\Win11_23H2_German_x64v2-en\sources\de-de\
to
G:\Win11_23H2_German_x64v2-en\sources\de-de_2\
and the H:\Win11_23H2_German_x64v2-en\sources\en-us\ to G:\Win11_23H2_German_x64v2-en\sources\de-de\ .
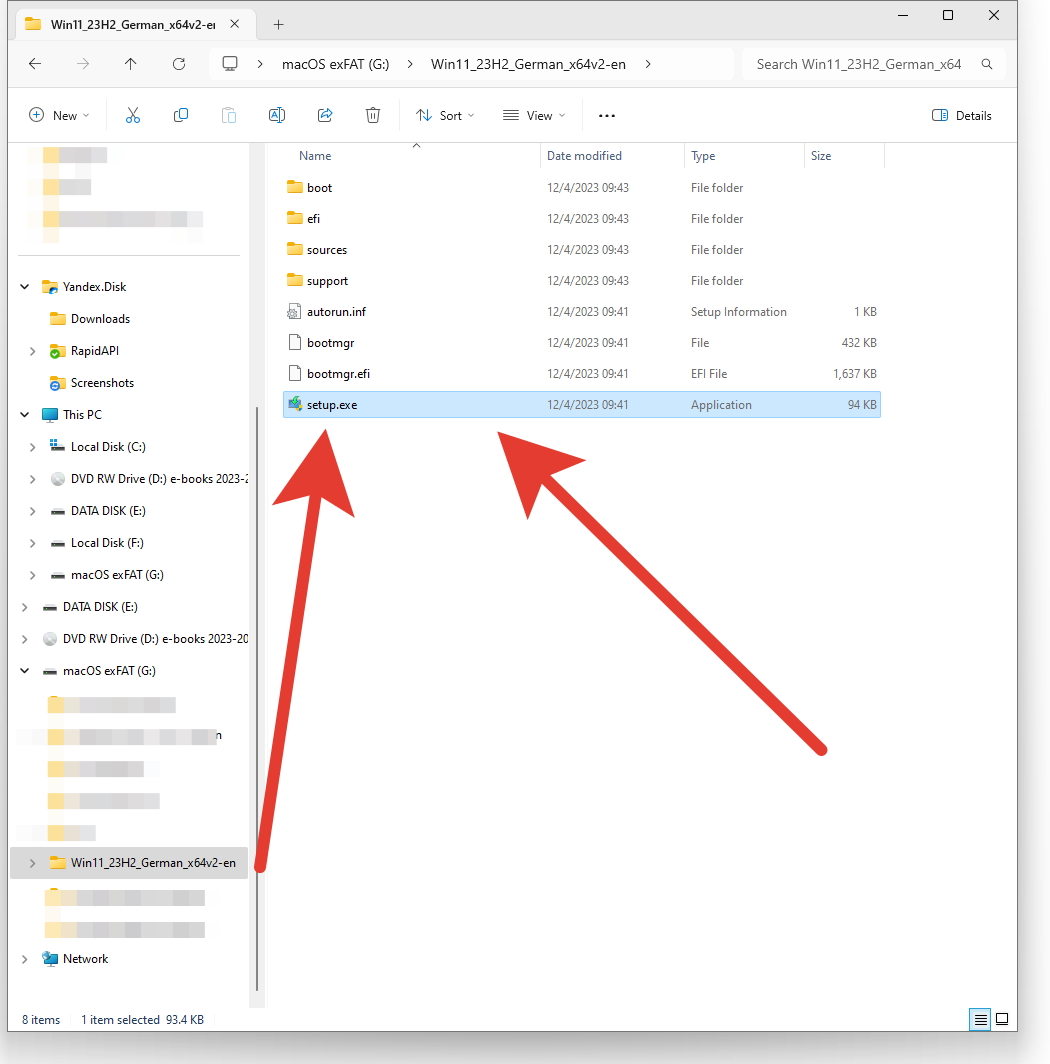
This way I can follow in ENGLISH during the upgrade as I do not know German, see screenshots:
3- Bypass Restrictions of Win-11 Pro for WS: upgrade 22H2 to 23H2 *
The last step is to start the Upgrade process from 22H2 to 23H3. If the hardware supports Windows 11, we proceed to run the:
“G:\Win11_23H2_German_x64v2-en\setup.exe”
But the hardware is unsupported:
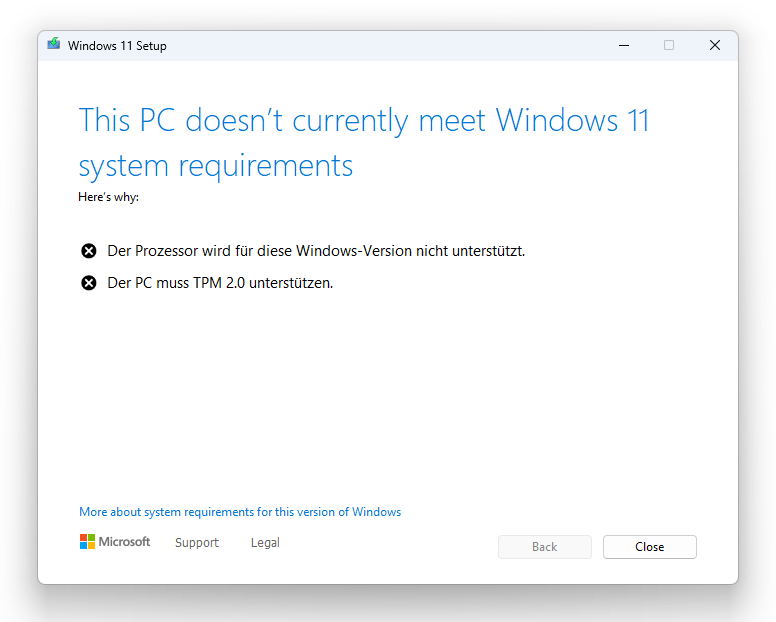
So, we proceed as follows:
Open CLI as Administrator and go to the folder:
G:\Win11_23H2_German_x64v2-en\sources\
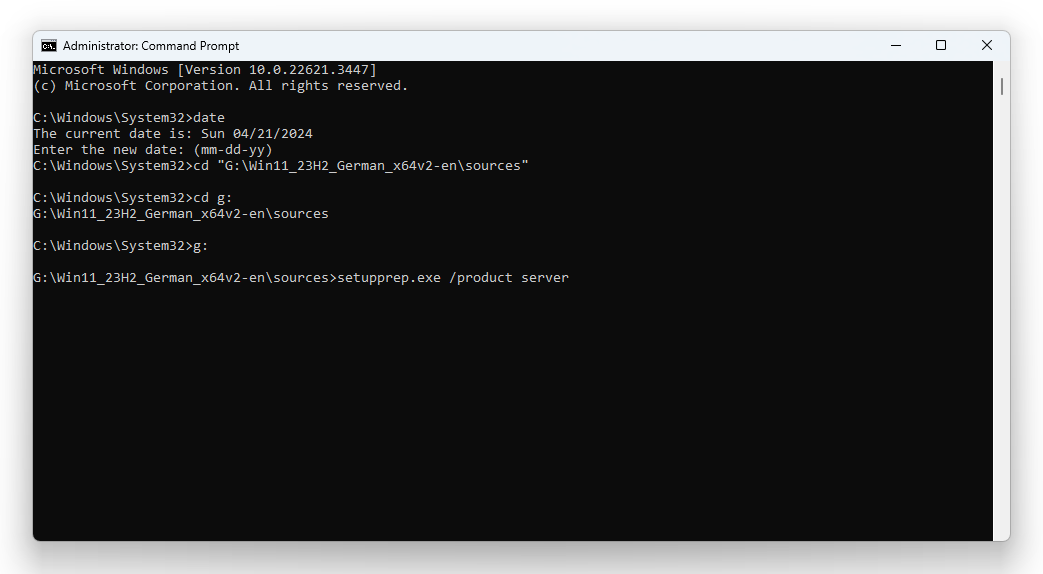
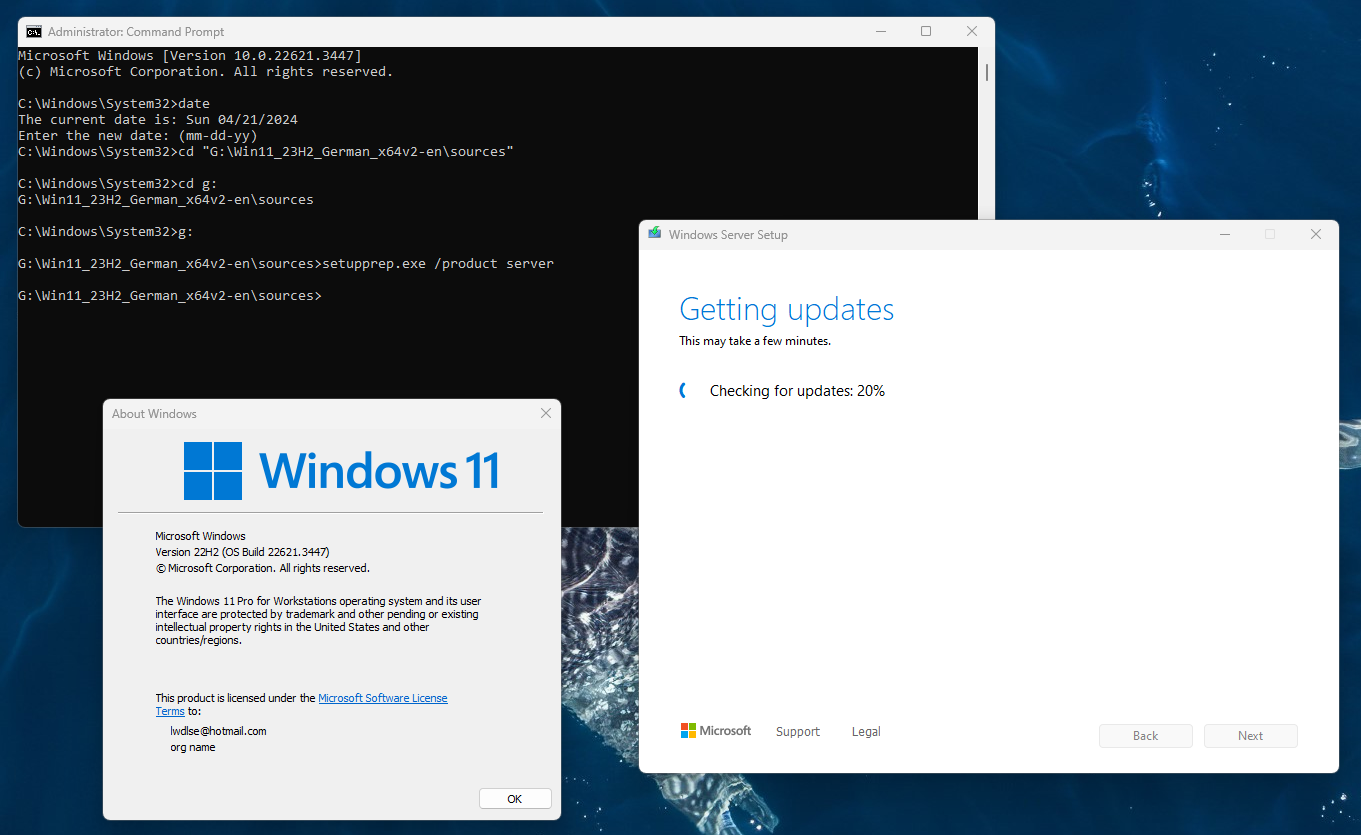
THEN WE GIVE THE COMMAND:
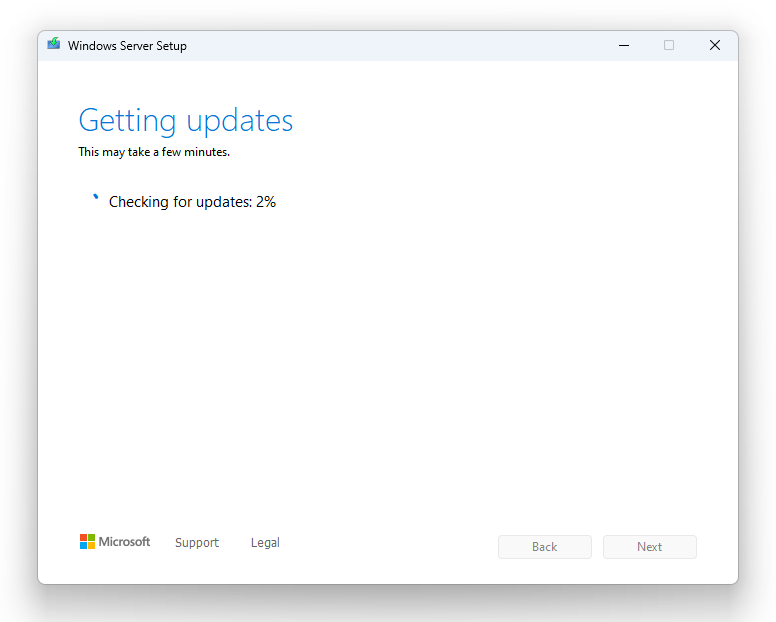
setupprep.exe /product serverThis will start the upgrade process ignoring the Hardware Restrictions of Windows 11.
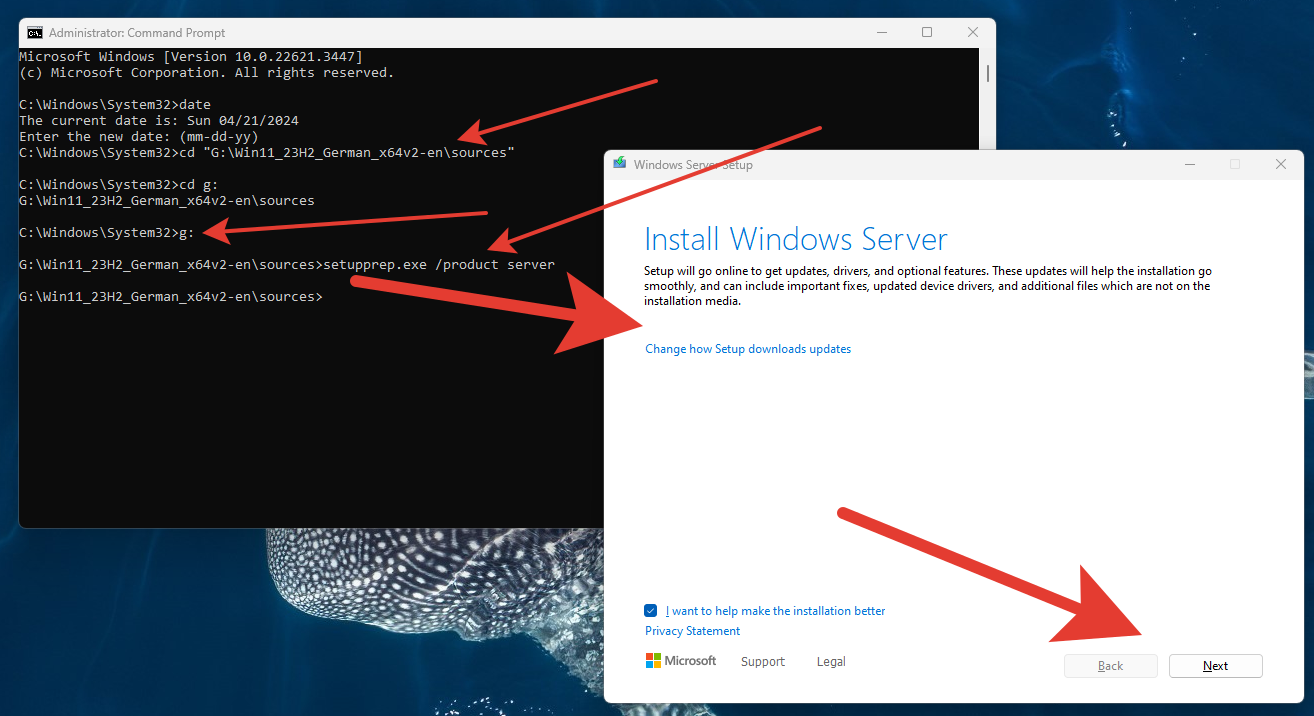
Please ignore the “Install Windows Server” – It does not matter – it is upgrading the OS in which you run it, in our case Windows 11 Pro for Workstations – but, can also be Windows 11 Home, Windows 11 Pro, if e.g. Home or Pro, Windows 11.
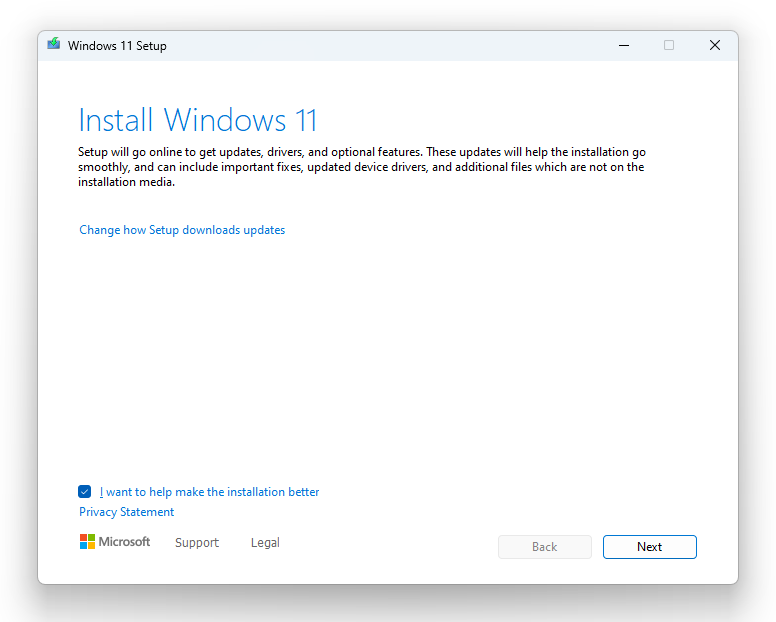
Press “Next”
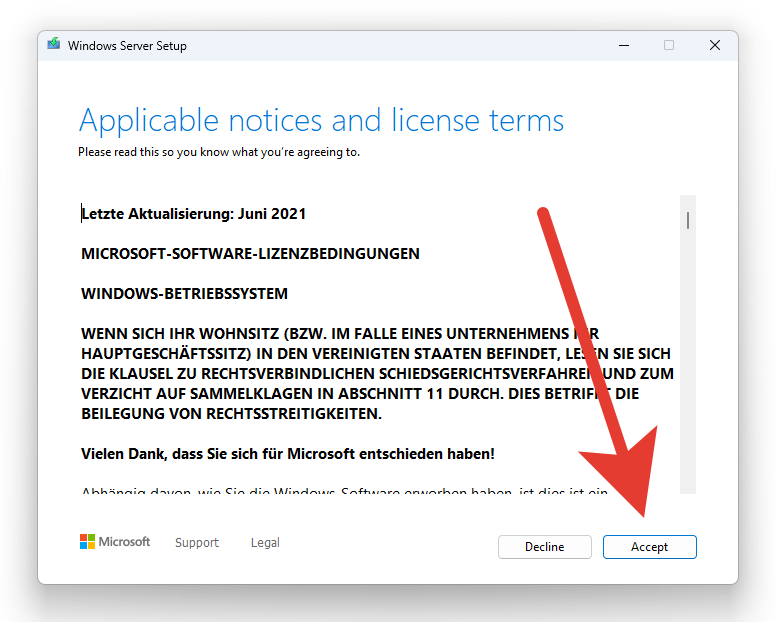
Press “Accept”
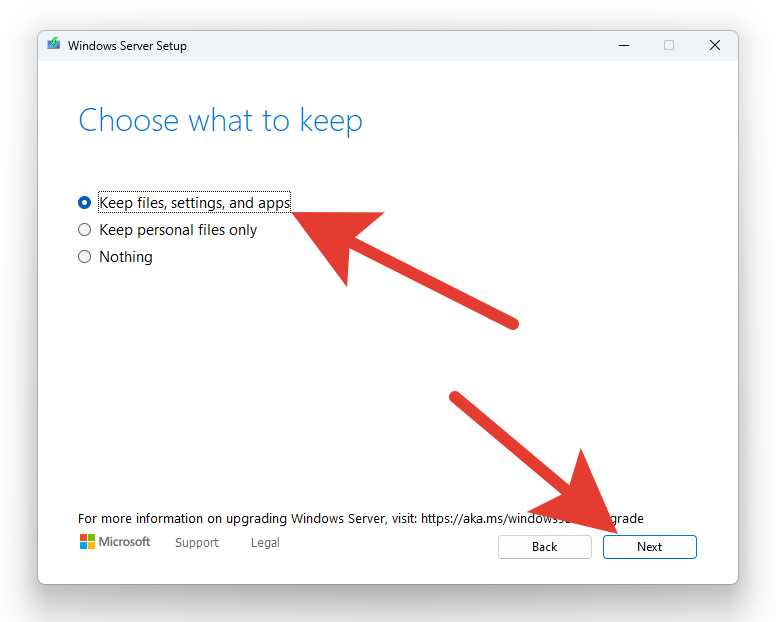
Press “Next”
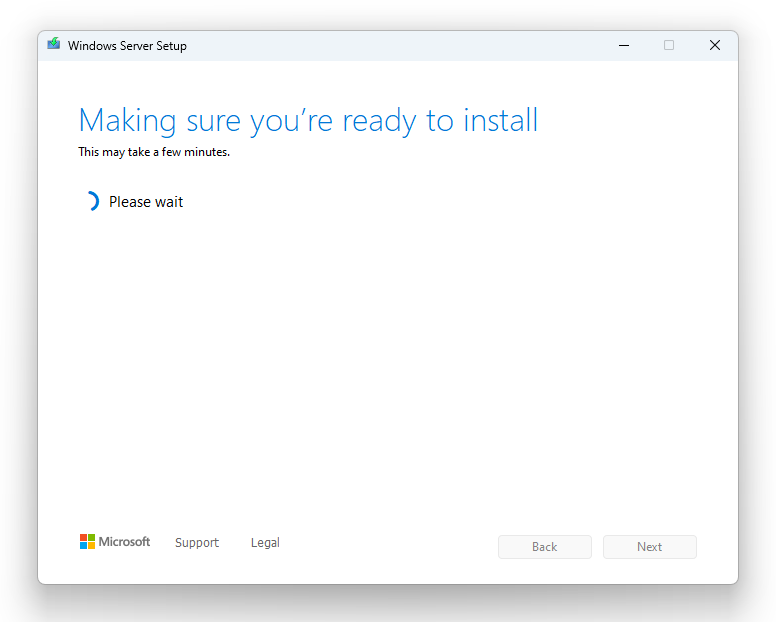
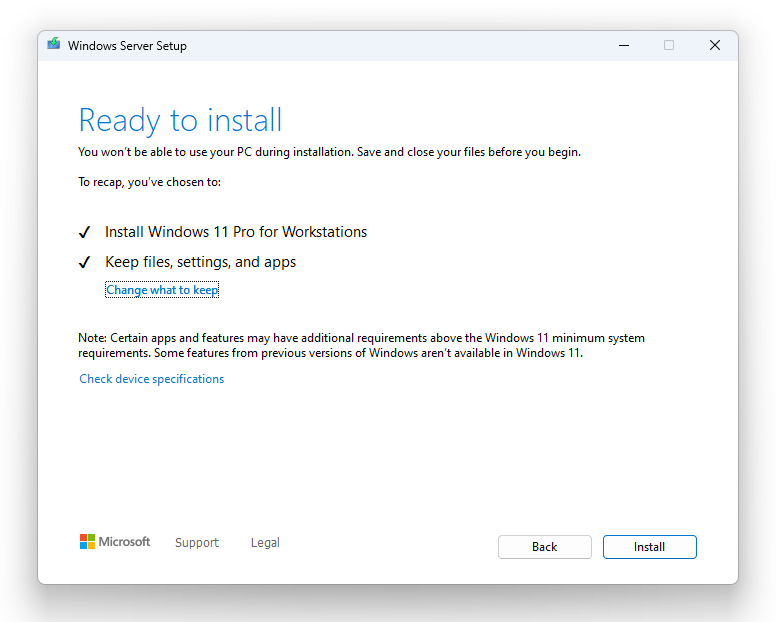
Press “Install”.
[If you use a PC I recommend a UPS or if you use Laptop Plug-in the power cord]
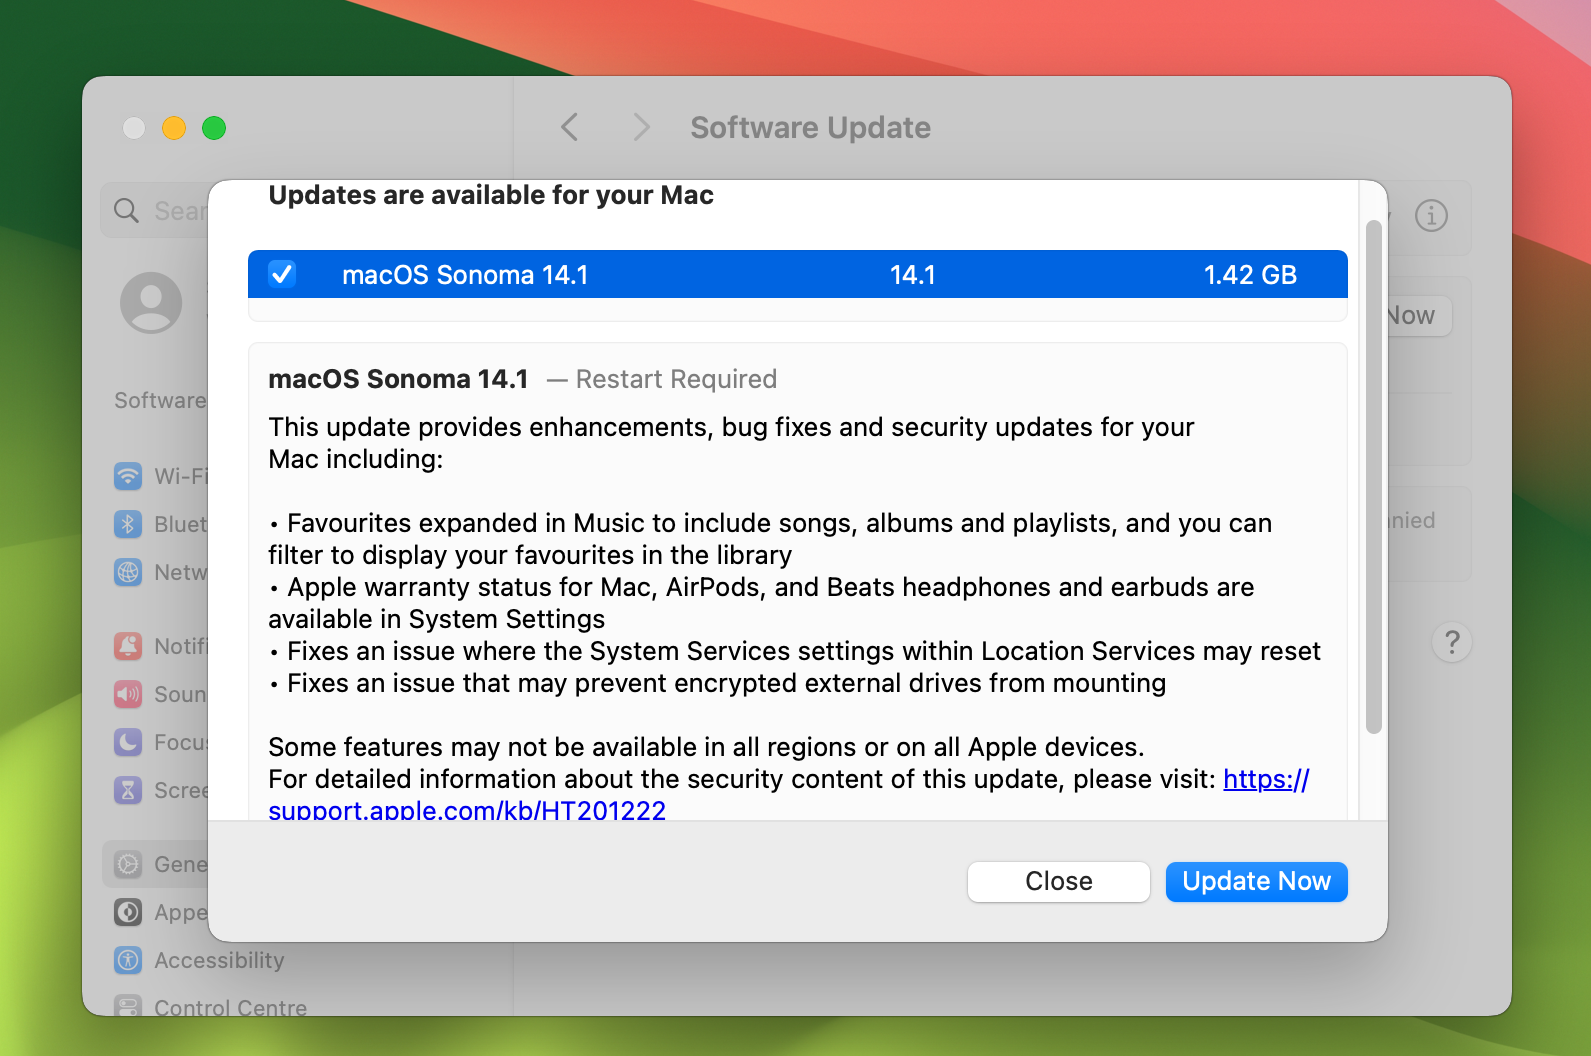
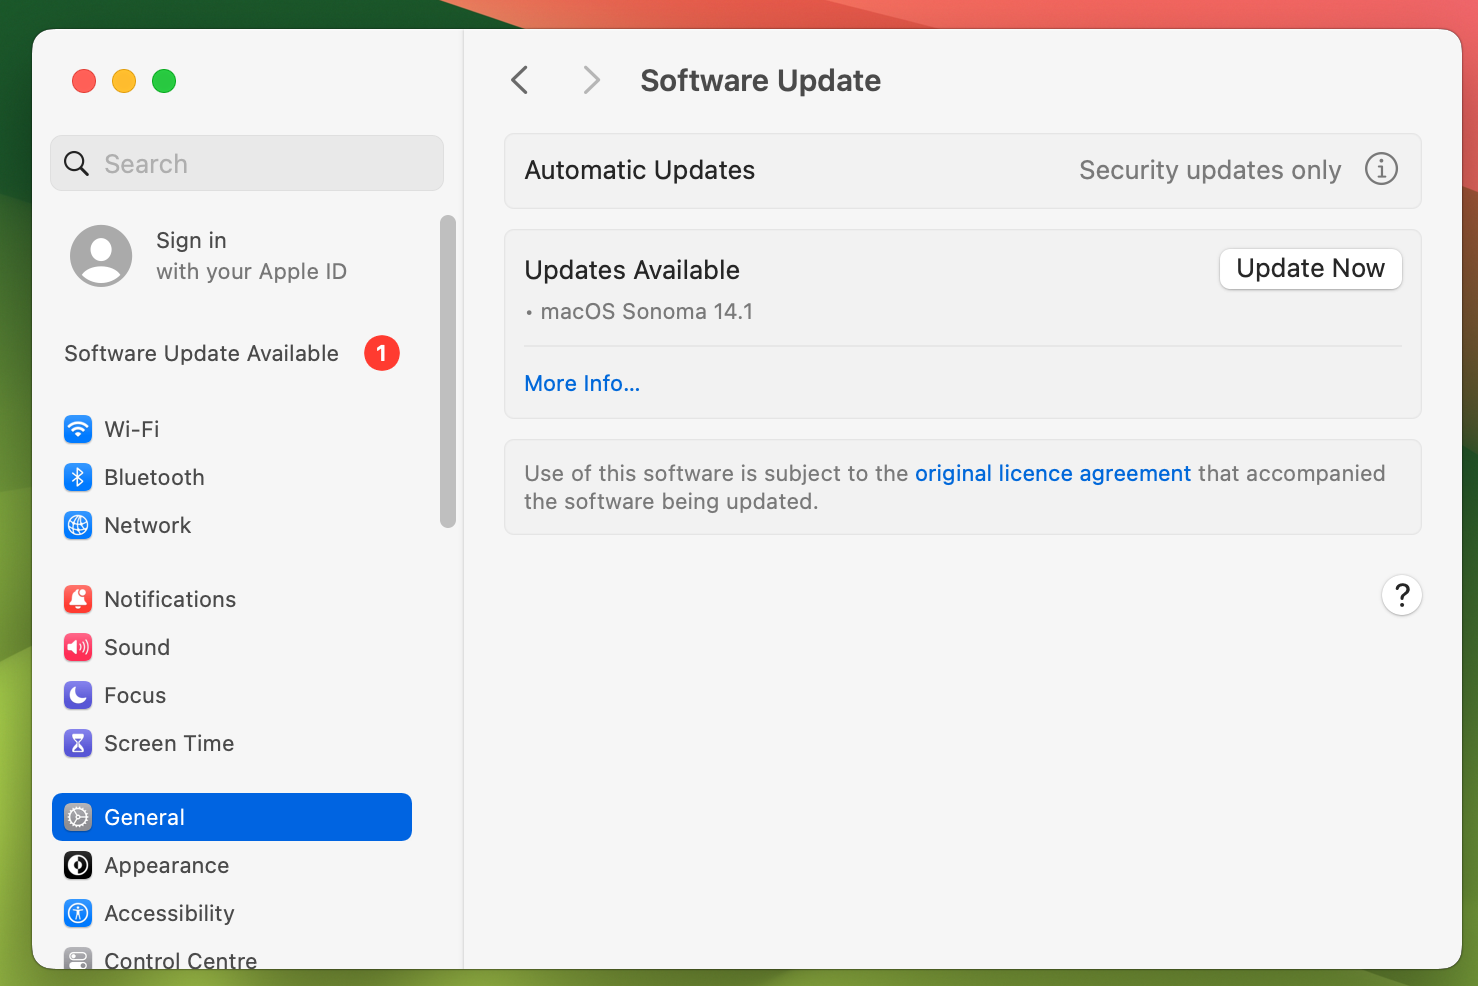
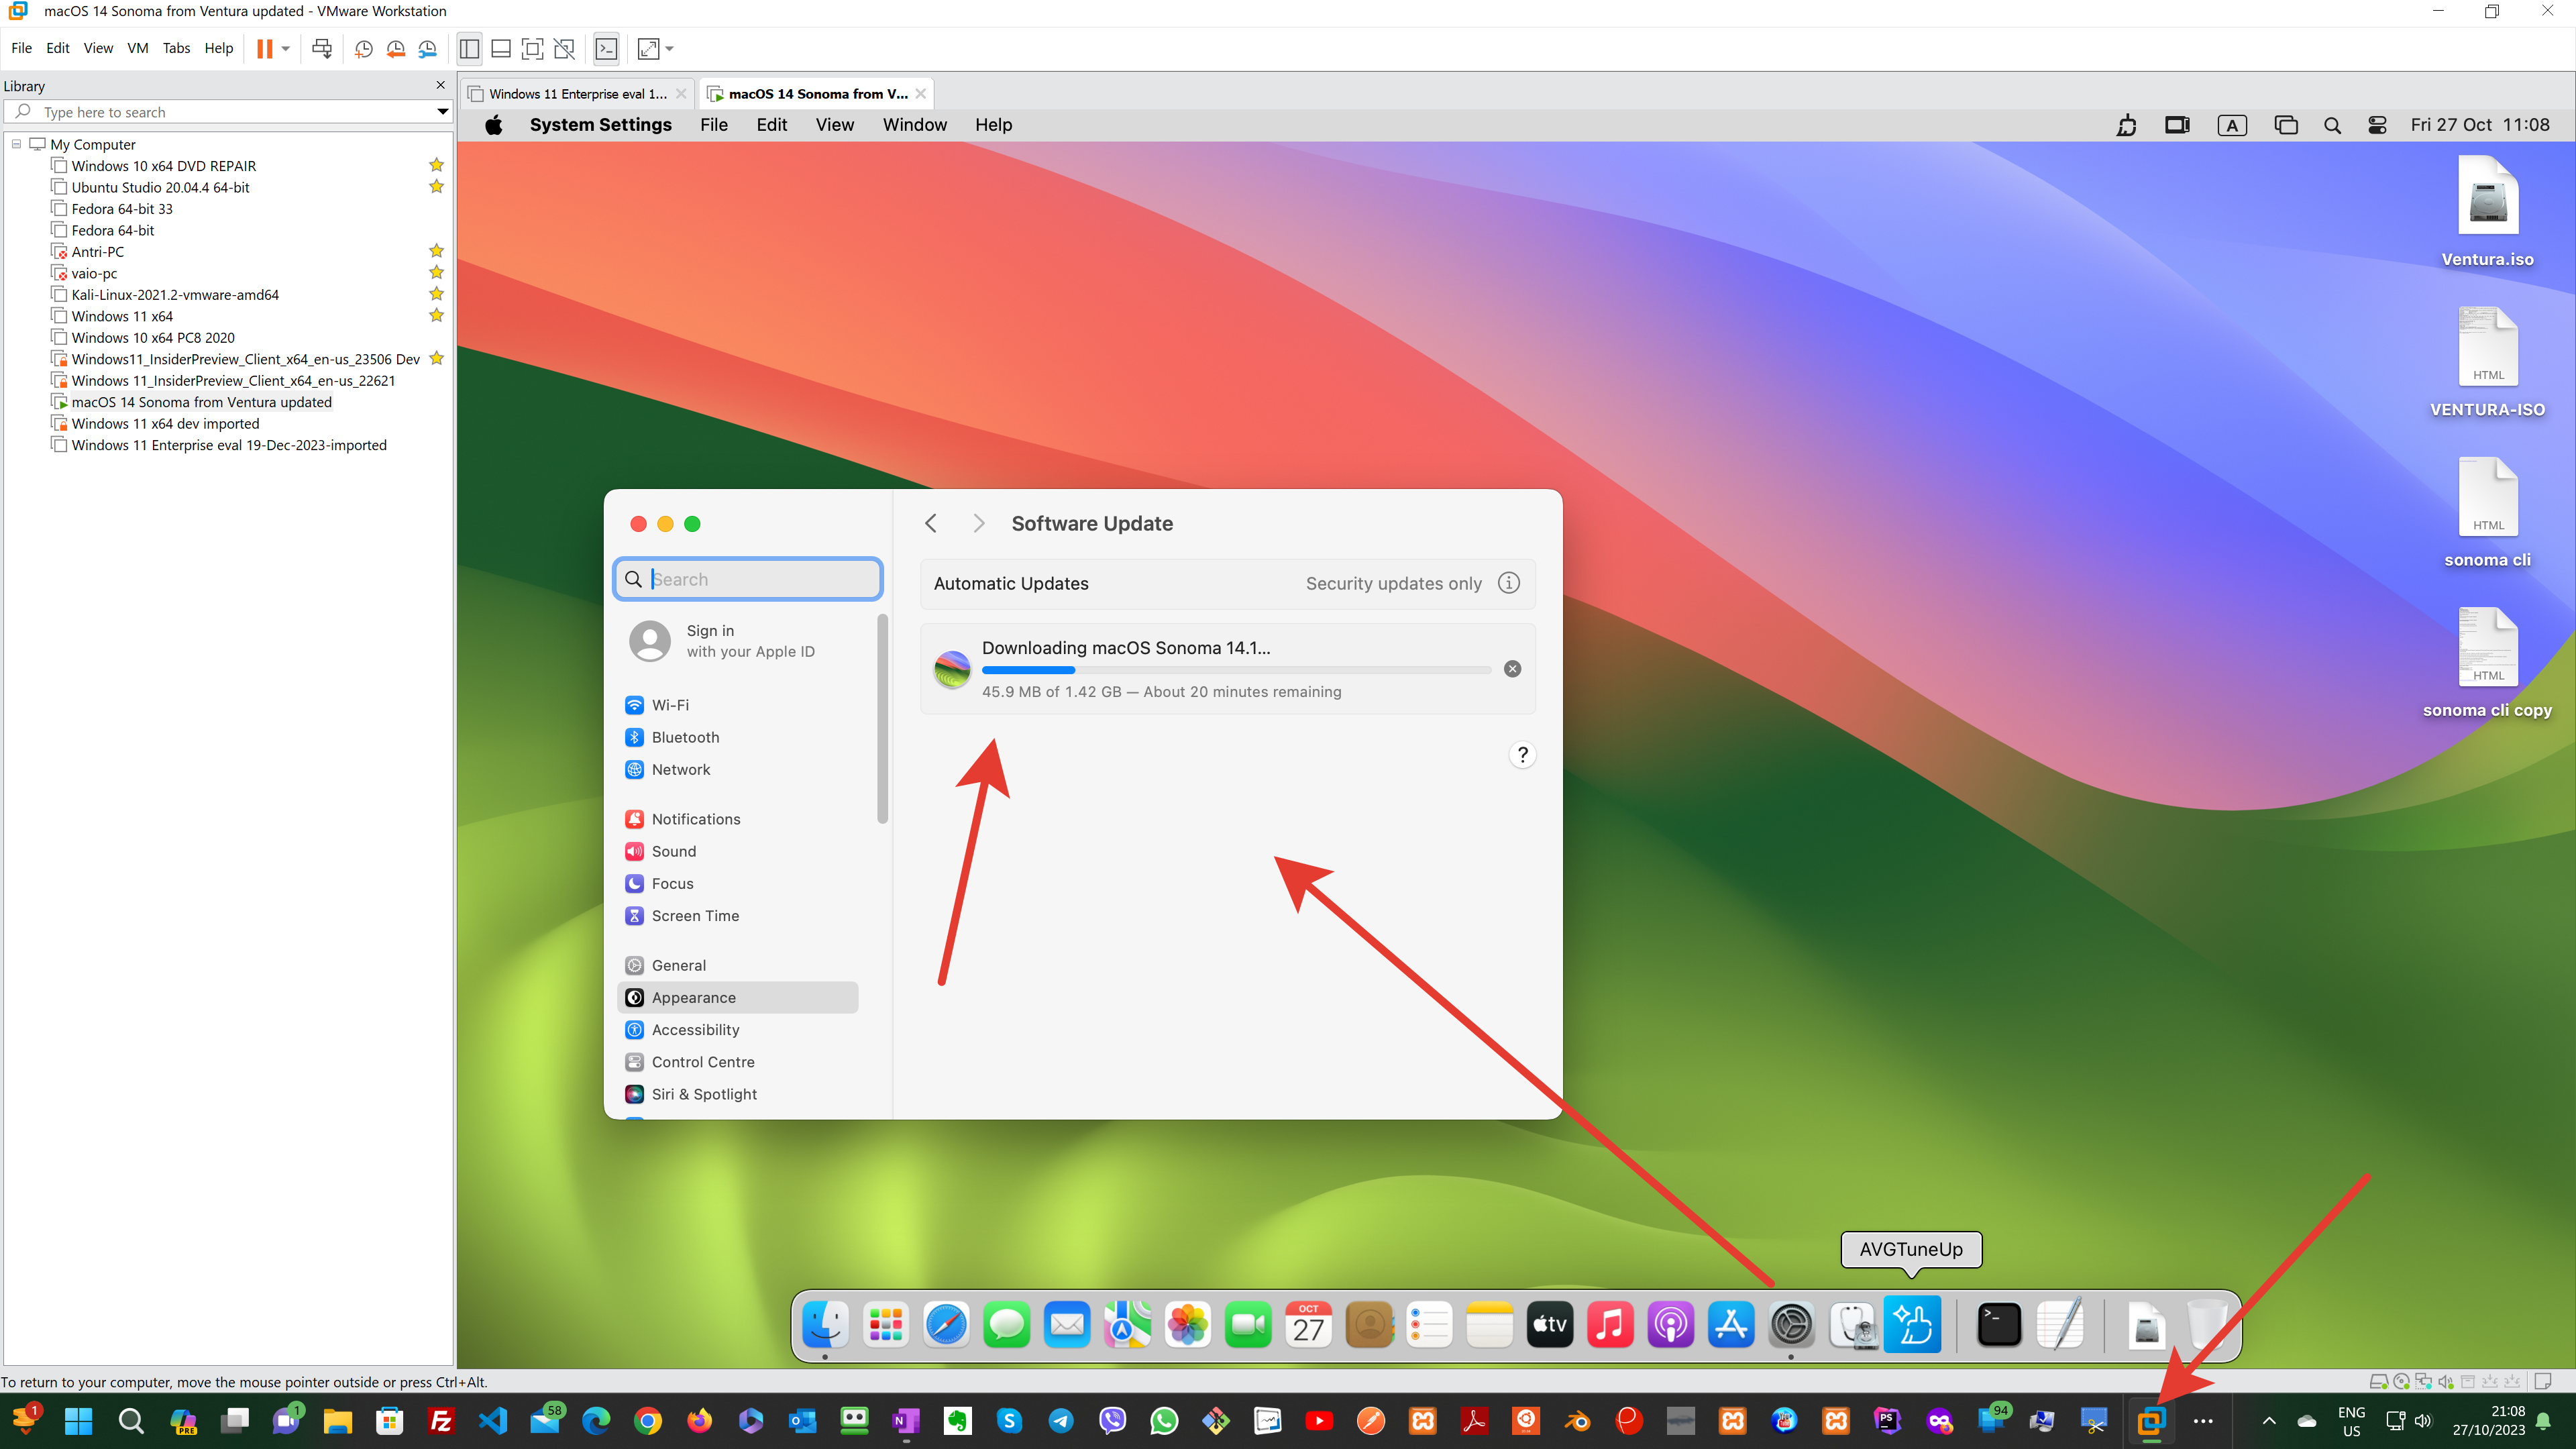
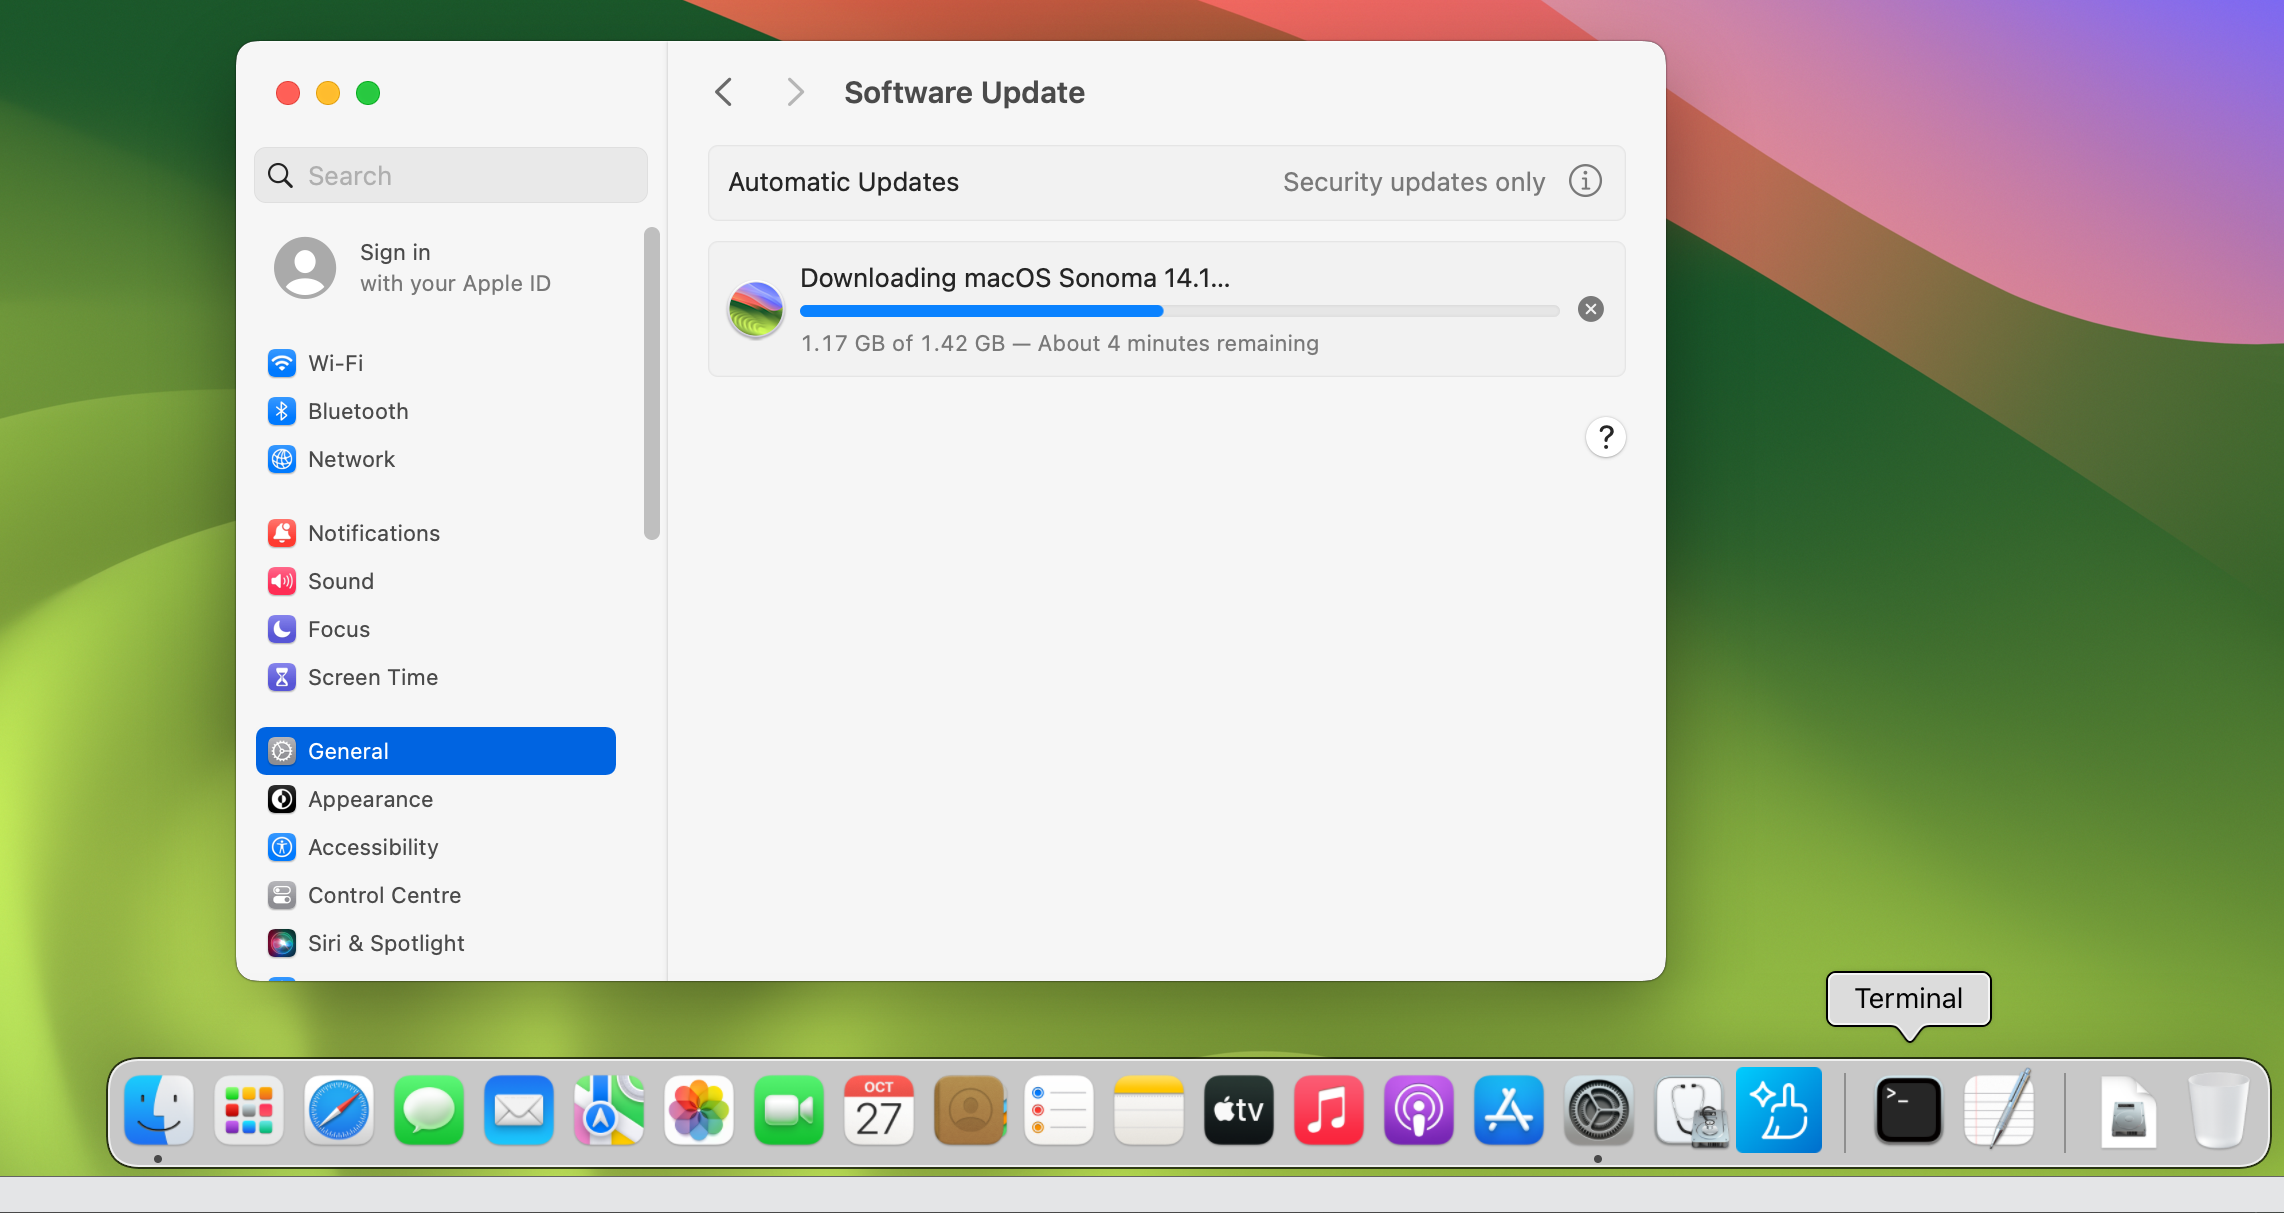
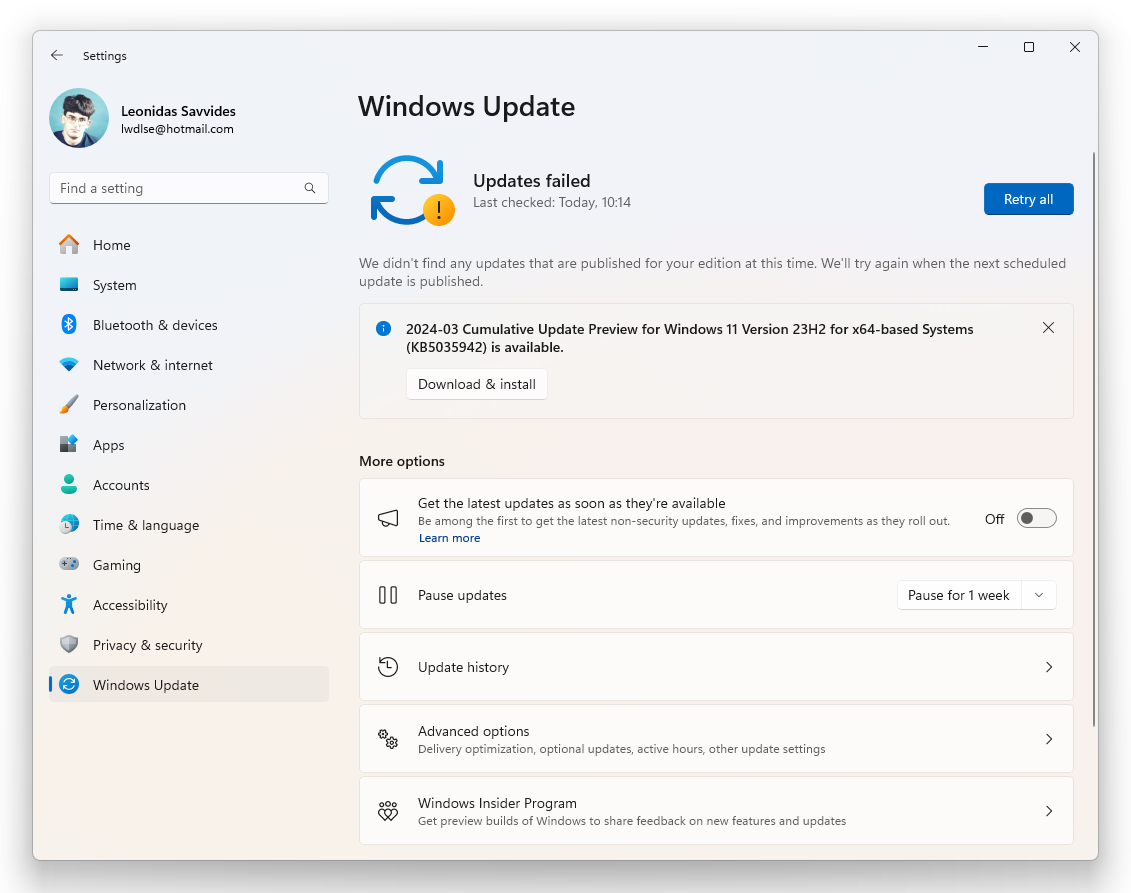
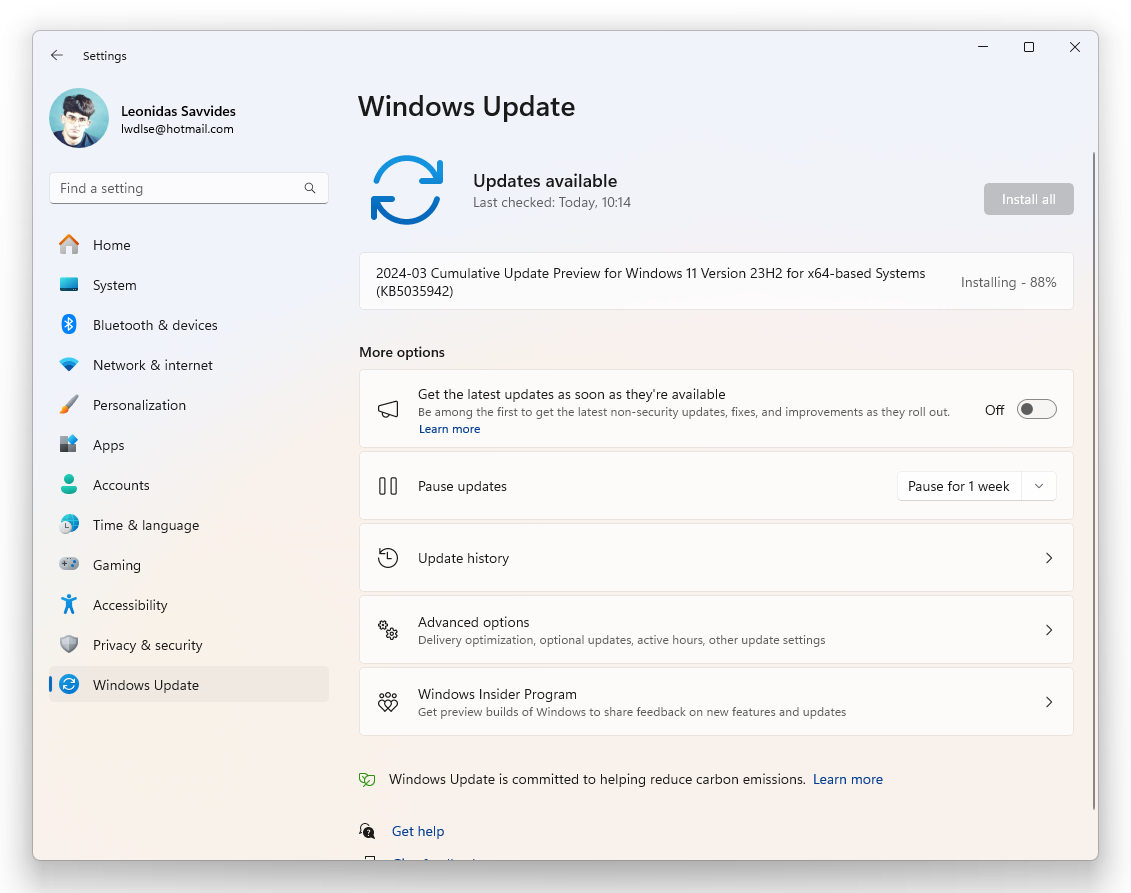
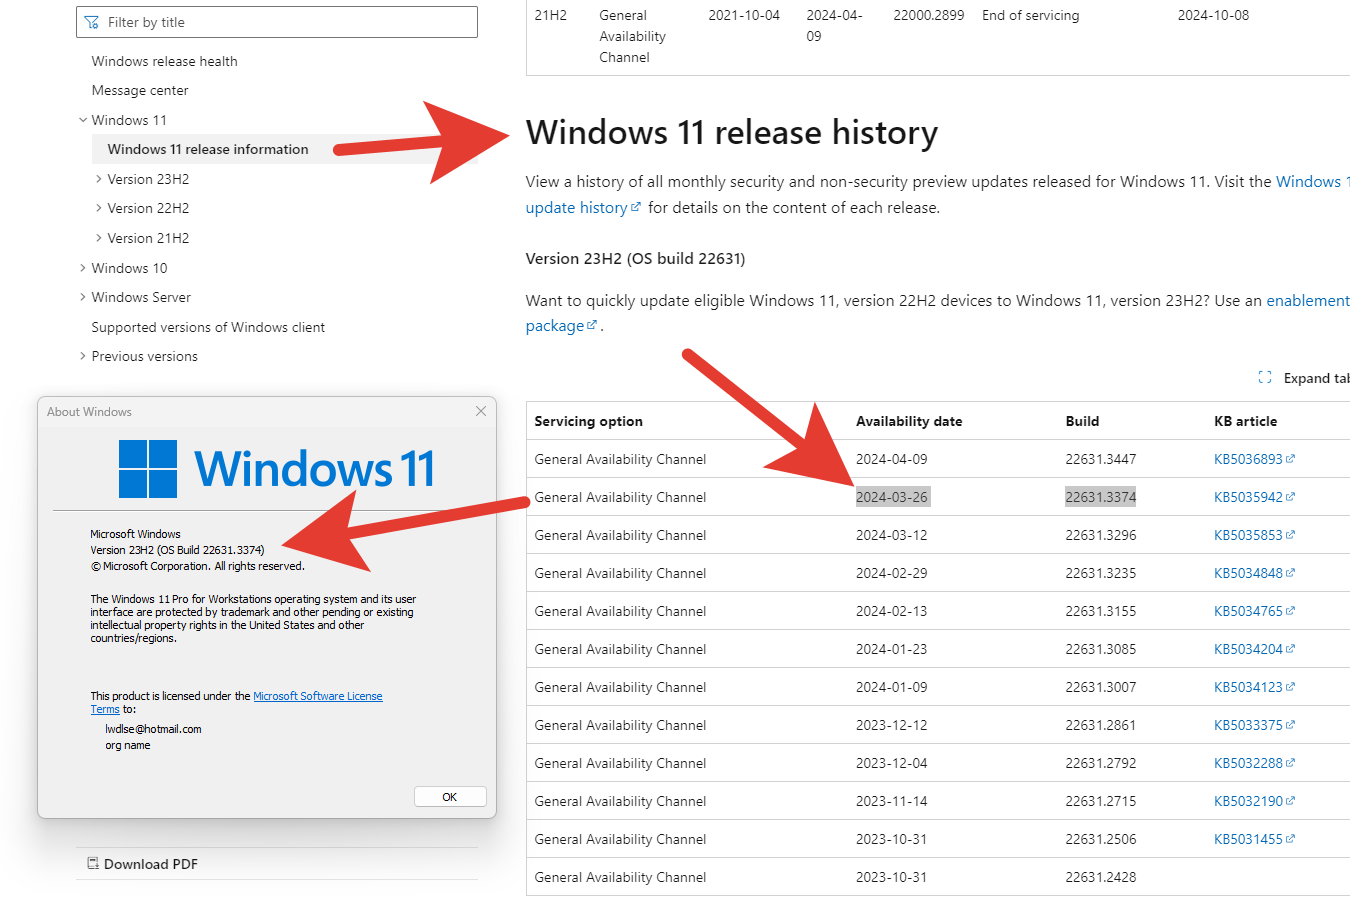
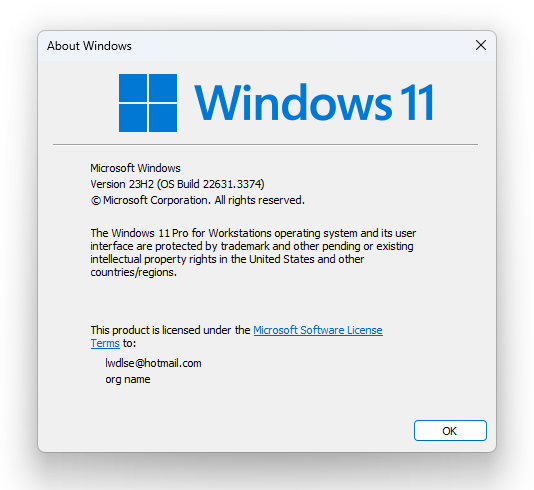
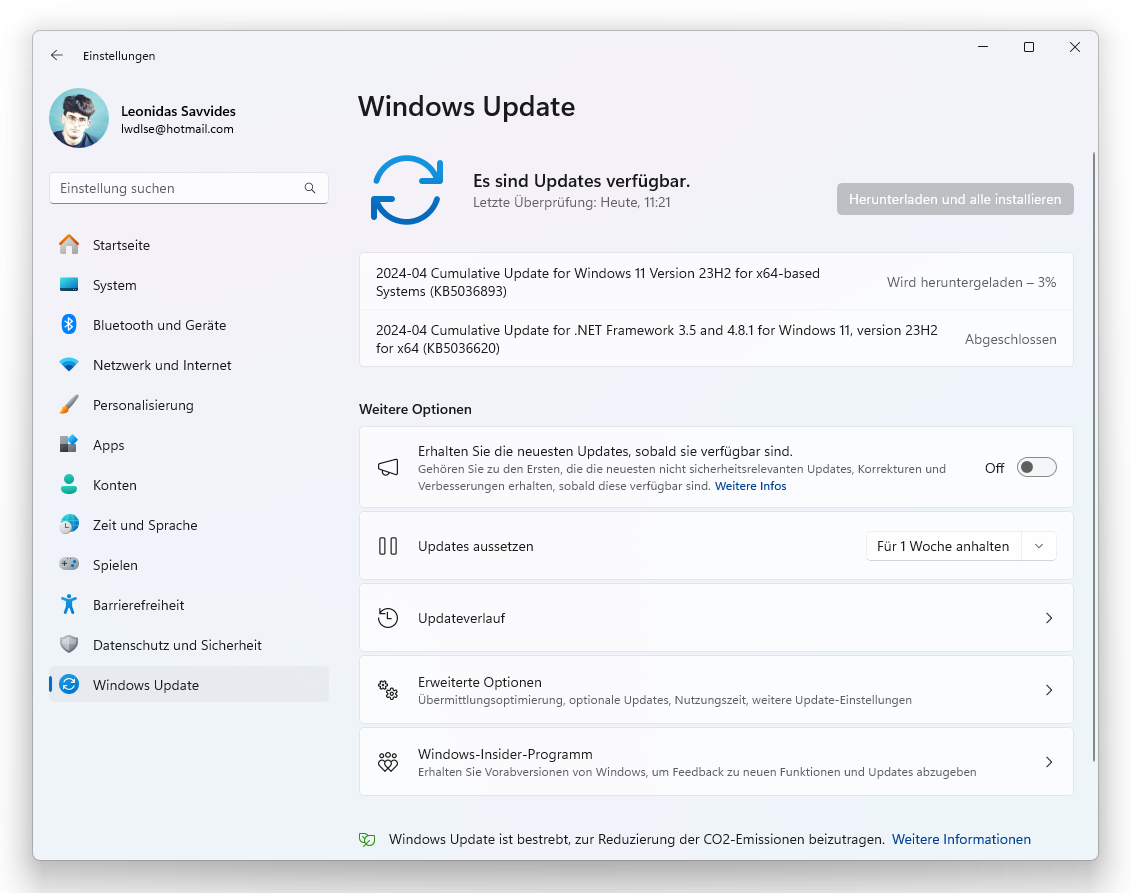
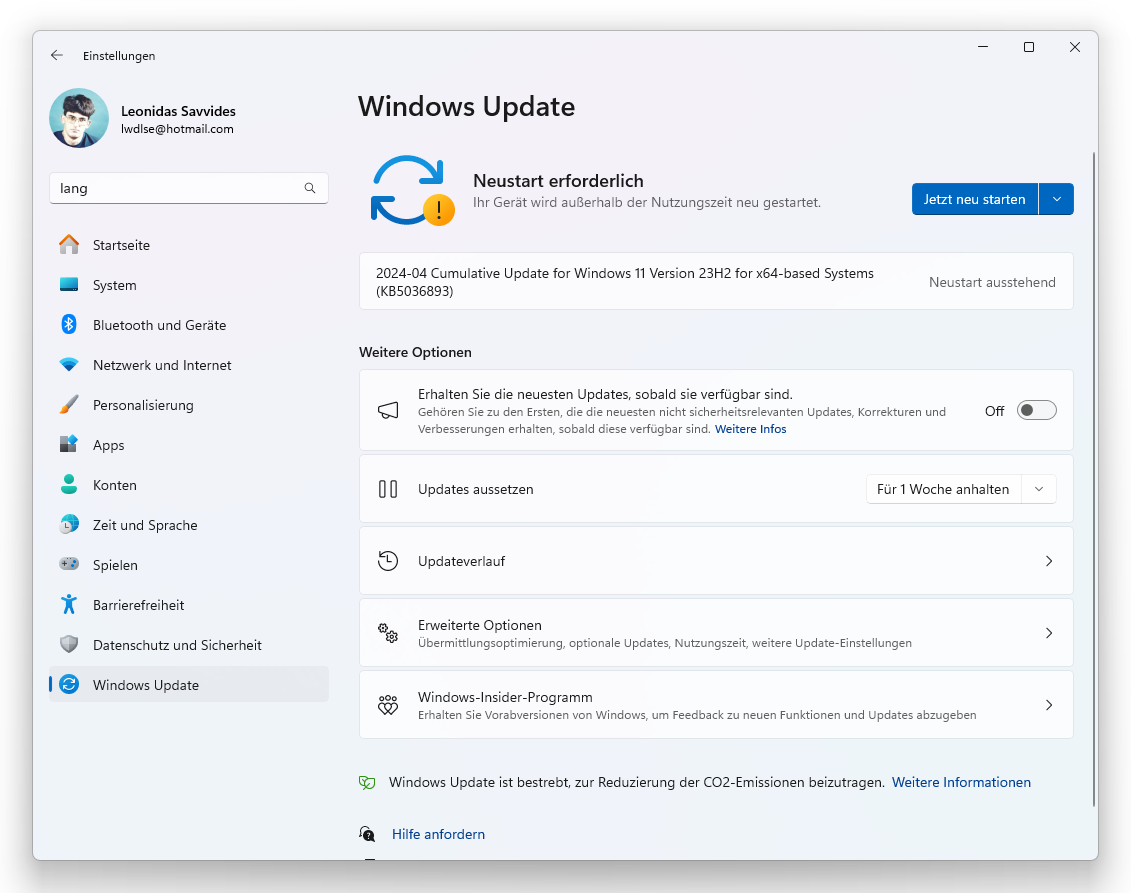
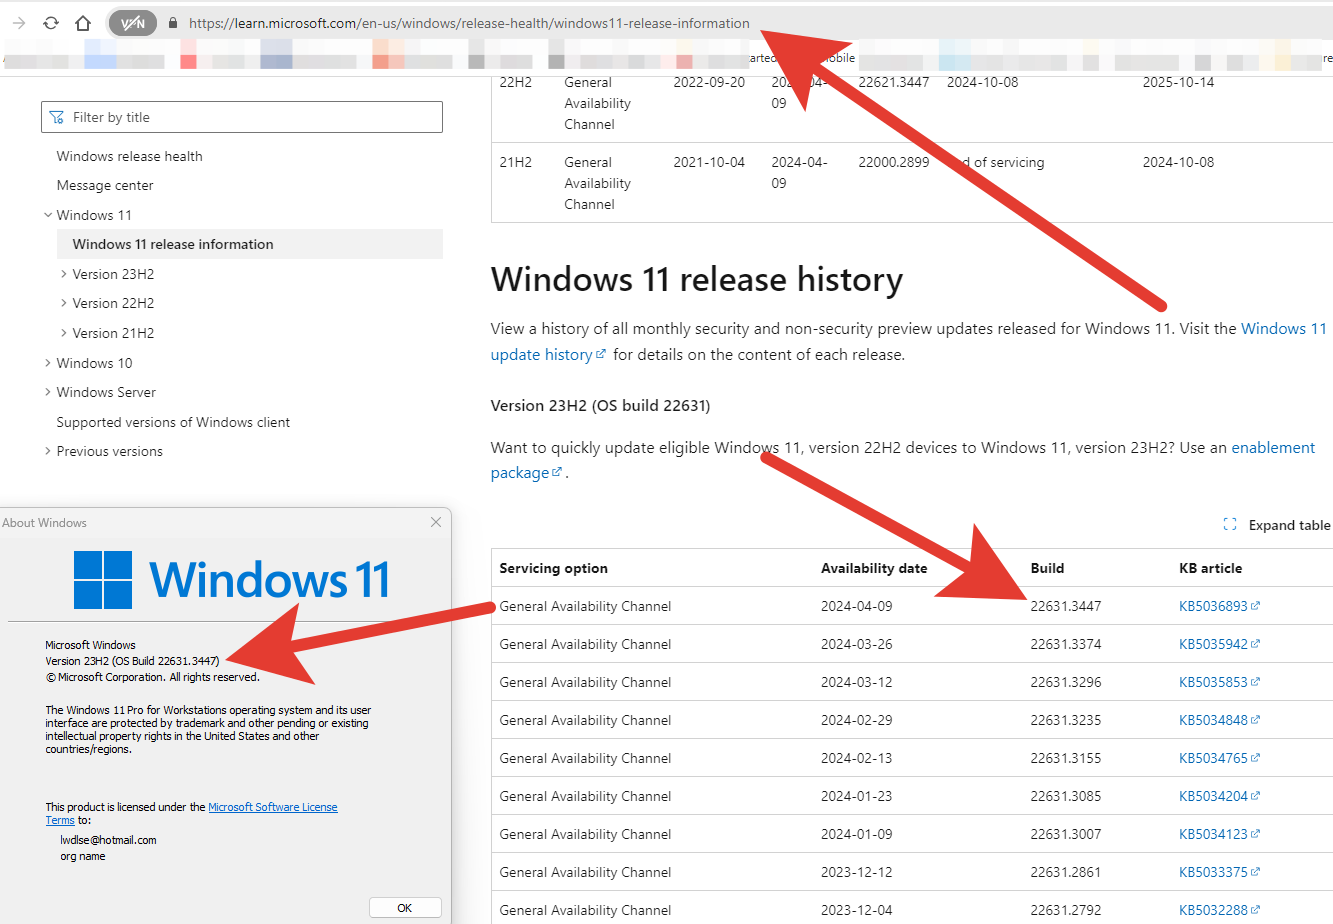
4- After upgrading from 22H2 to 23H2, Win-11 Pro for Workstations, some minor updates may be needed
You proceed normally for minor updates – there is no check for unsupported hardware. See below shots:
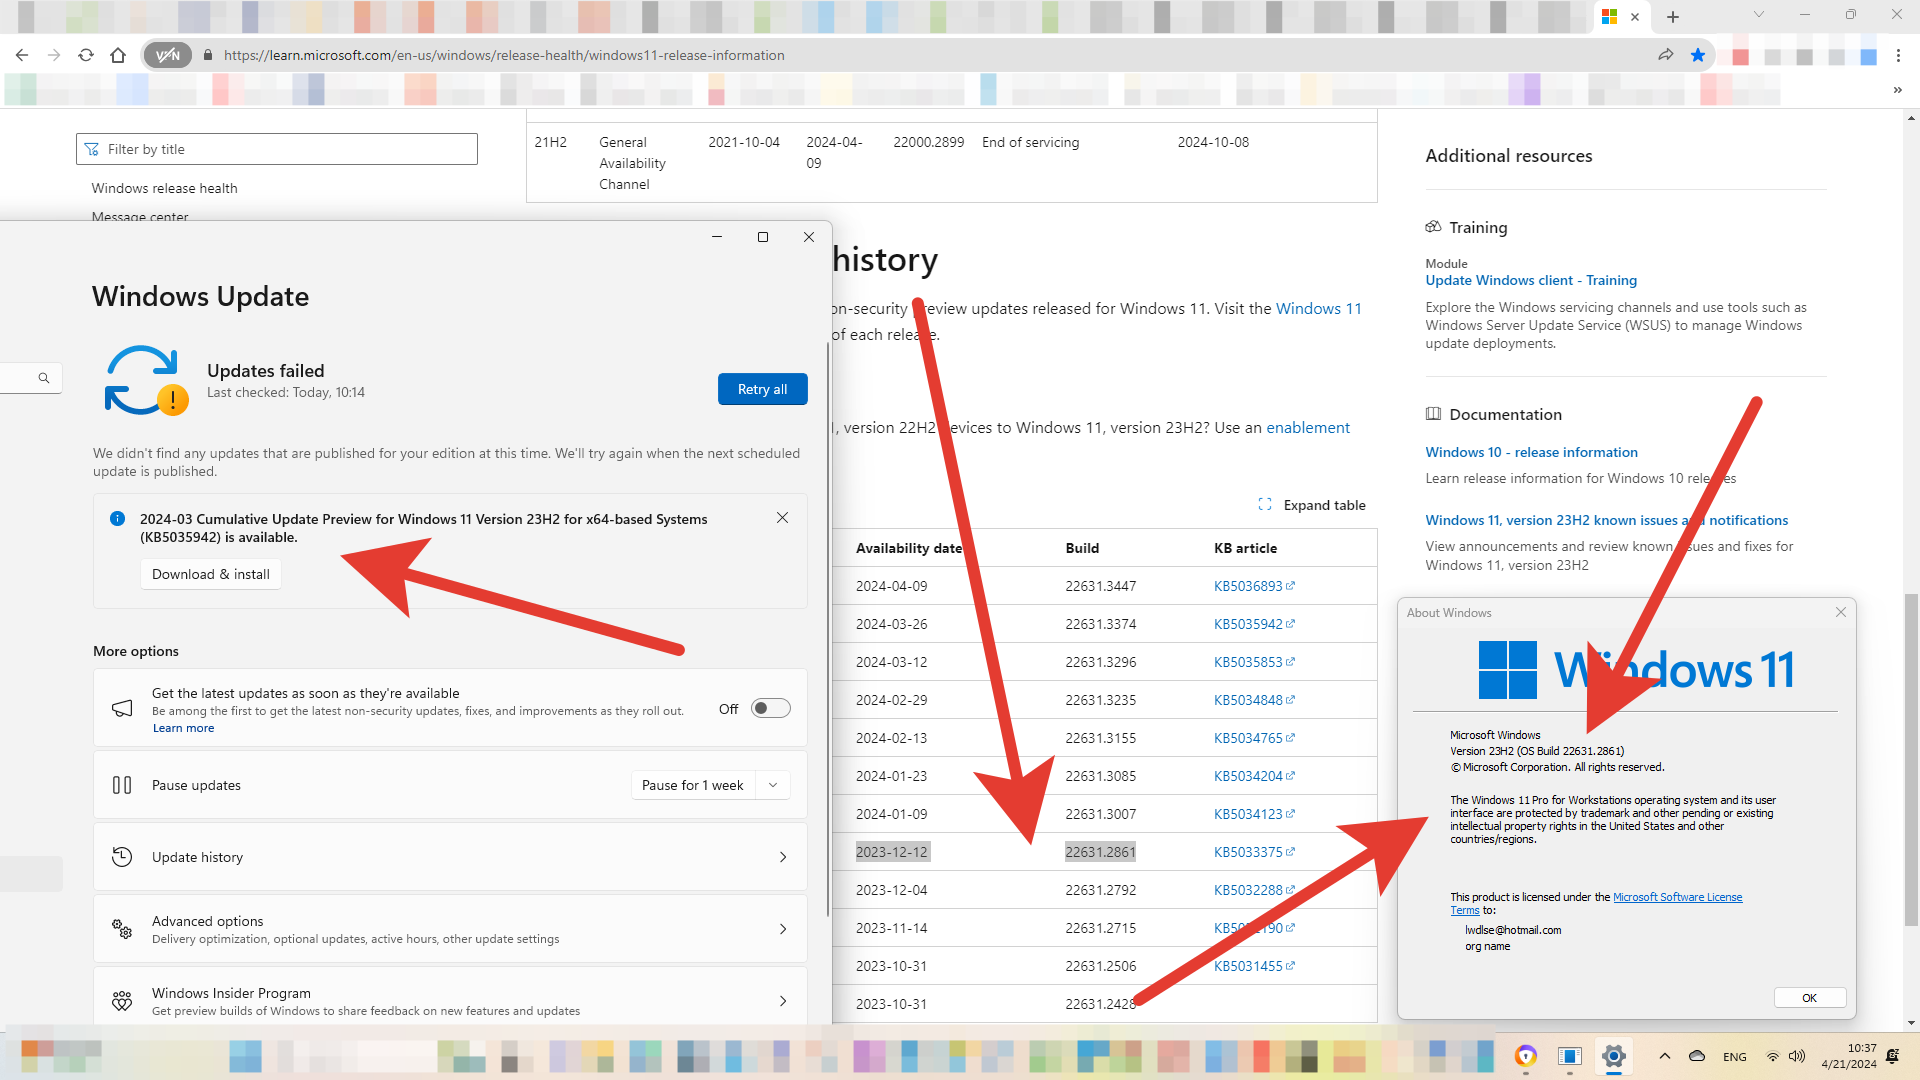
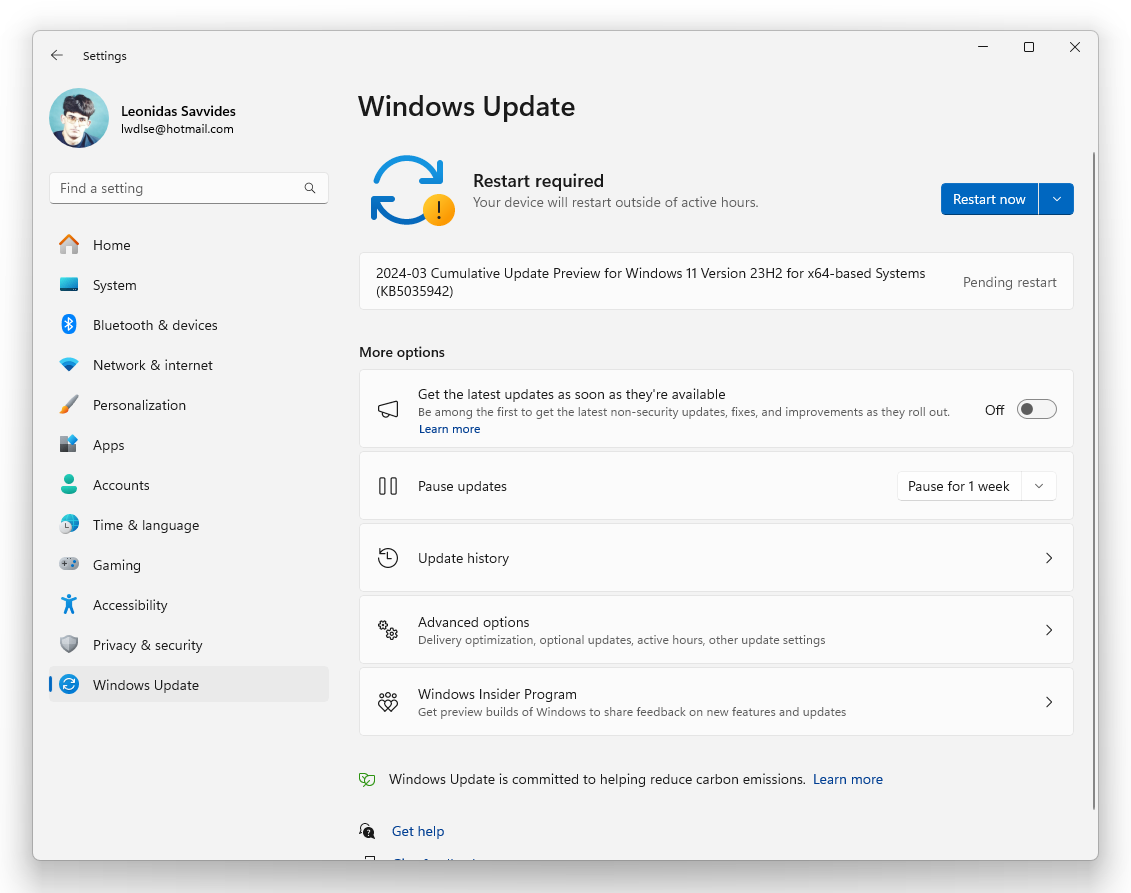
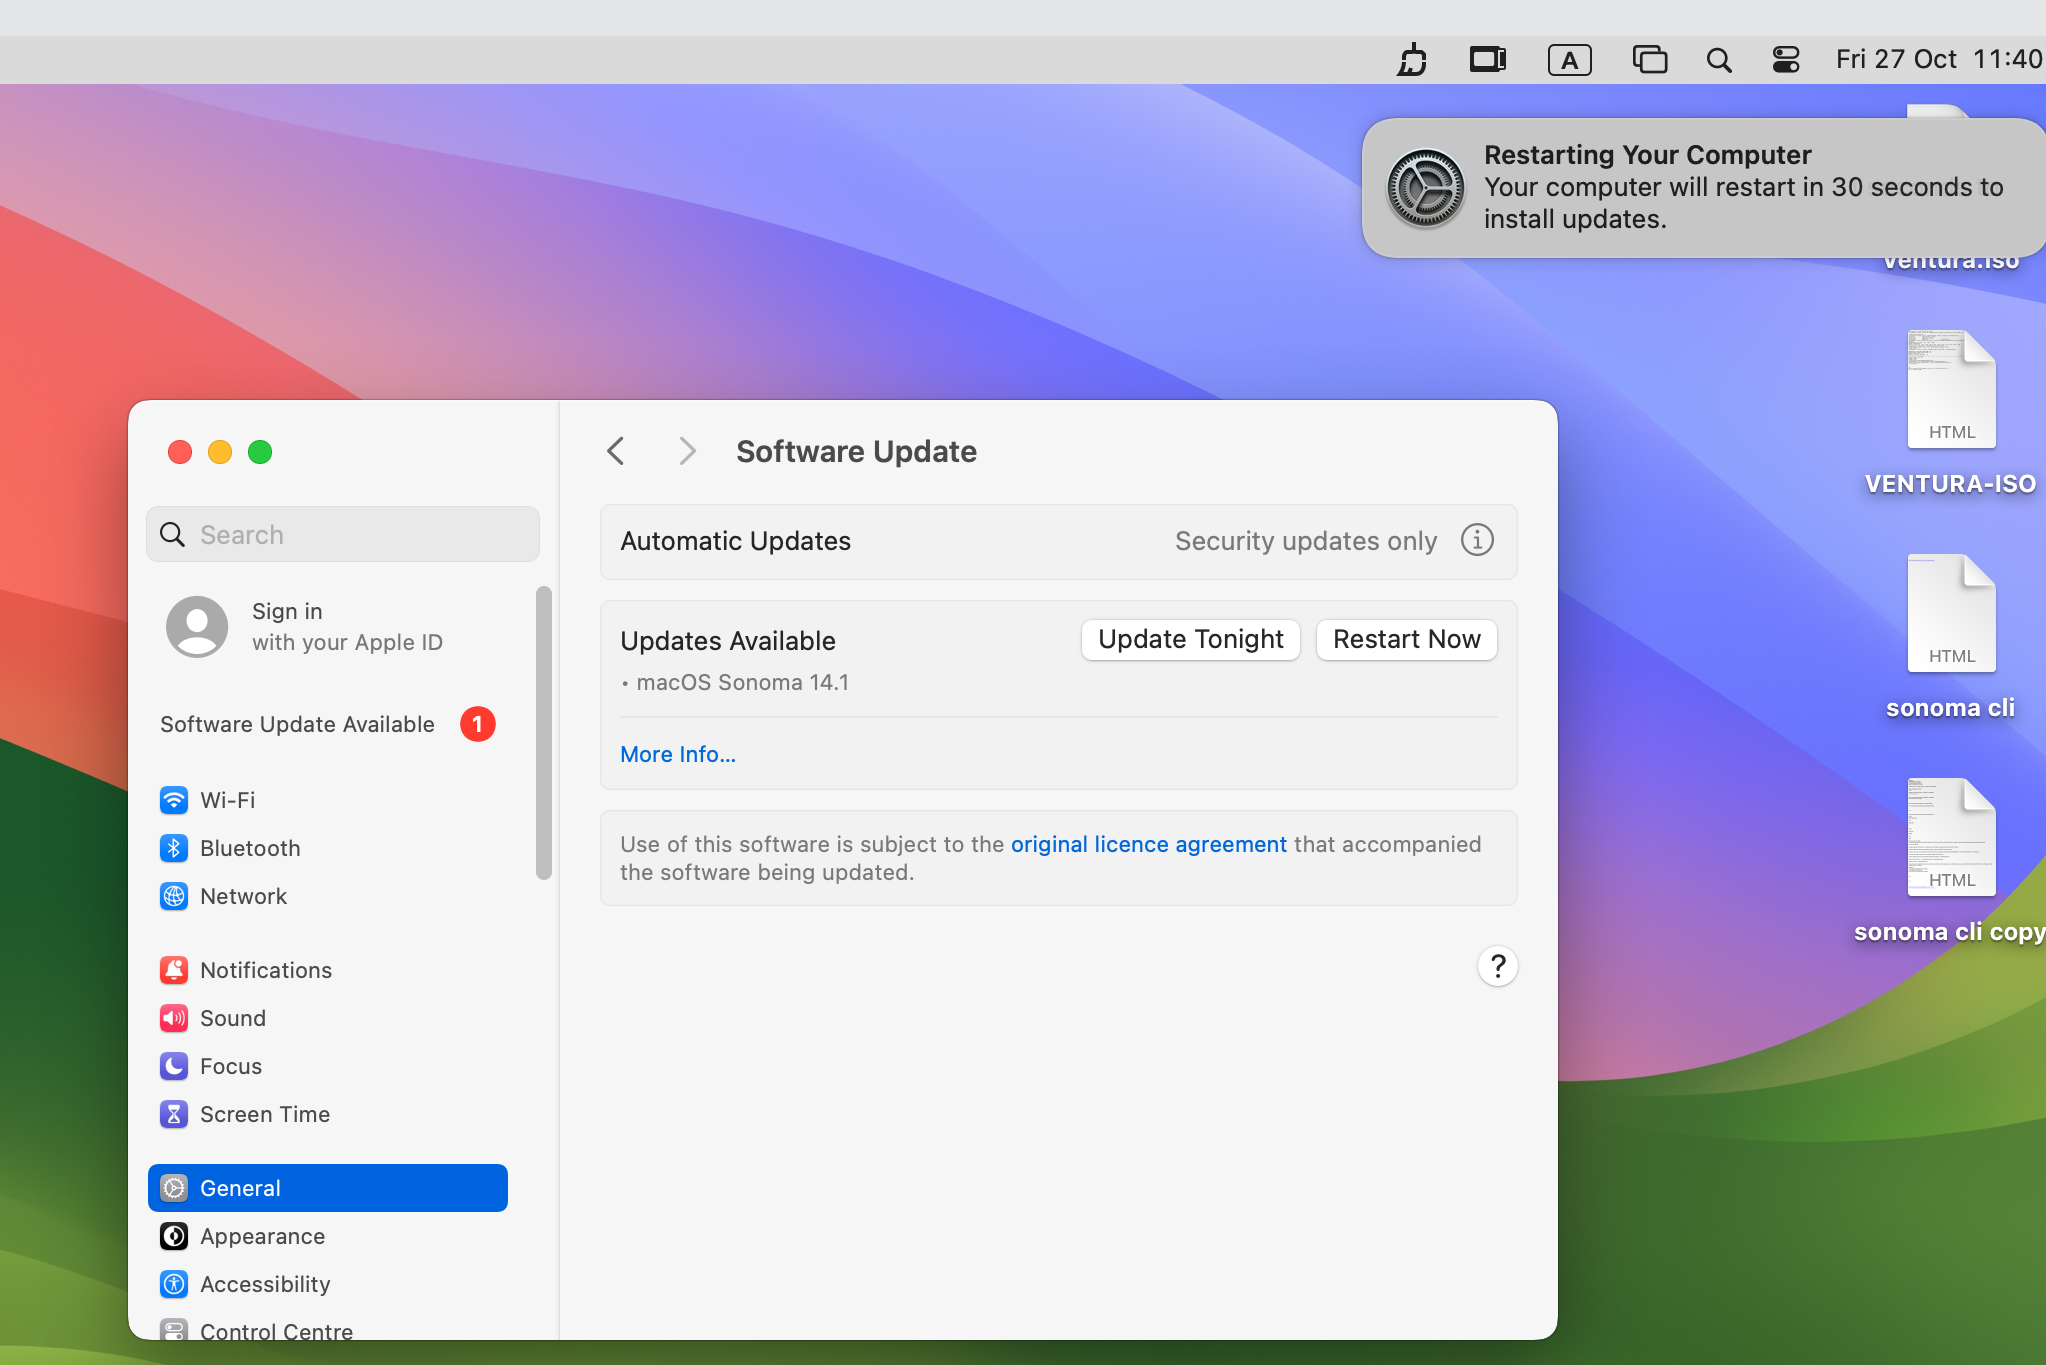
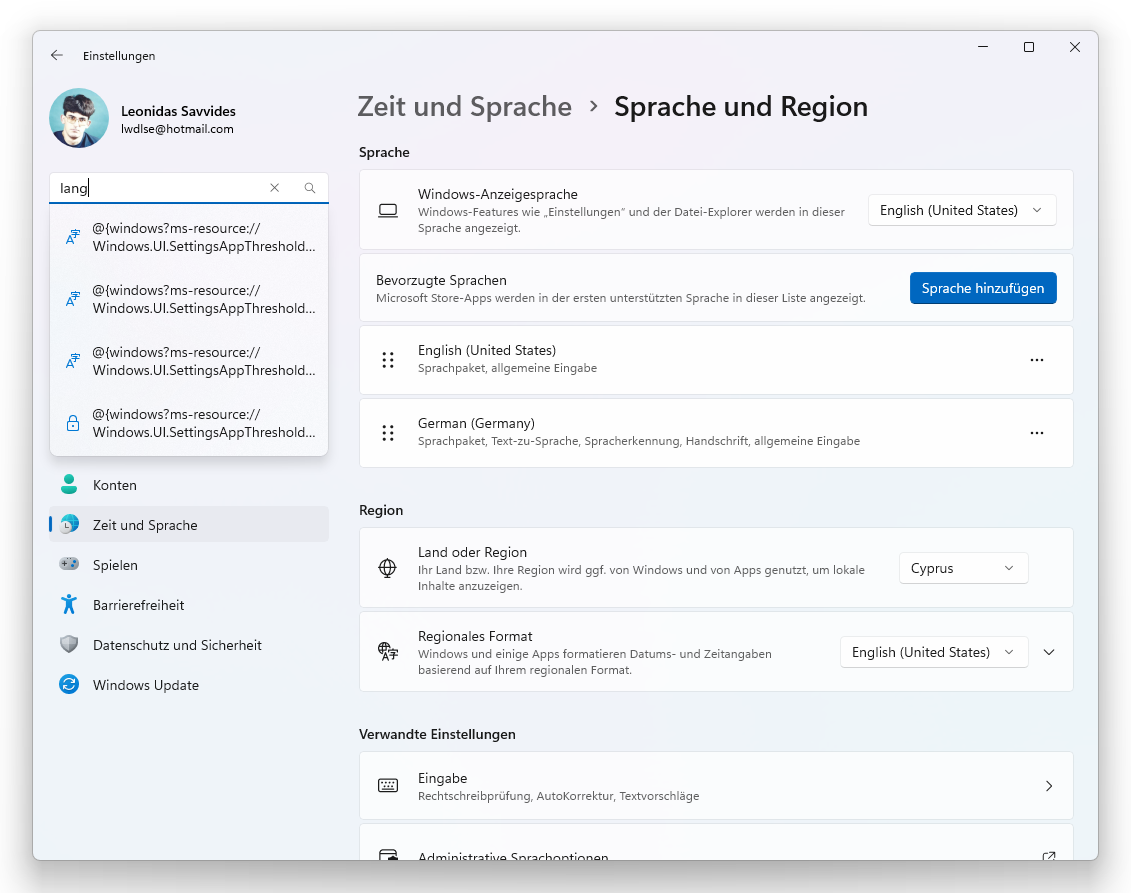
here are some German words involved, for unknown reason:
You can search in Settings for “lang”, normally if you log out, re-login, or restart the PC, when prompted – some of the screen words may be in German but you will understand the RESTART Button is self-explanatory.
====
Thank you!
Please share this article with your friends on Social Media!
5- Buy Cheap Software keys – Windows 11/10 Pro for Workstations, Windows 11 Pro, Home, etc. **
Windows 11 Pro for Workstations – $13.99 just
Windows 10 Pro for Workstations – $13.41 just
Windows 11 Pro + Office 2021 Pro Plus
Windows 10 Pro + Office 2021 Pro Plus