Create macOS Sonoma [14.x] ISO without a Mac Computer and FREE

The basic idea of FREE ISO is:
“Use a free non-trusted macOS Sonoma VM in a Hypervisor like VMware Workstation Pro to create from it a macOS Sonoma ISO (Trusted)”

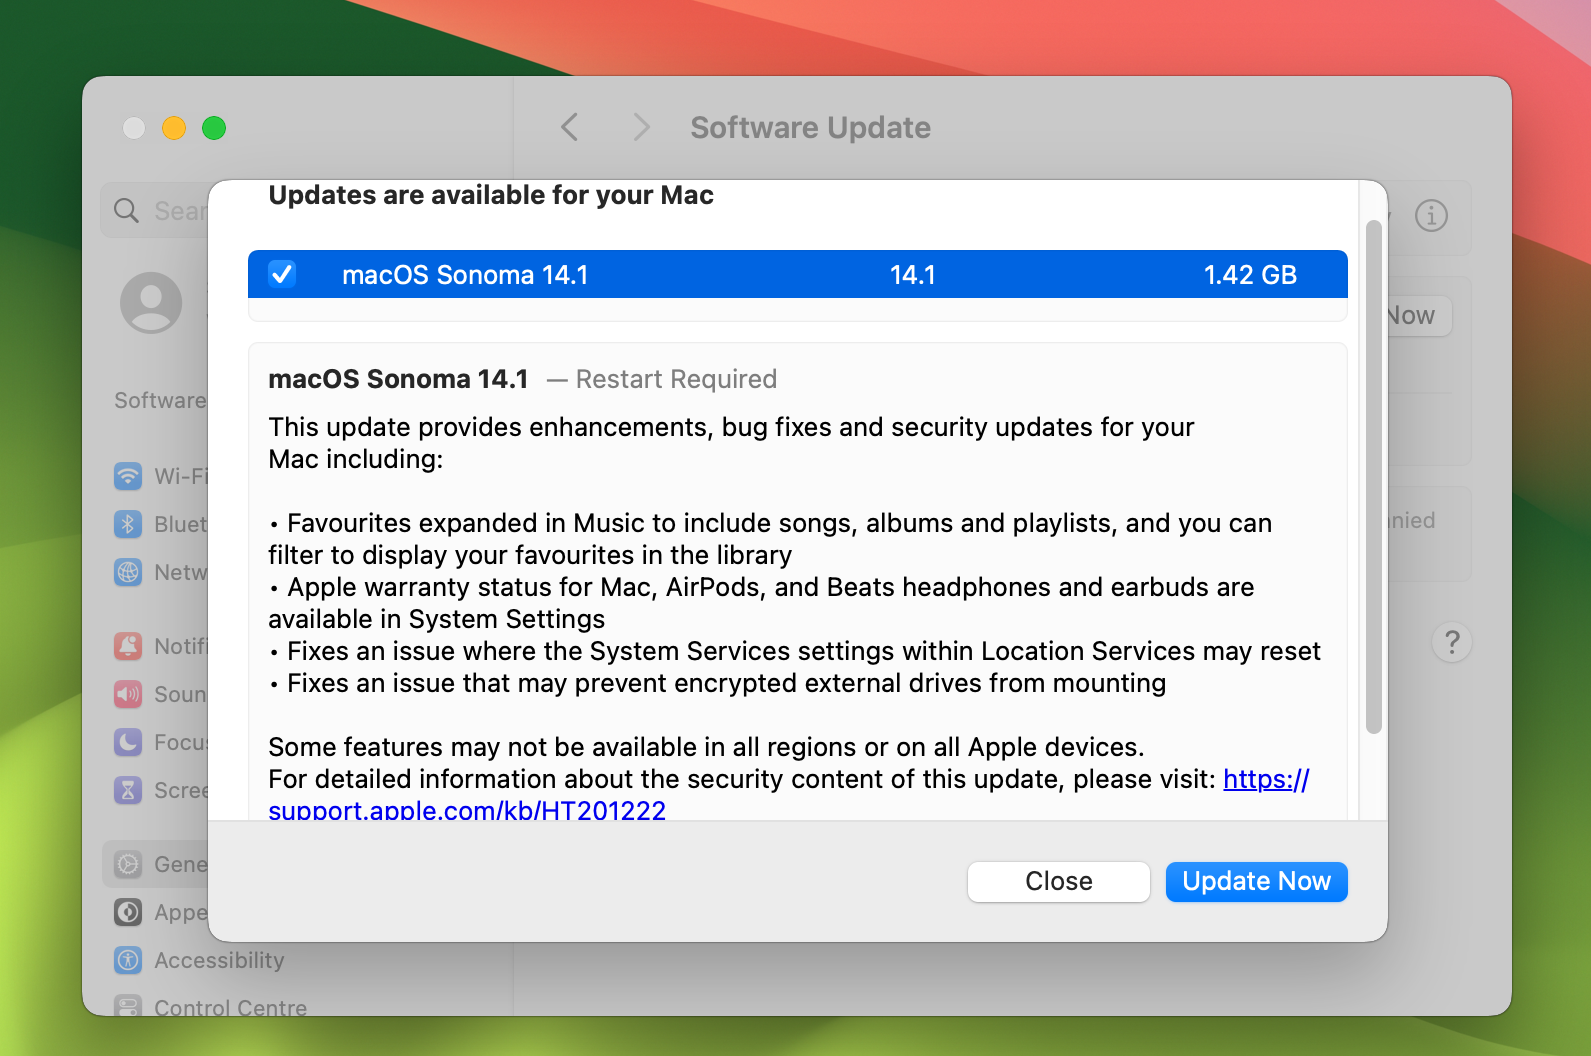
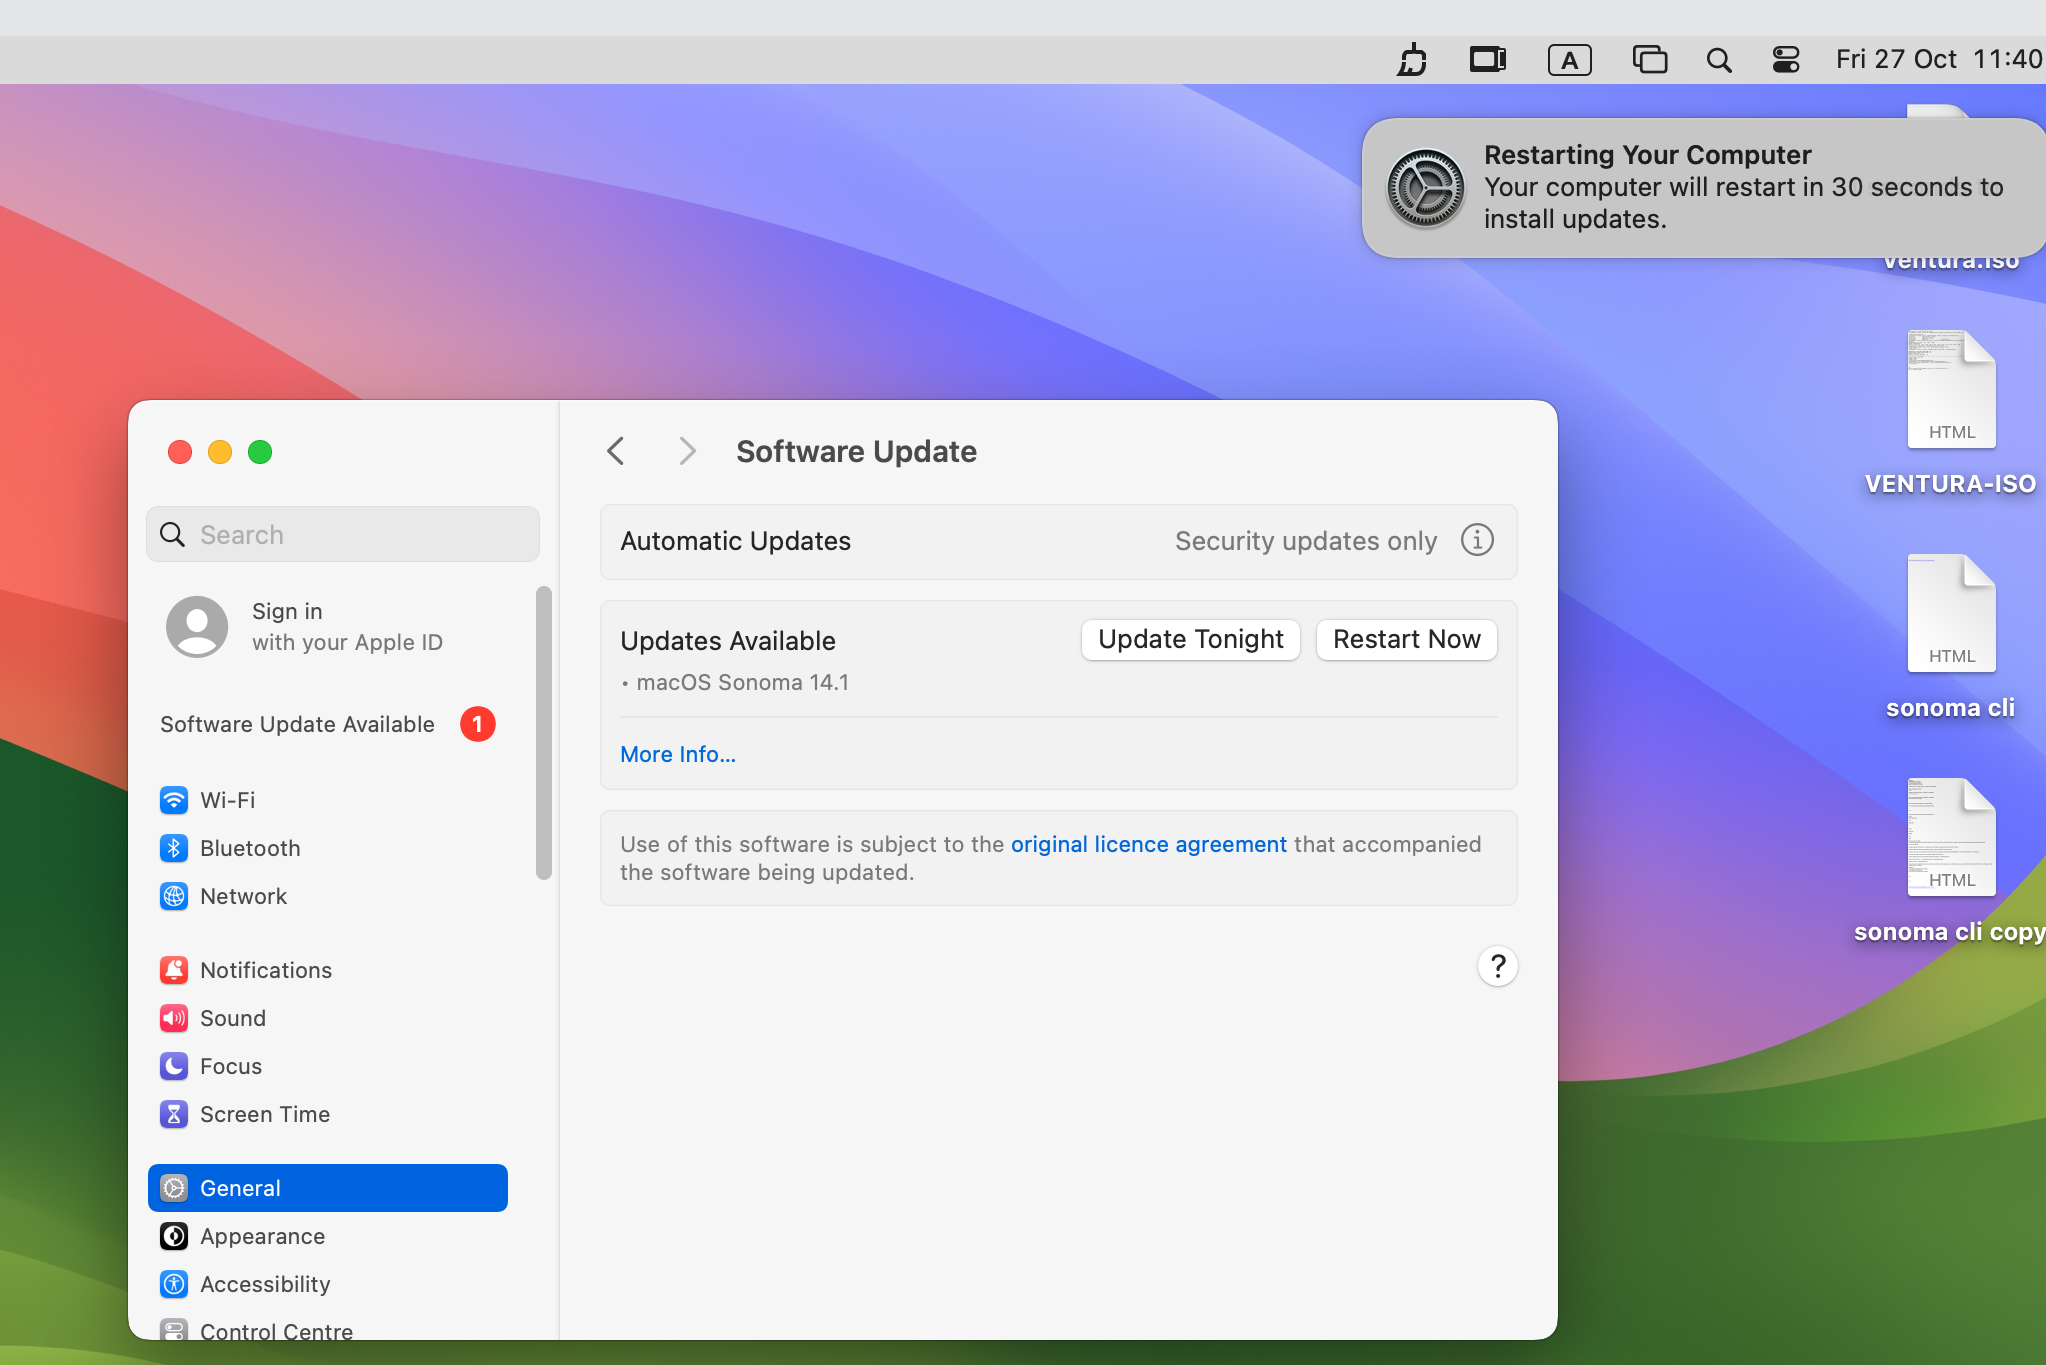
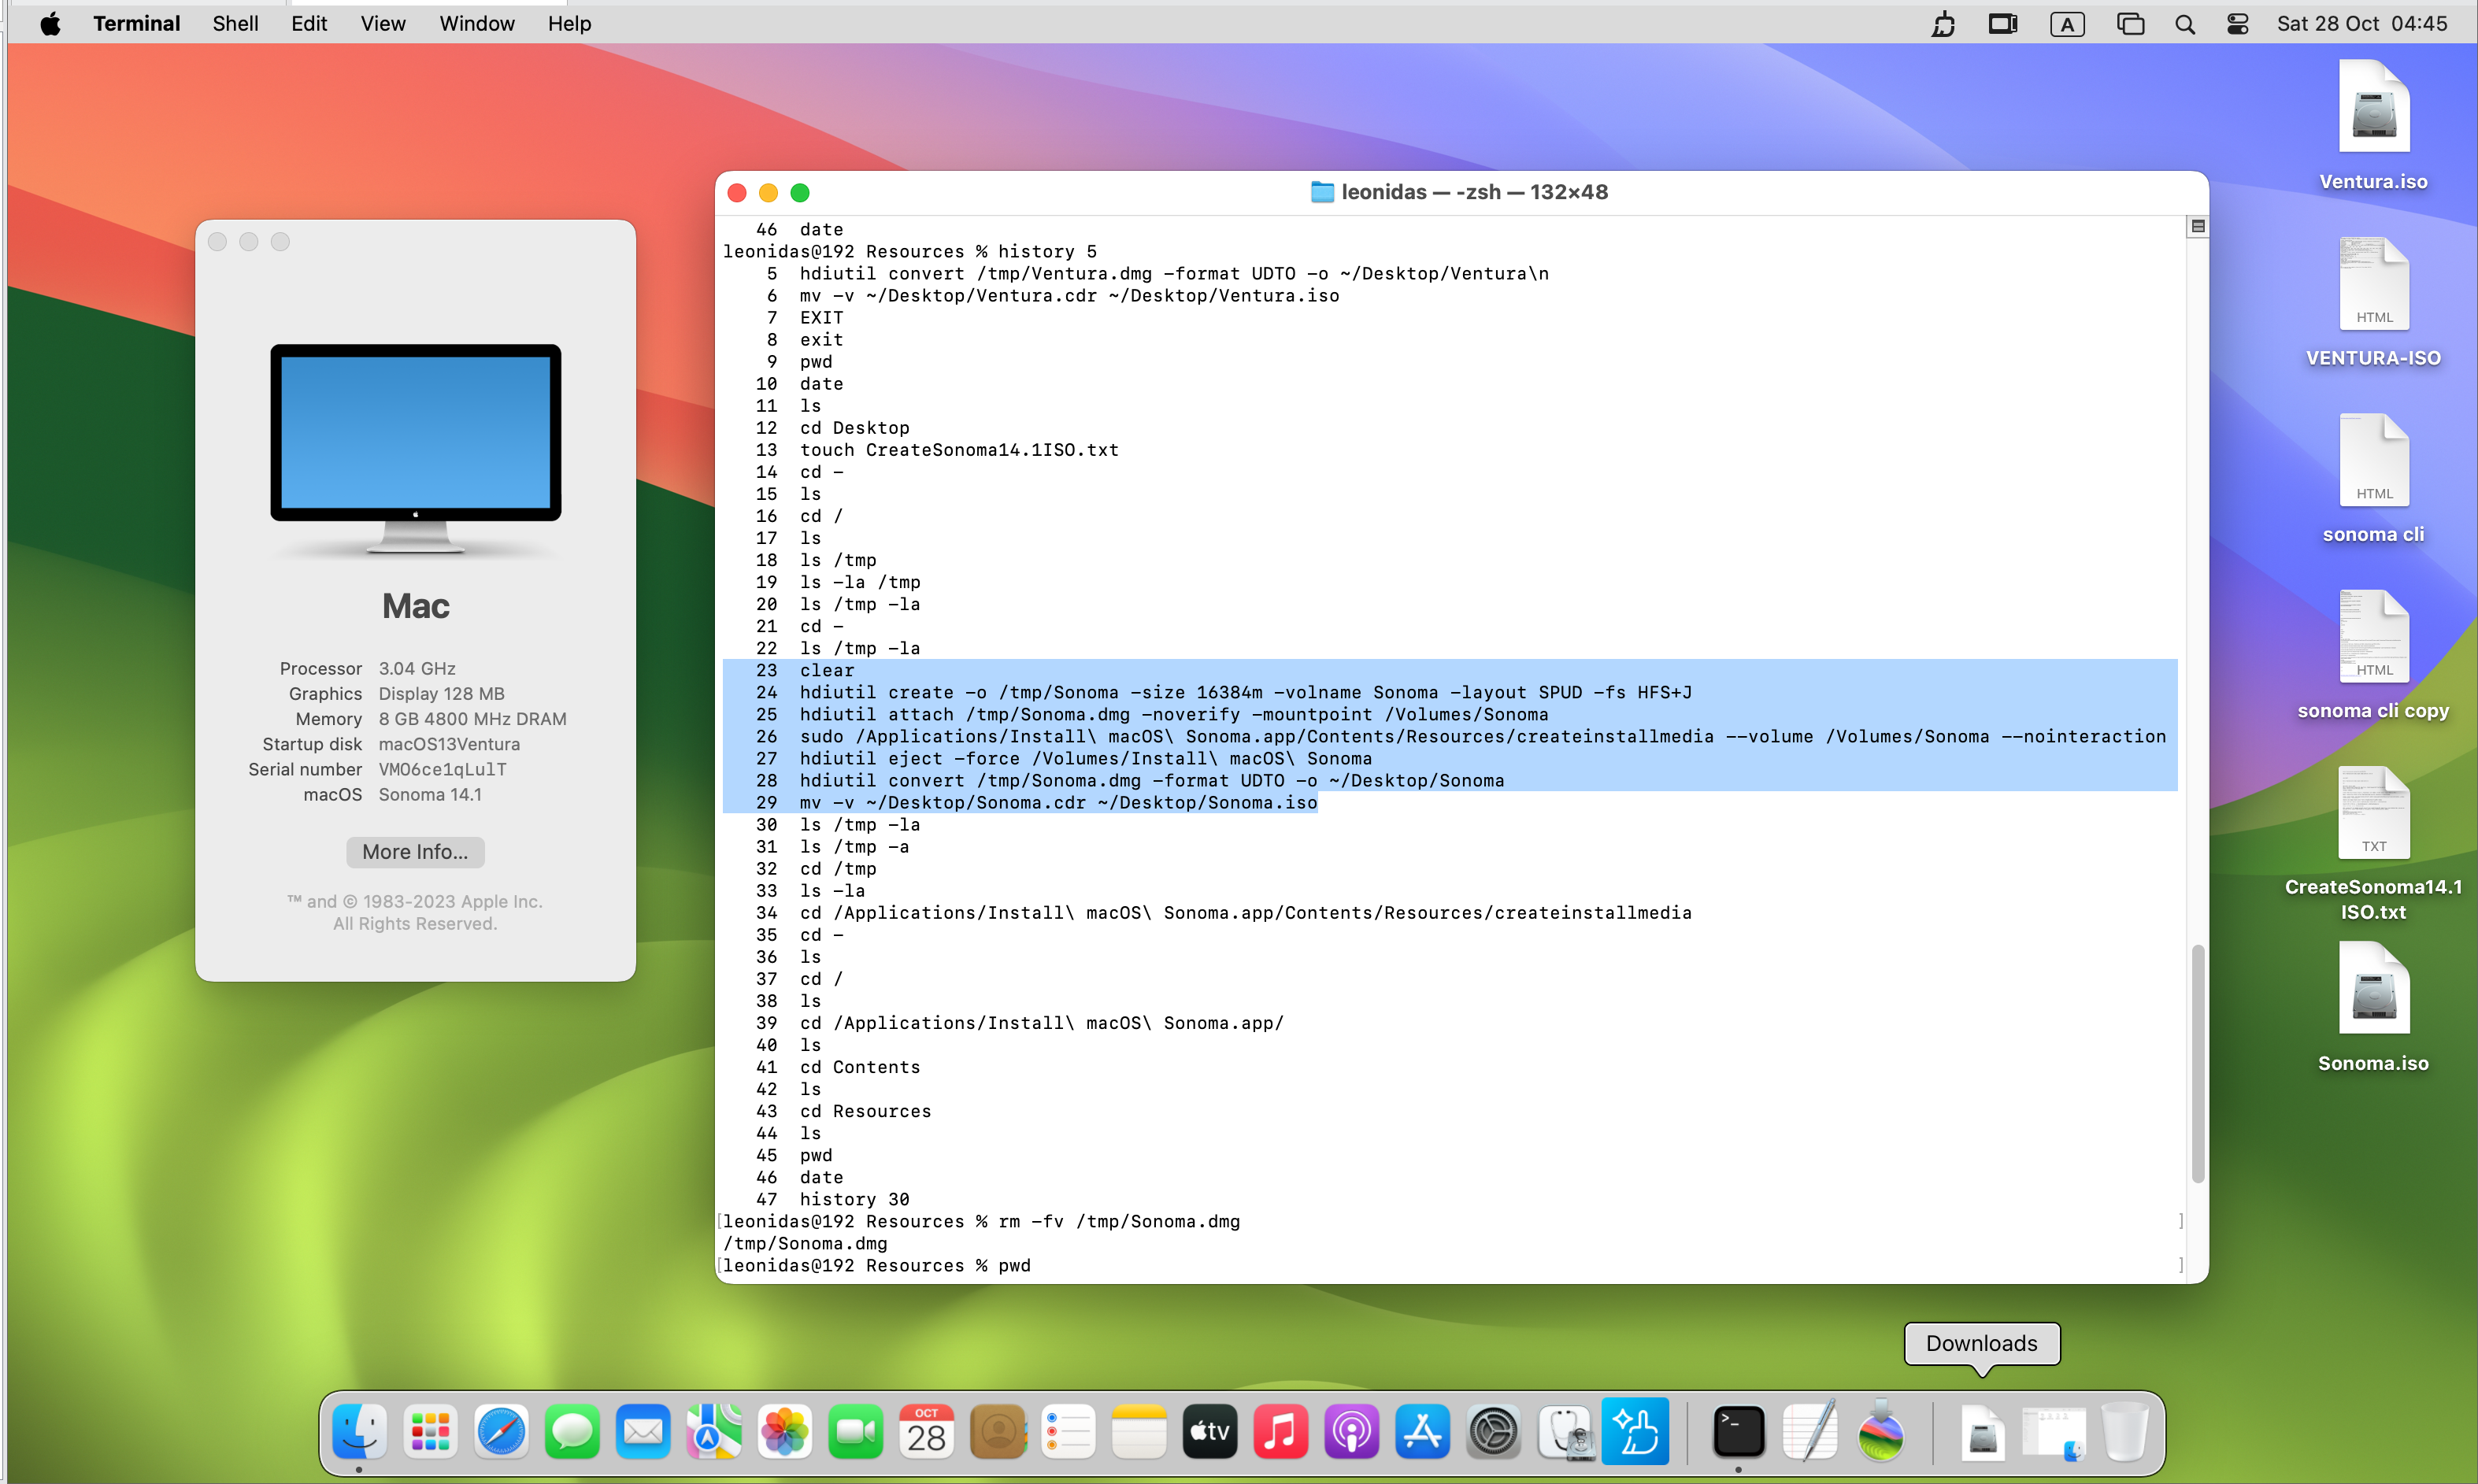
In my case the VM was Ventura 13.x [a year ago created Ventura.iso from this VM, see here the blog post for this], and updated to Sonoma 14.0, After this the non-Trusted VM macOS Updated to macOS Sonoma’s latest…. 14.1.

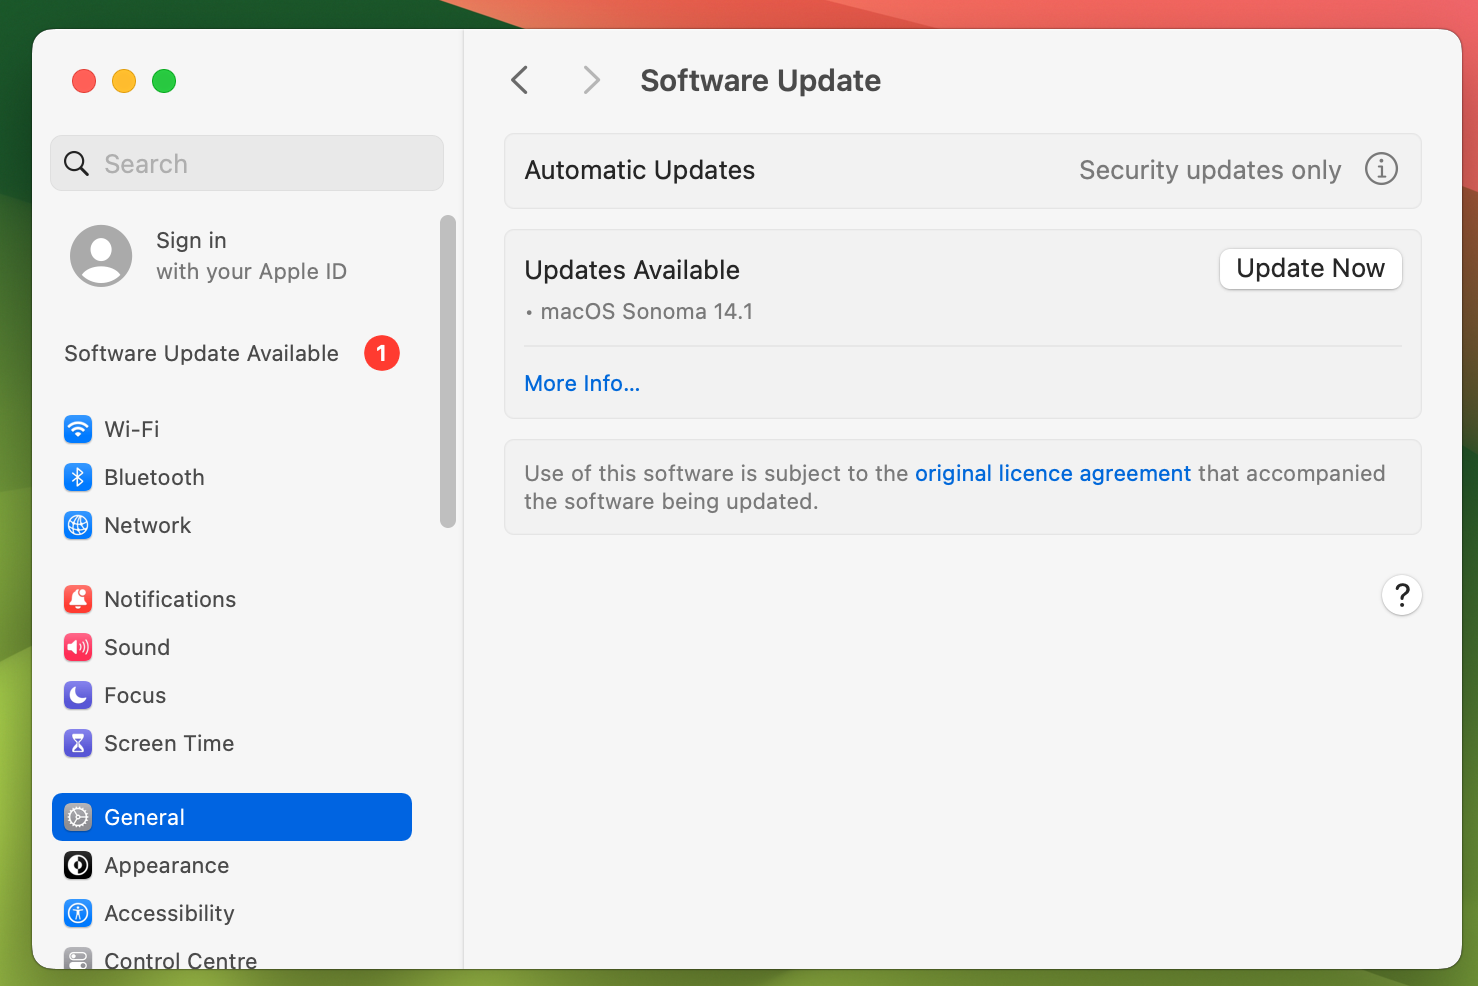
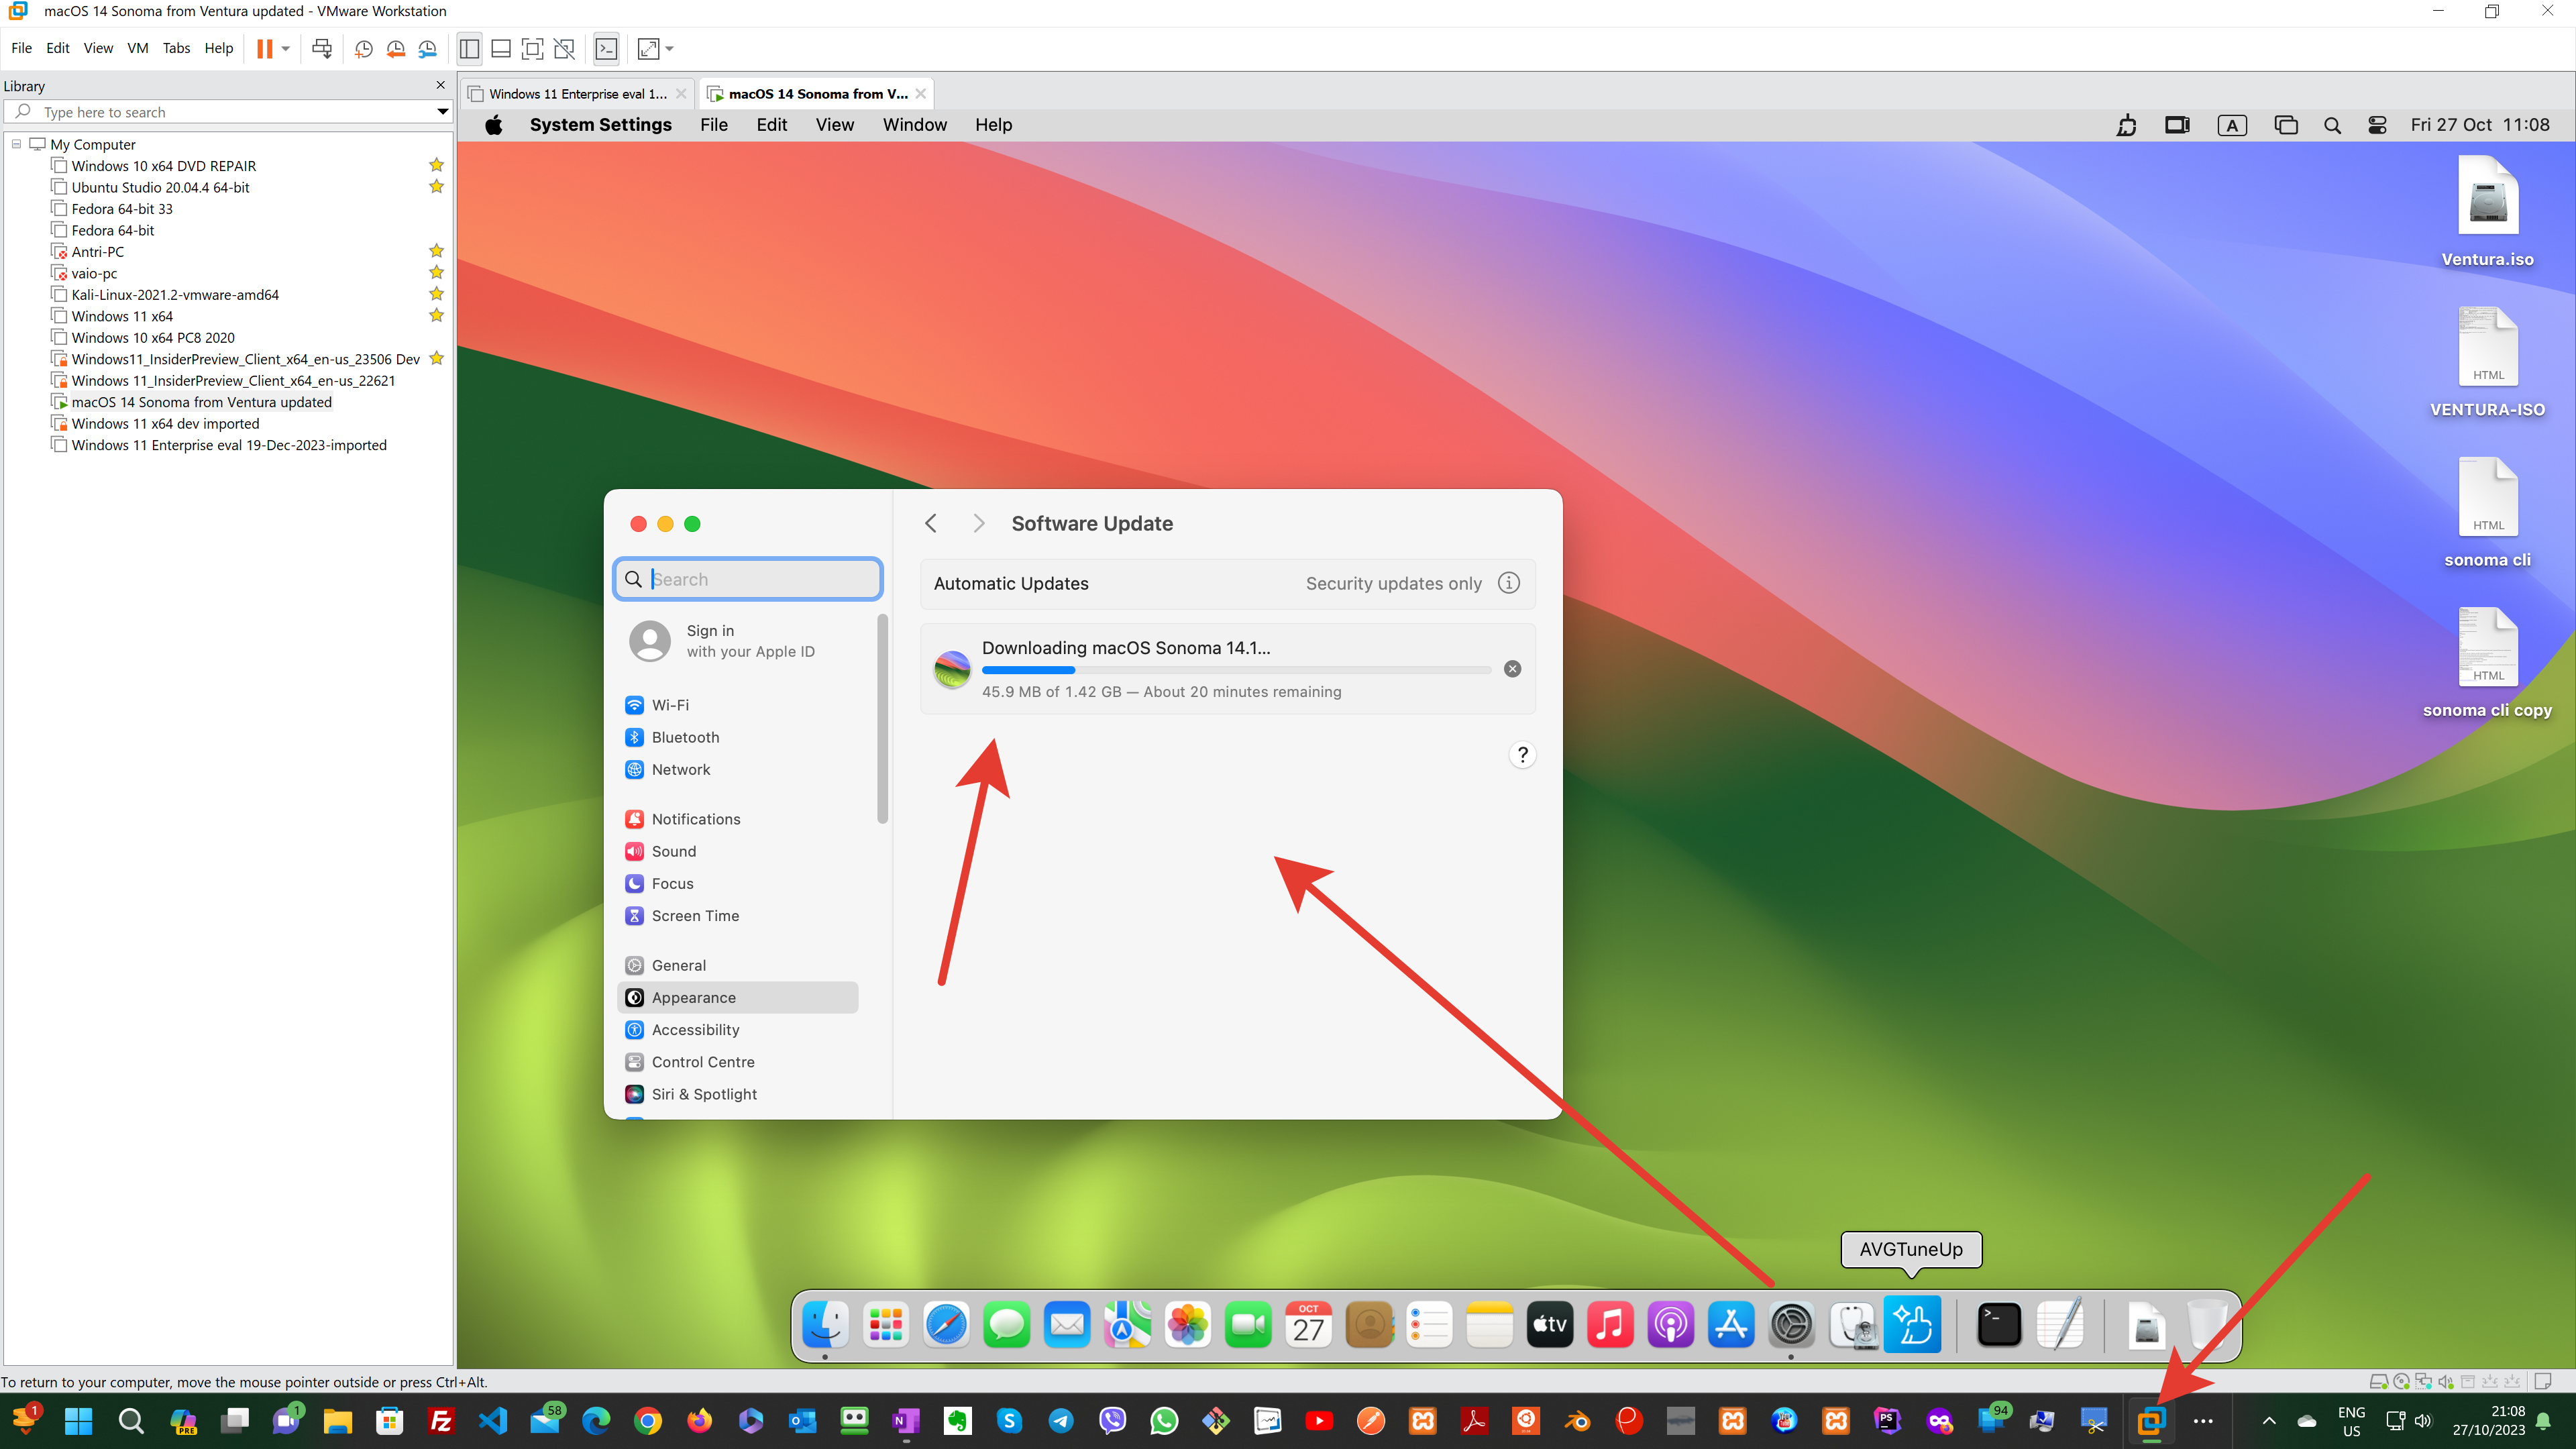
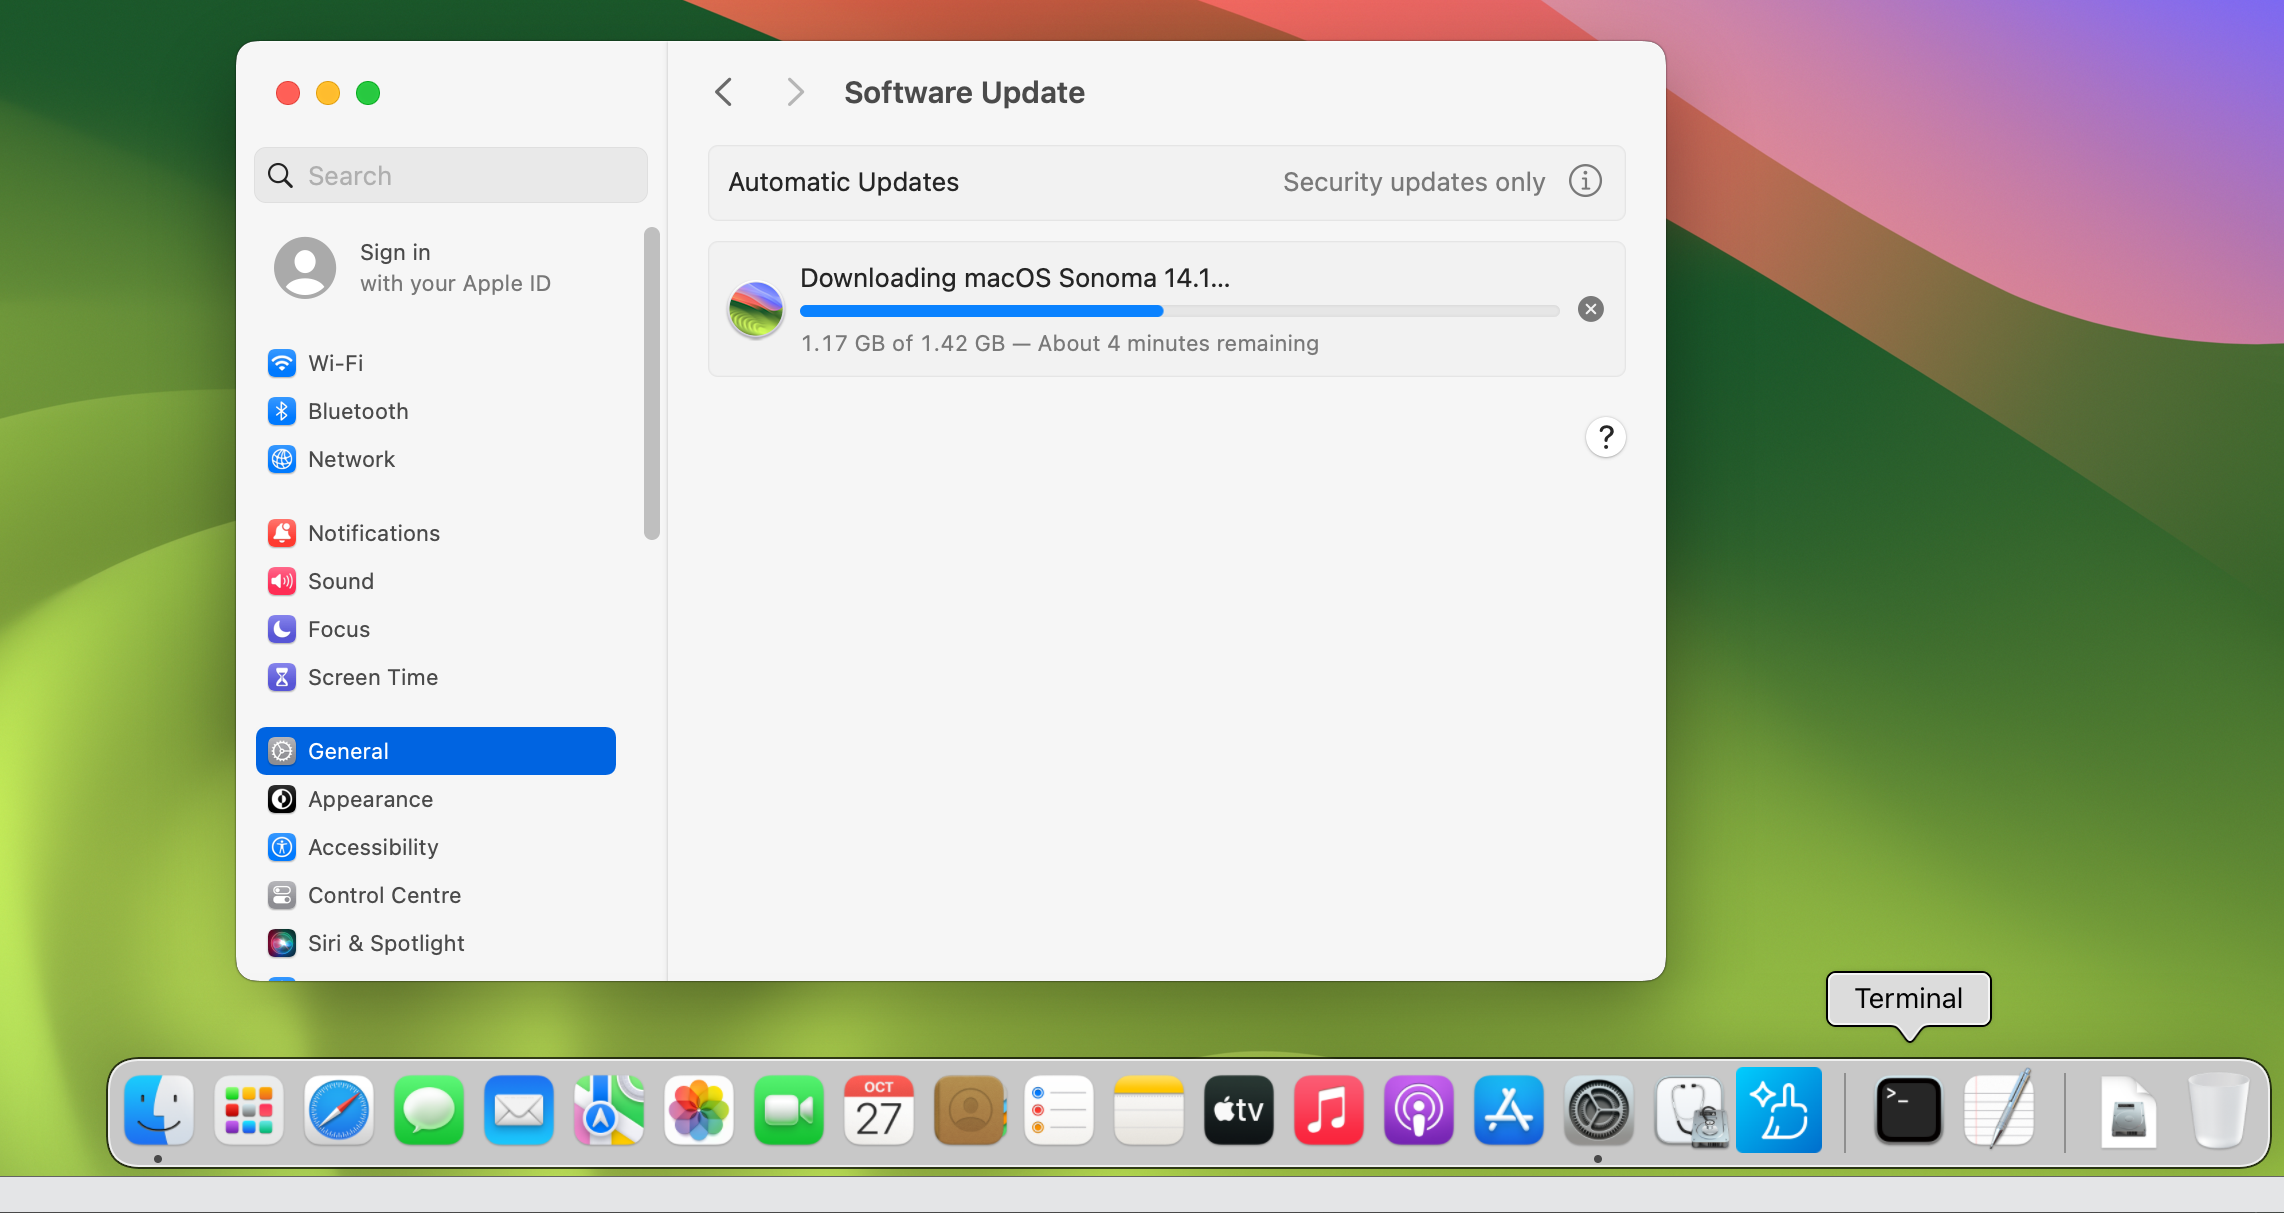
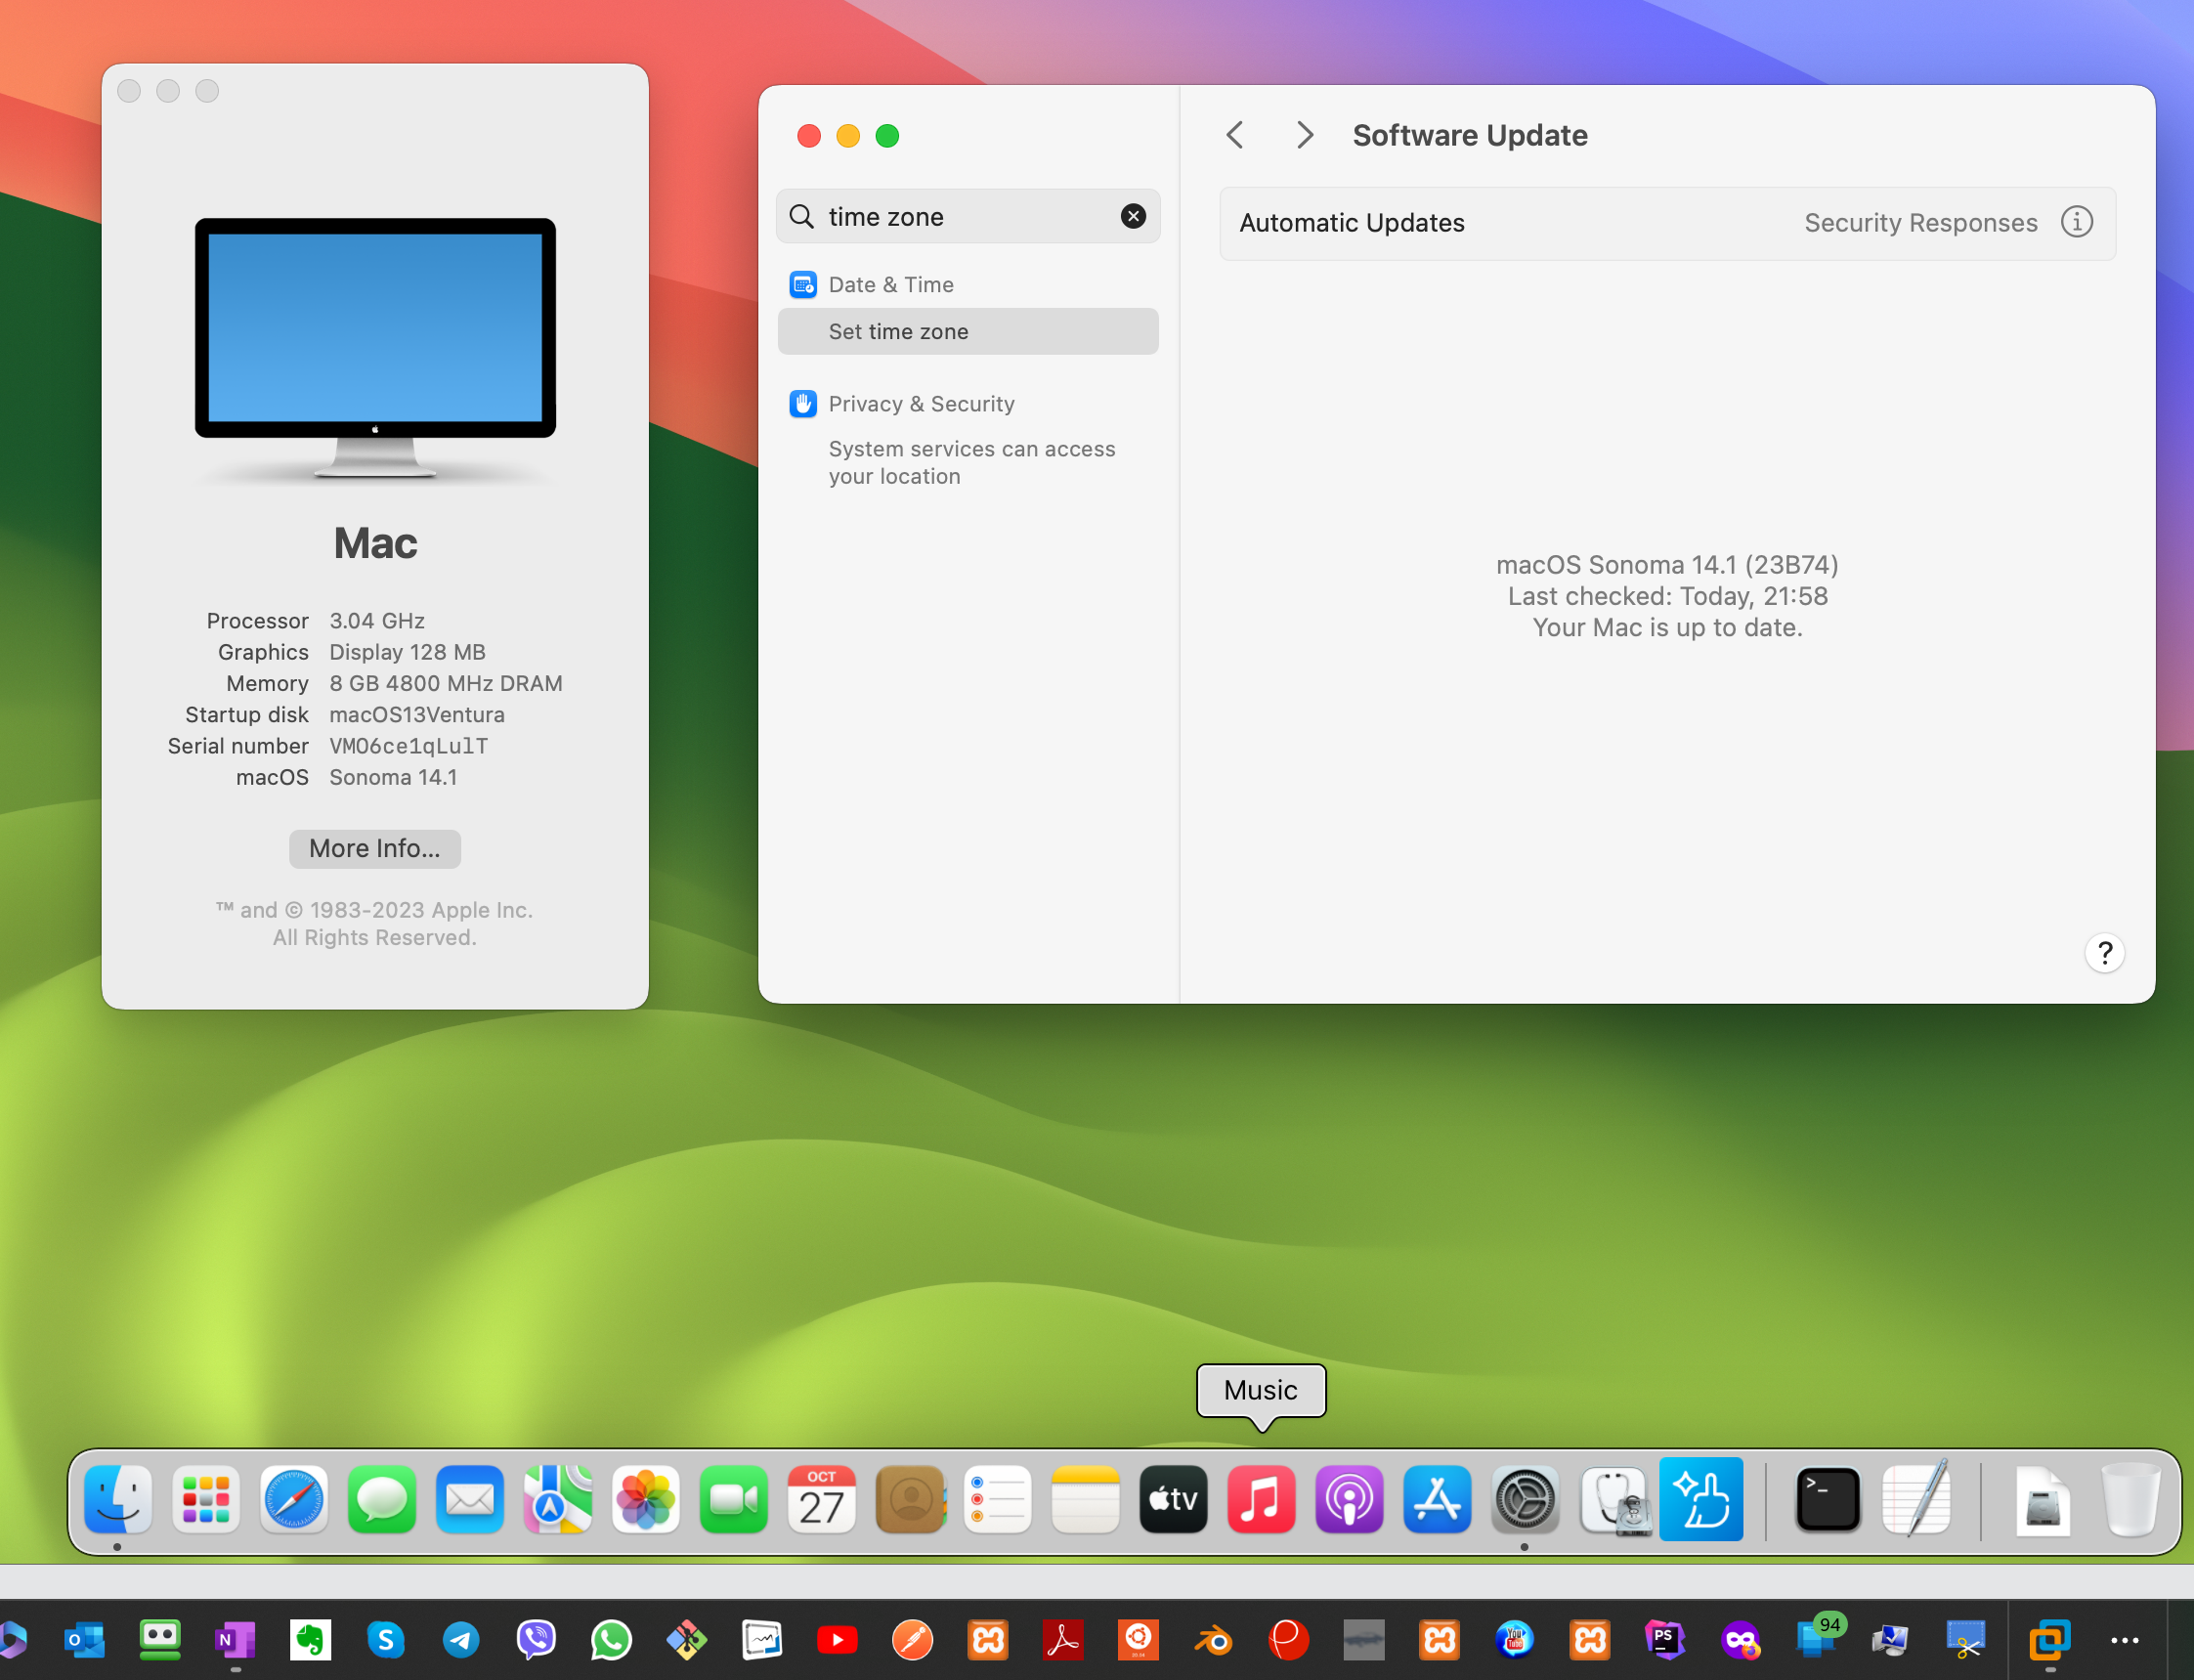
After Updating to MacOS 14.1 Sonoma, now I will create an ISO Sonoma14.1.iso file… useful for Virtual Machines, etc. Also, this should be a Trusted ISO, you can log in with Online internet accounts free of worries of malware…

STEPS CREATE macOS_Sonoma.iso

=========

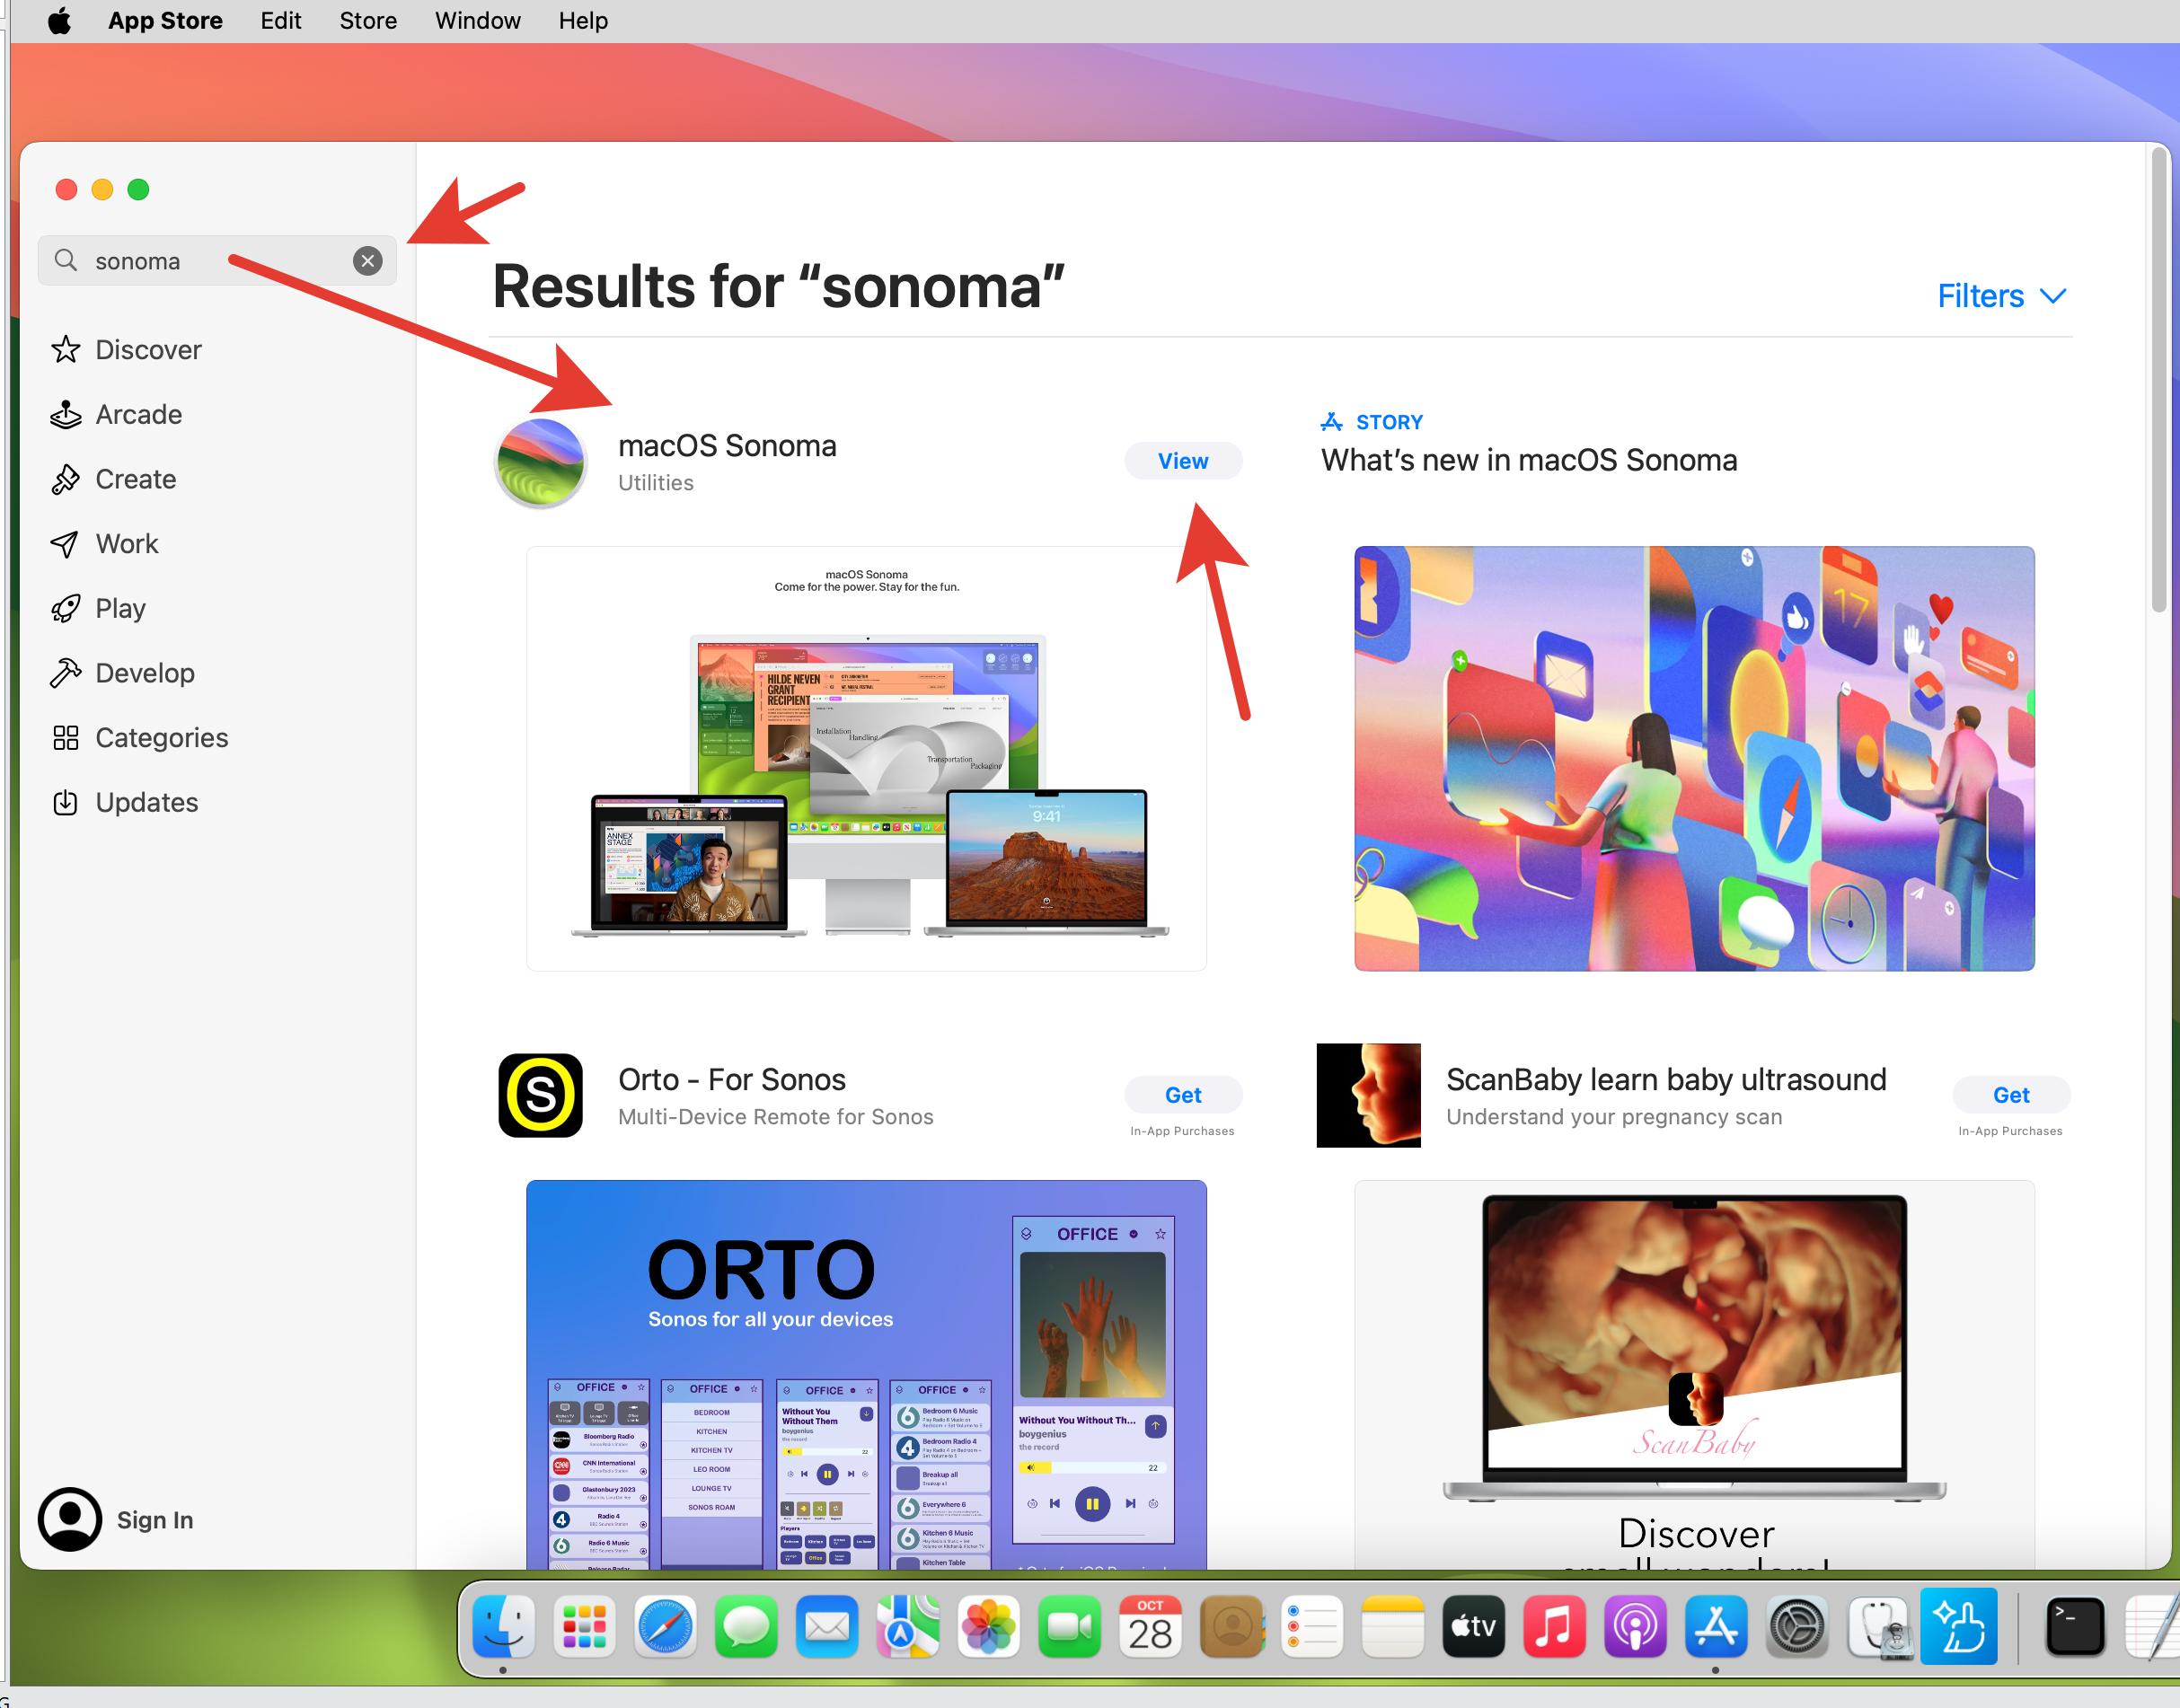
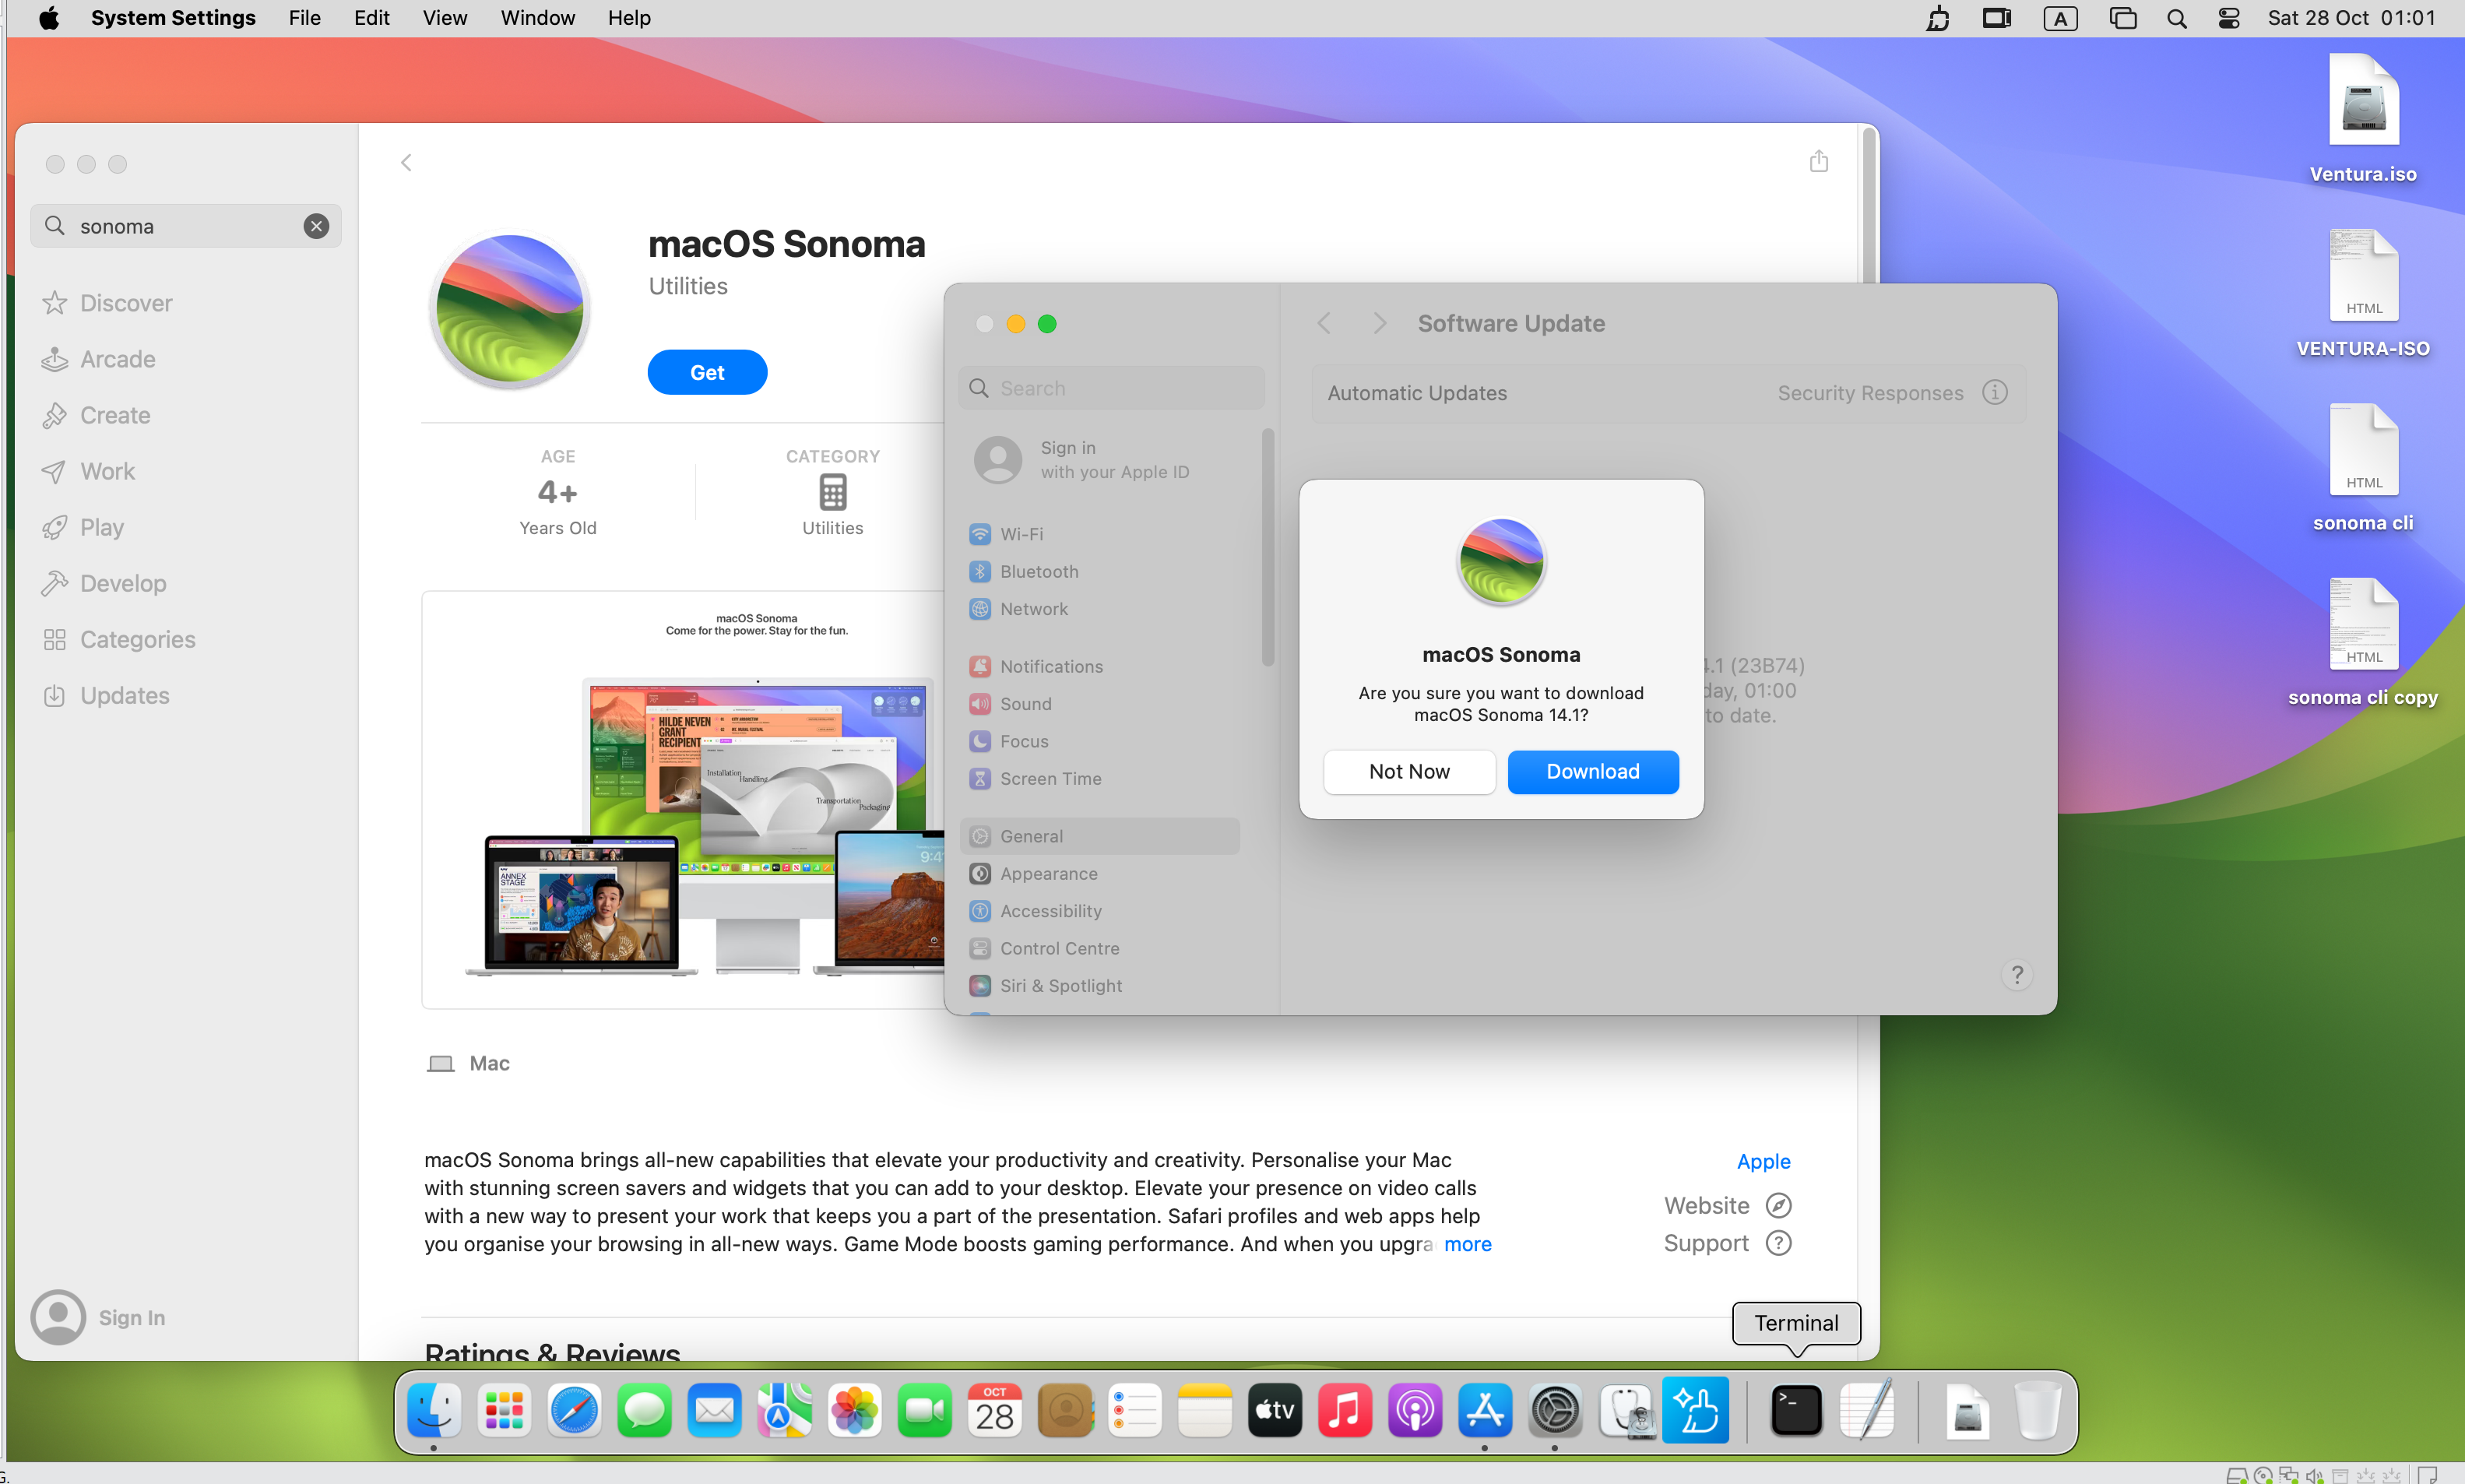
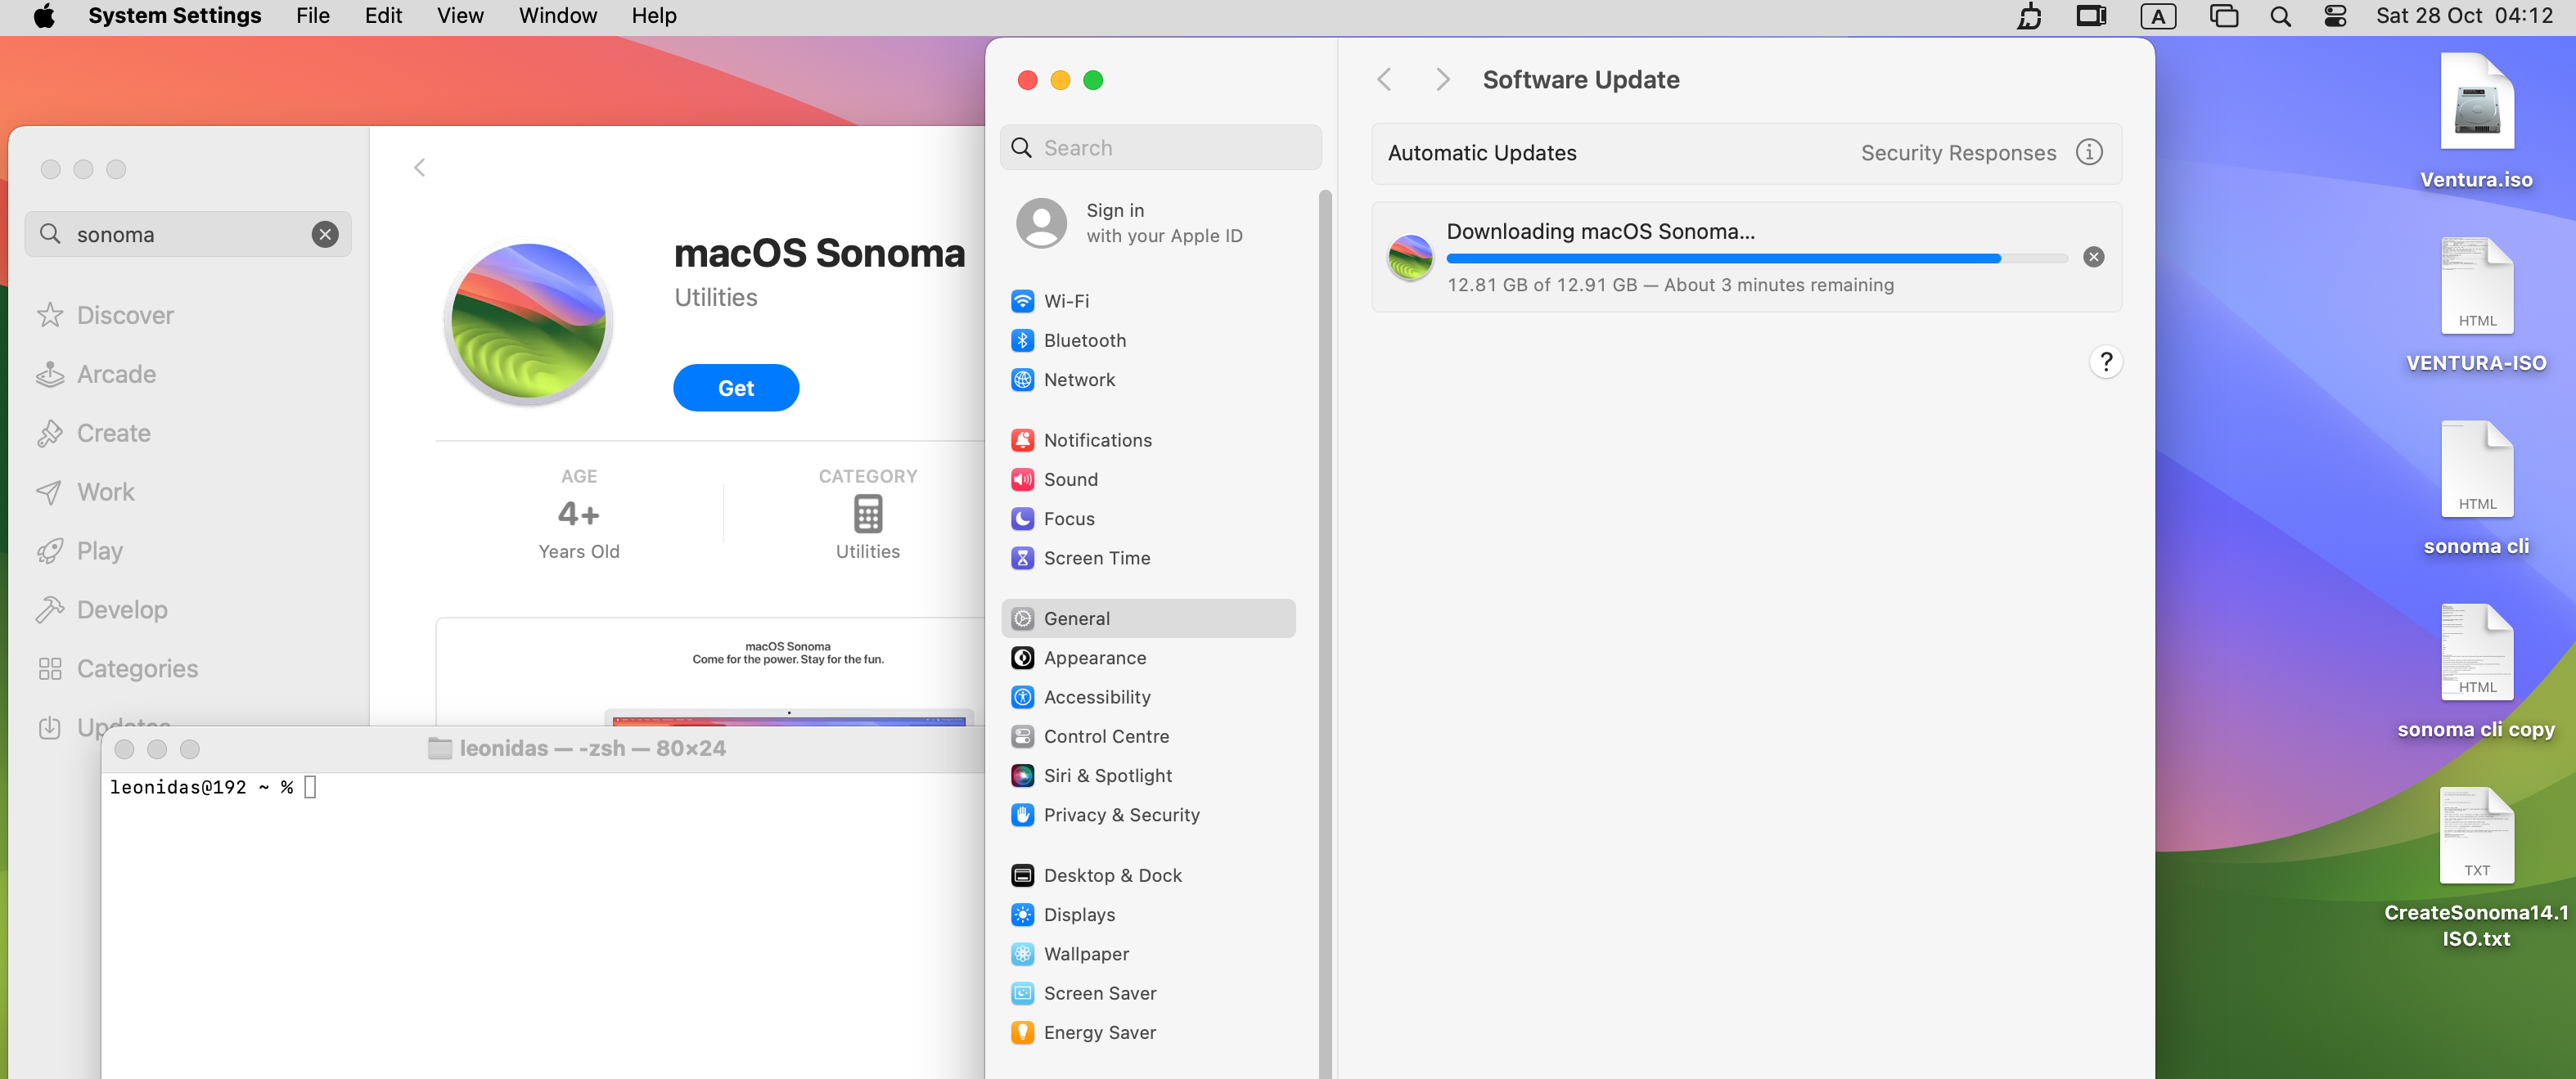
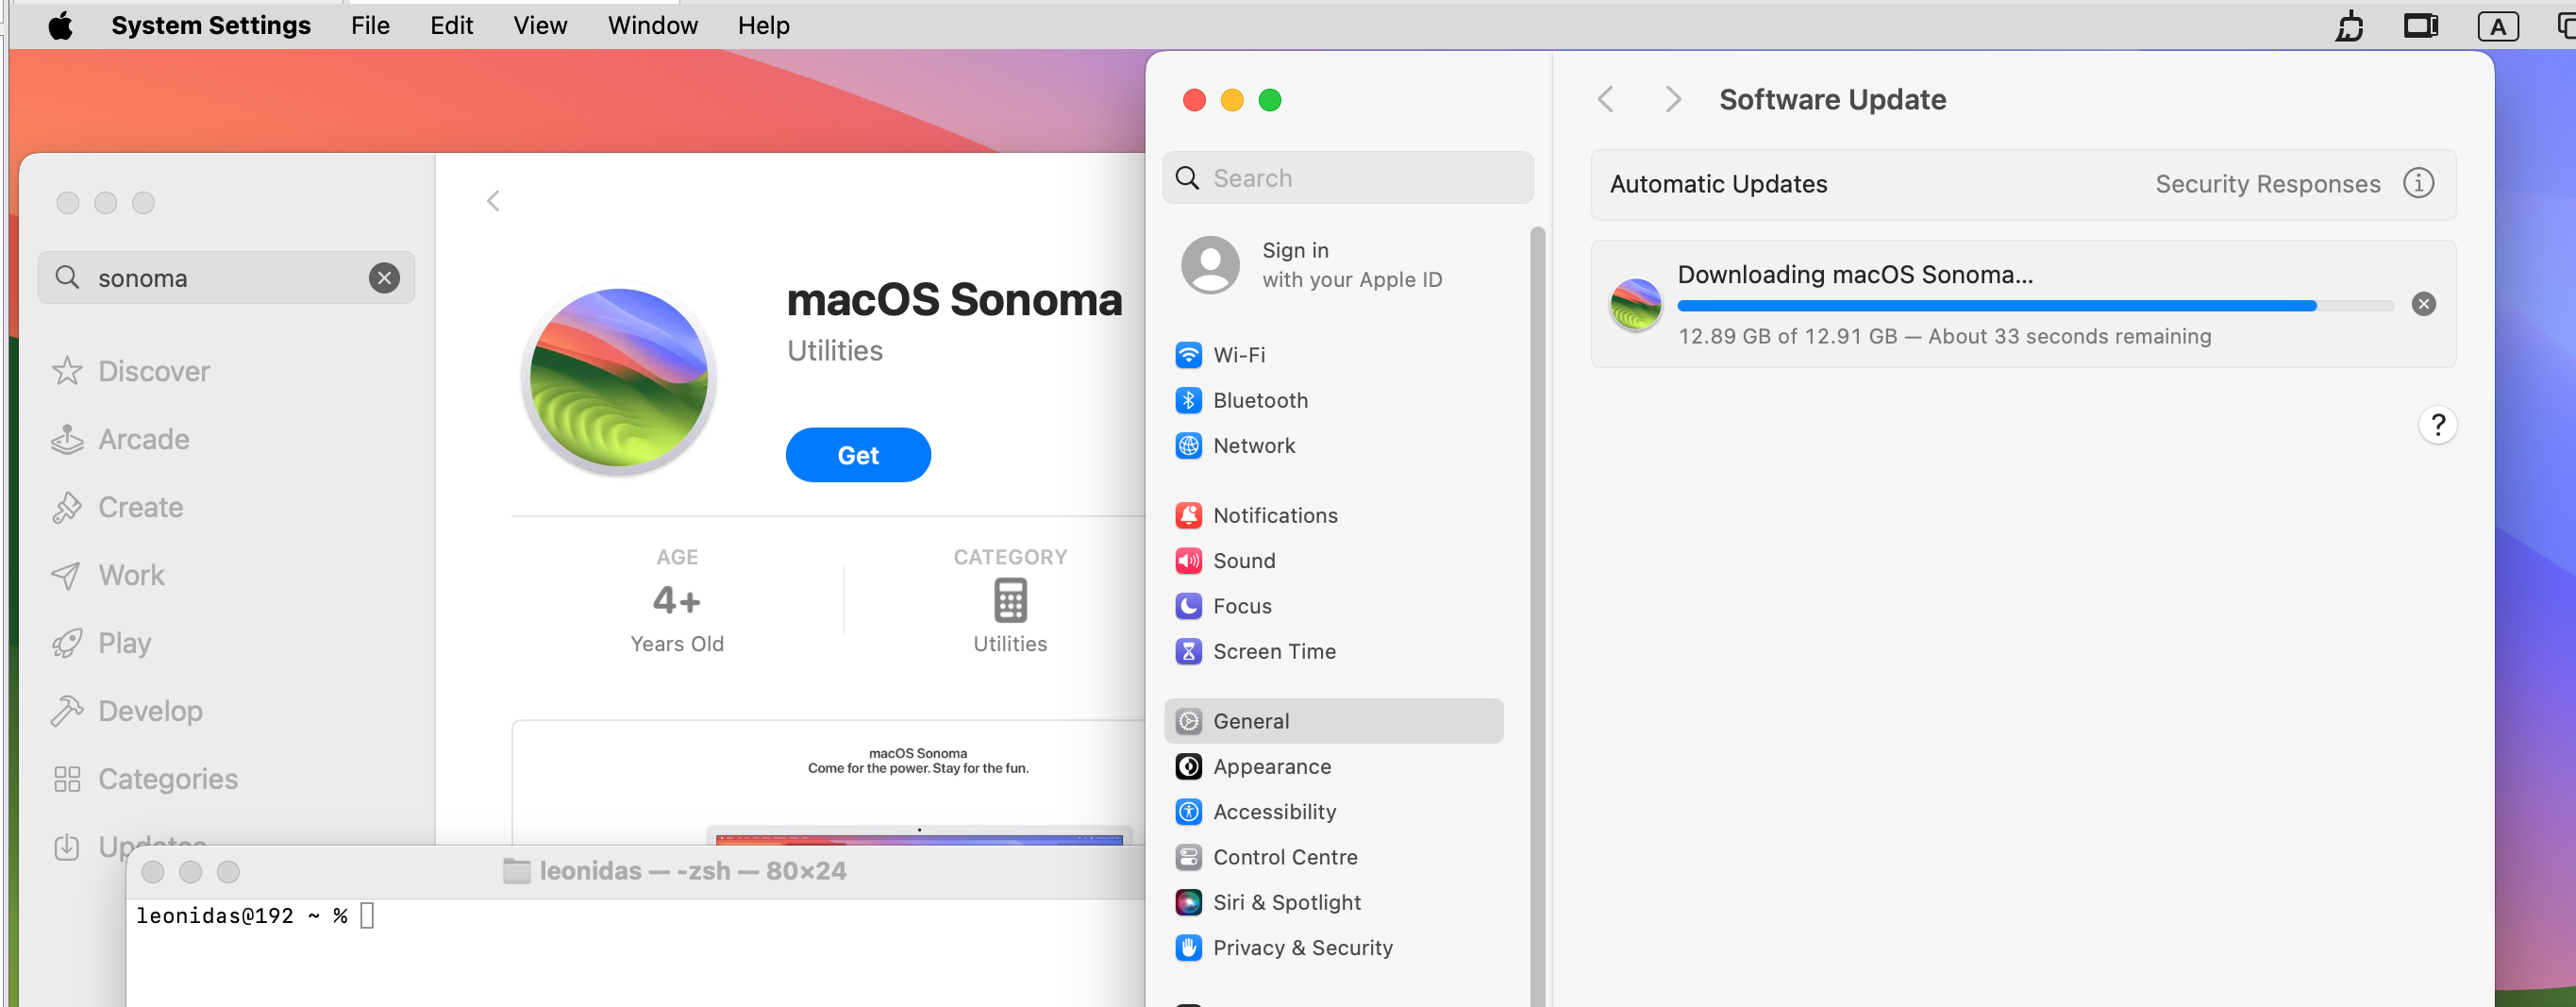
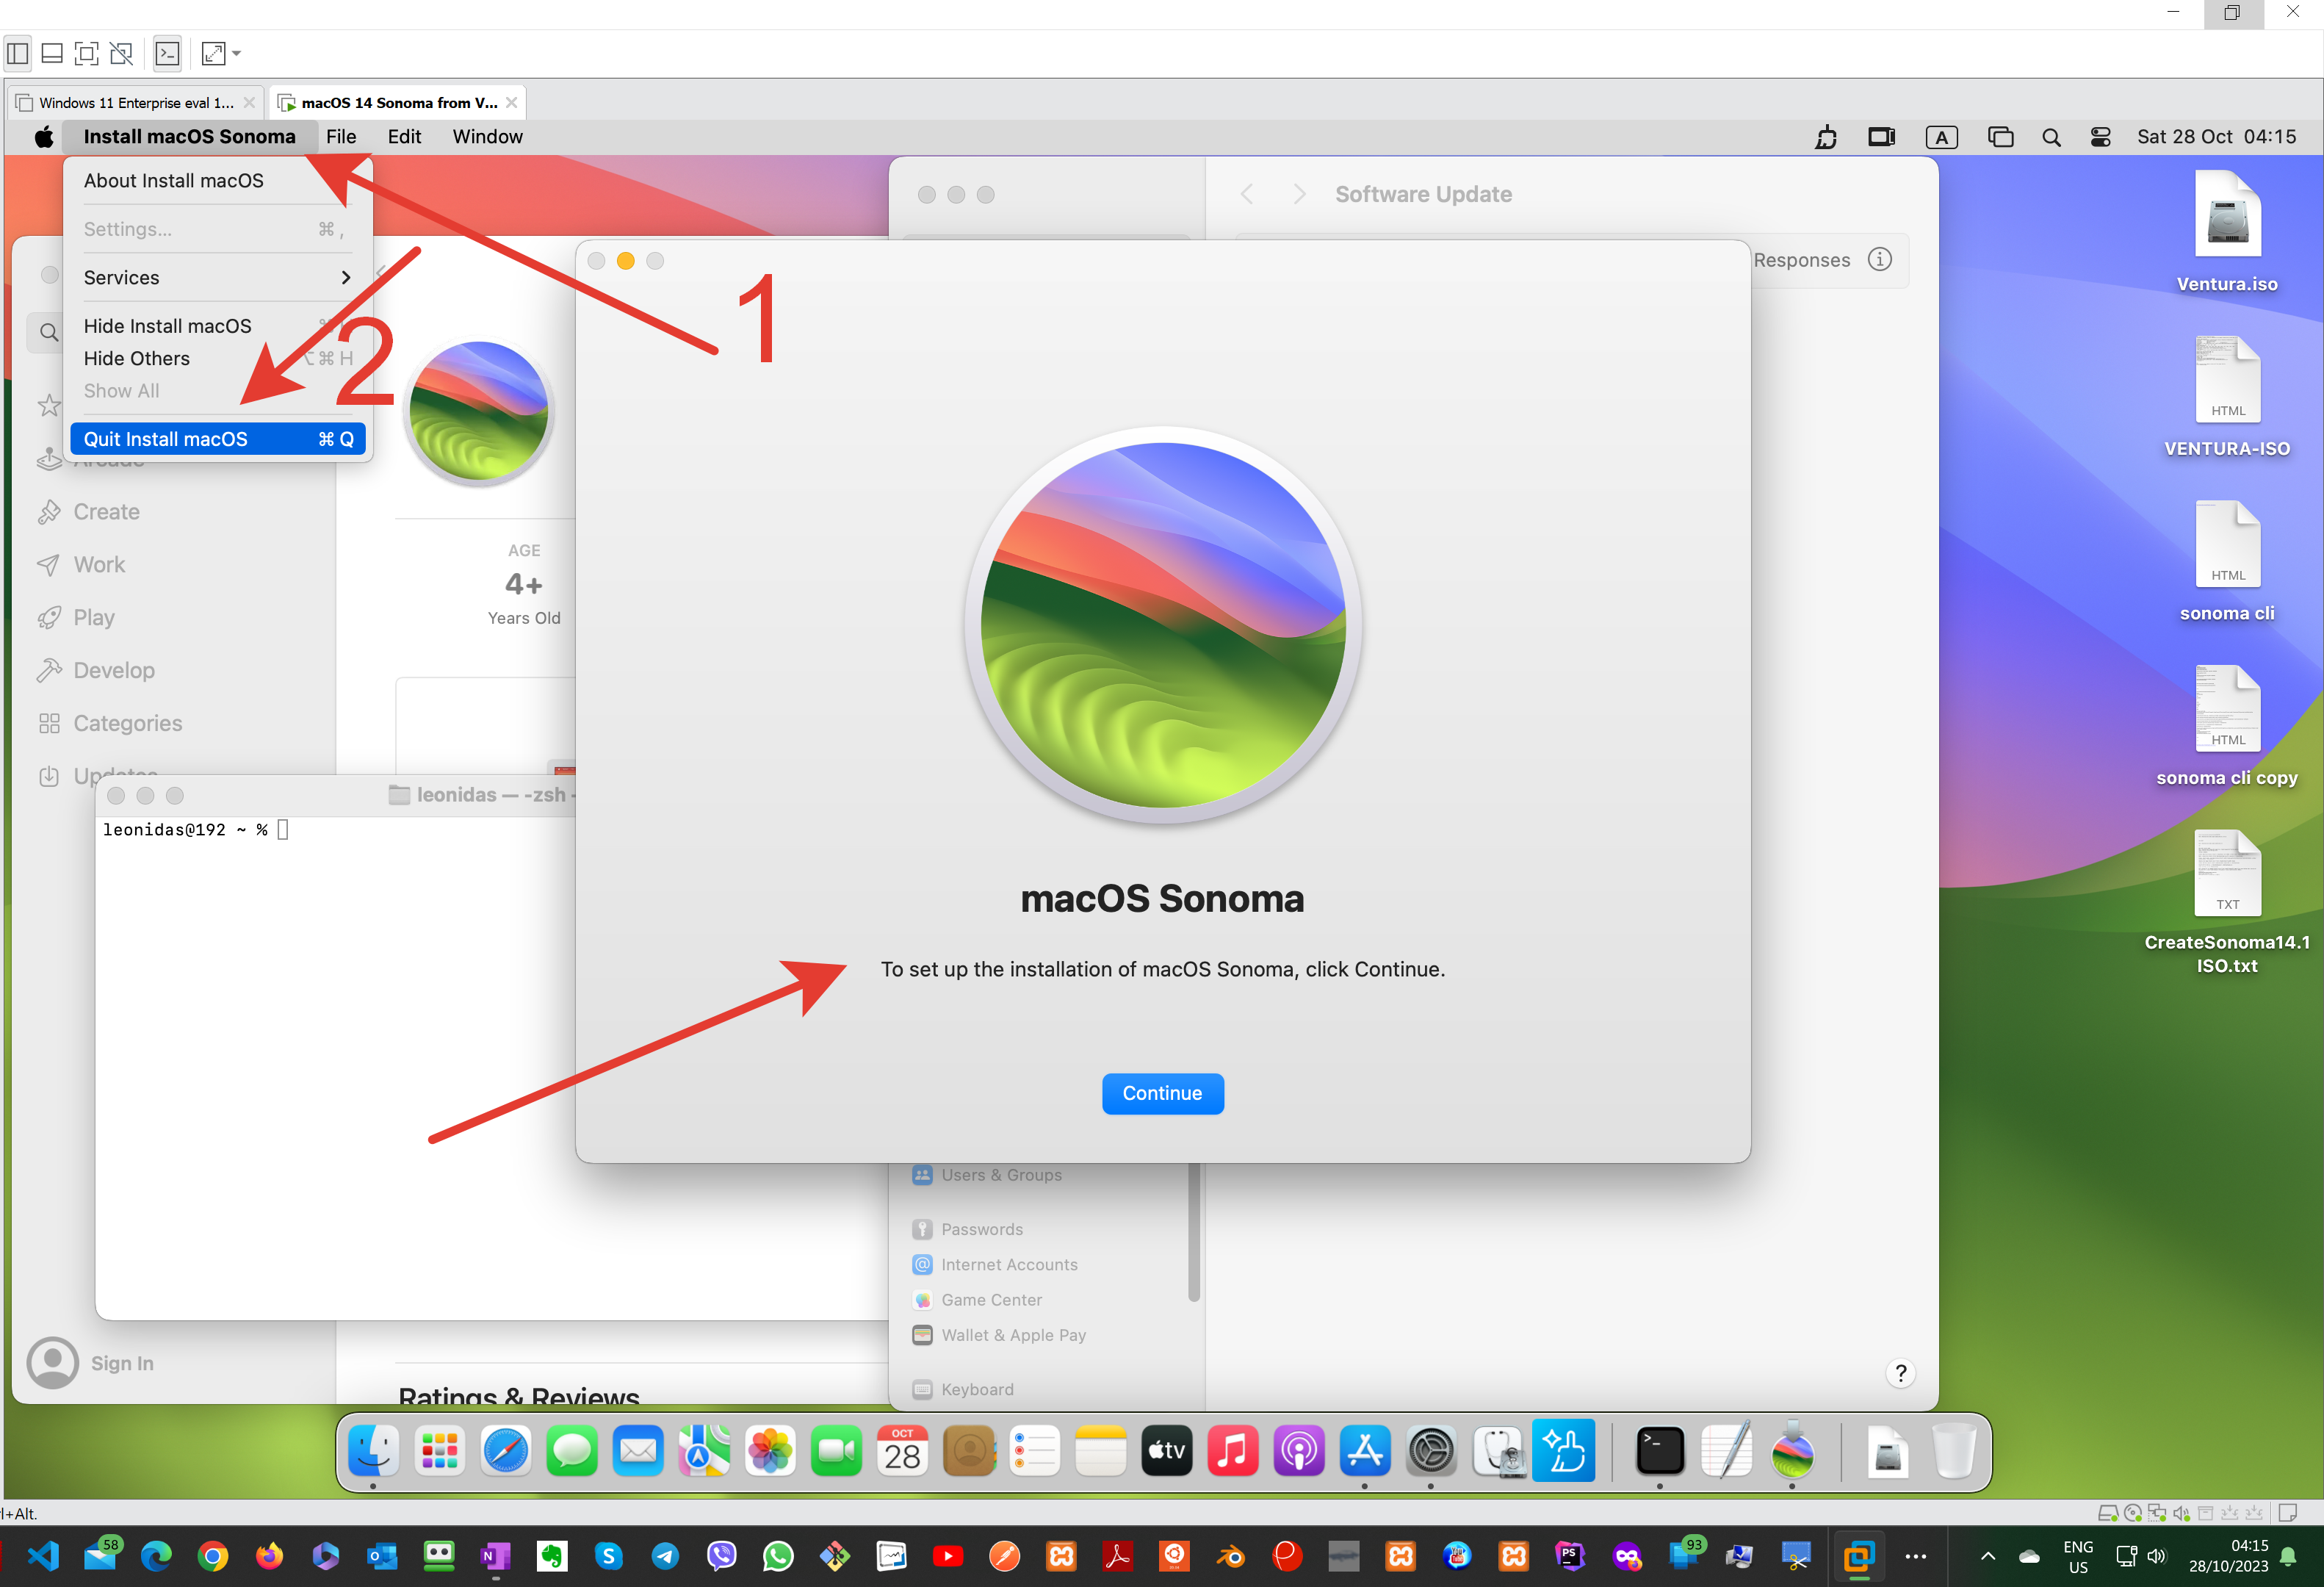
STEP-1: Download Sonoma Installer from the Apple Mac App Store

STEP-2: Choose Quit Install MacOS

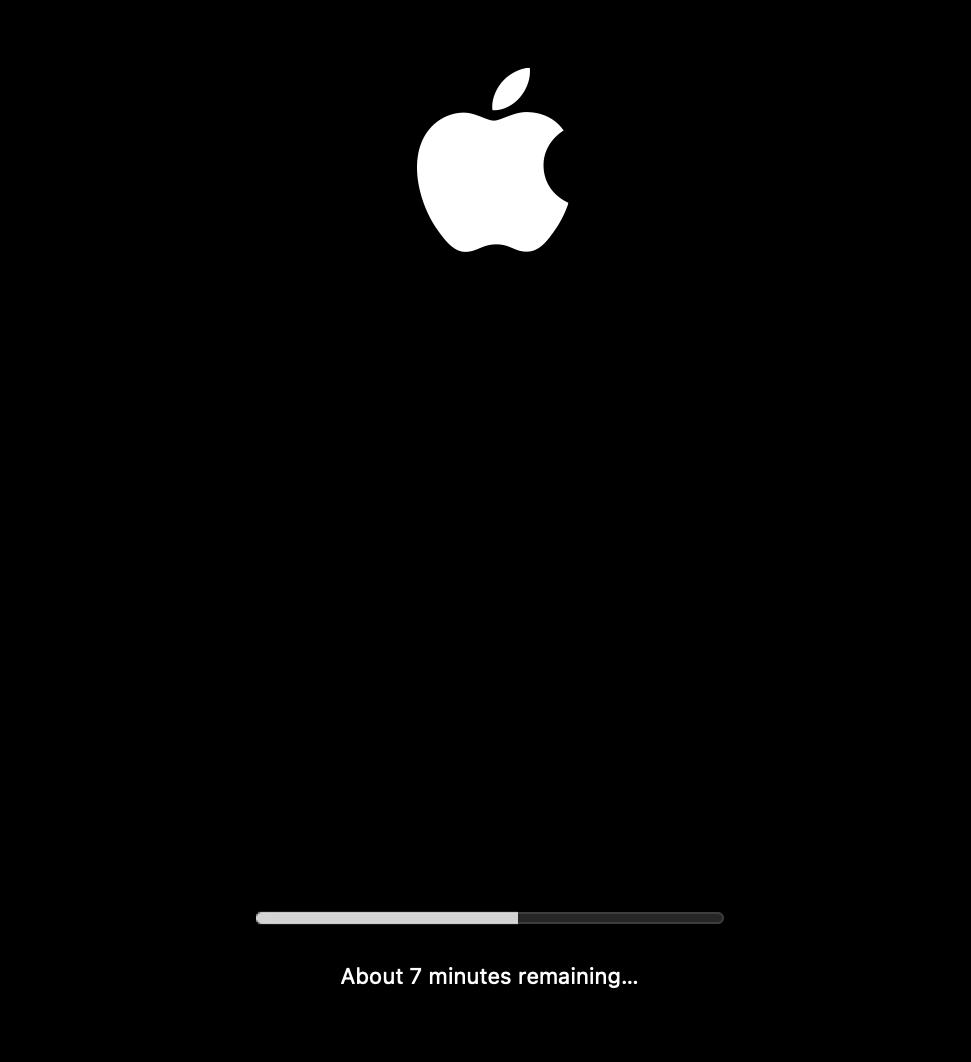
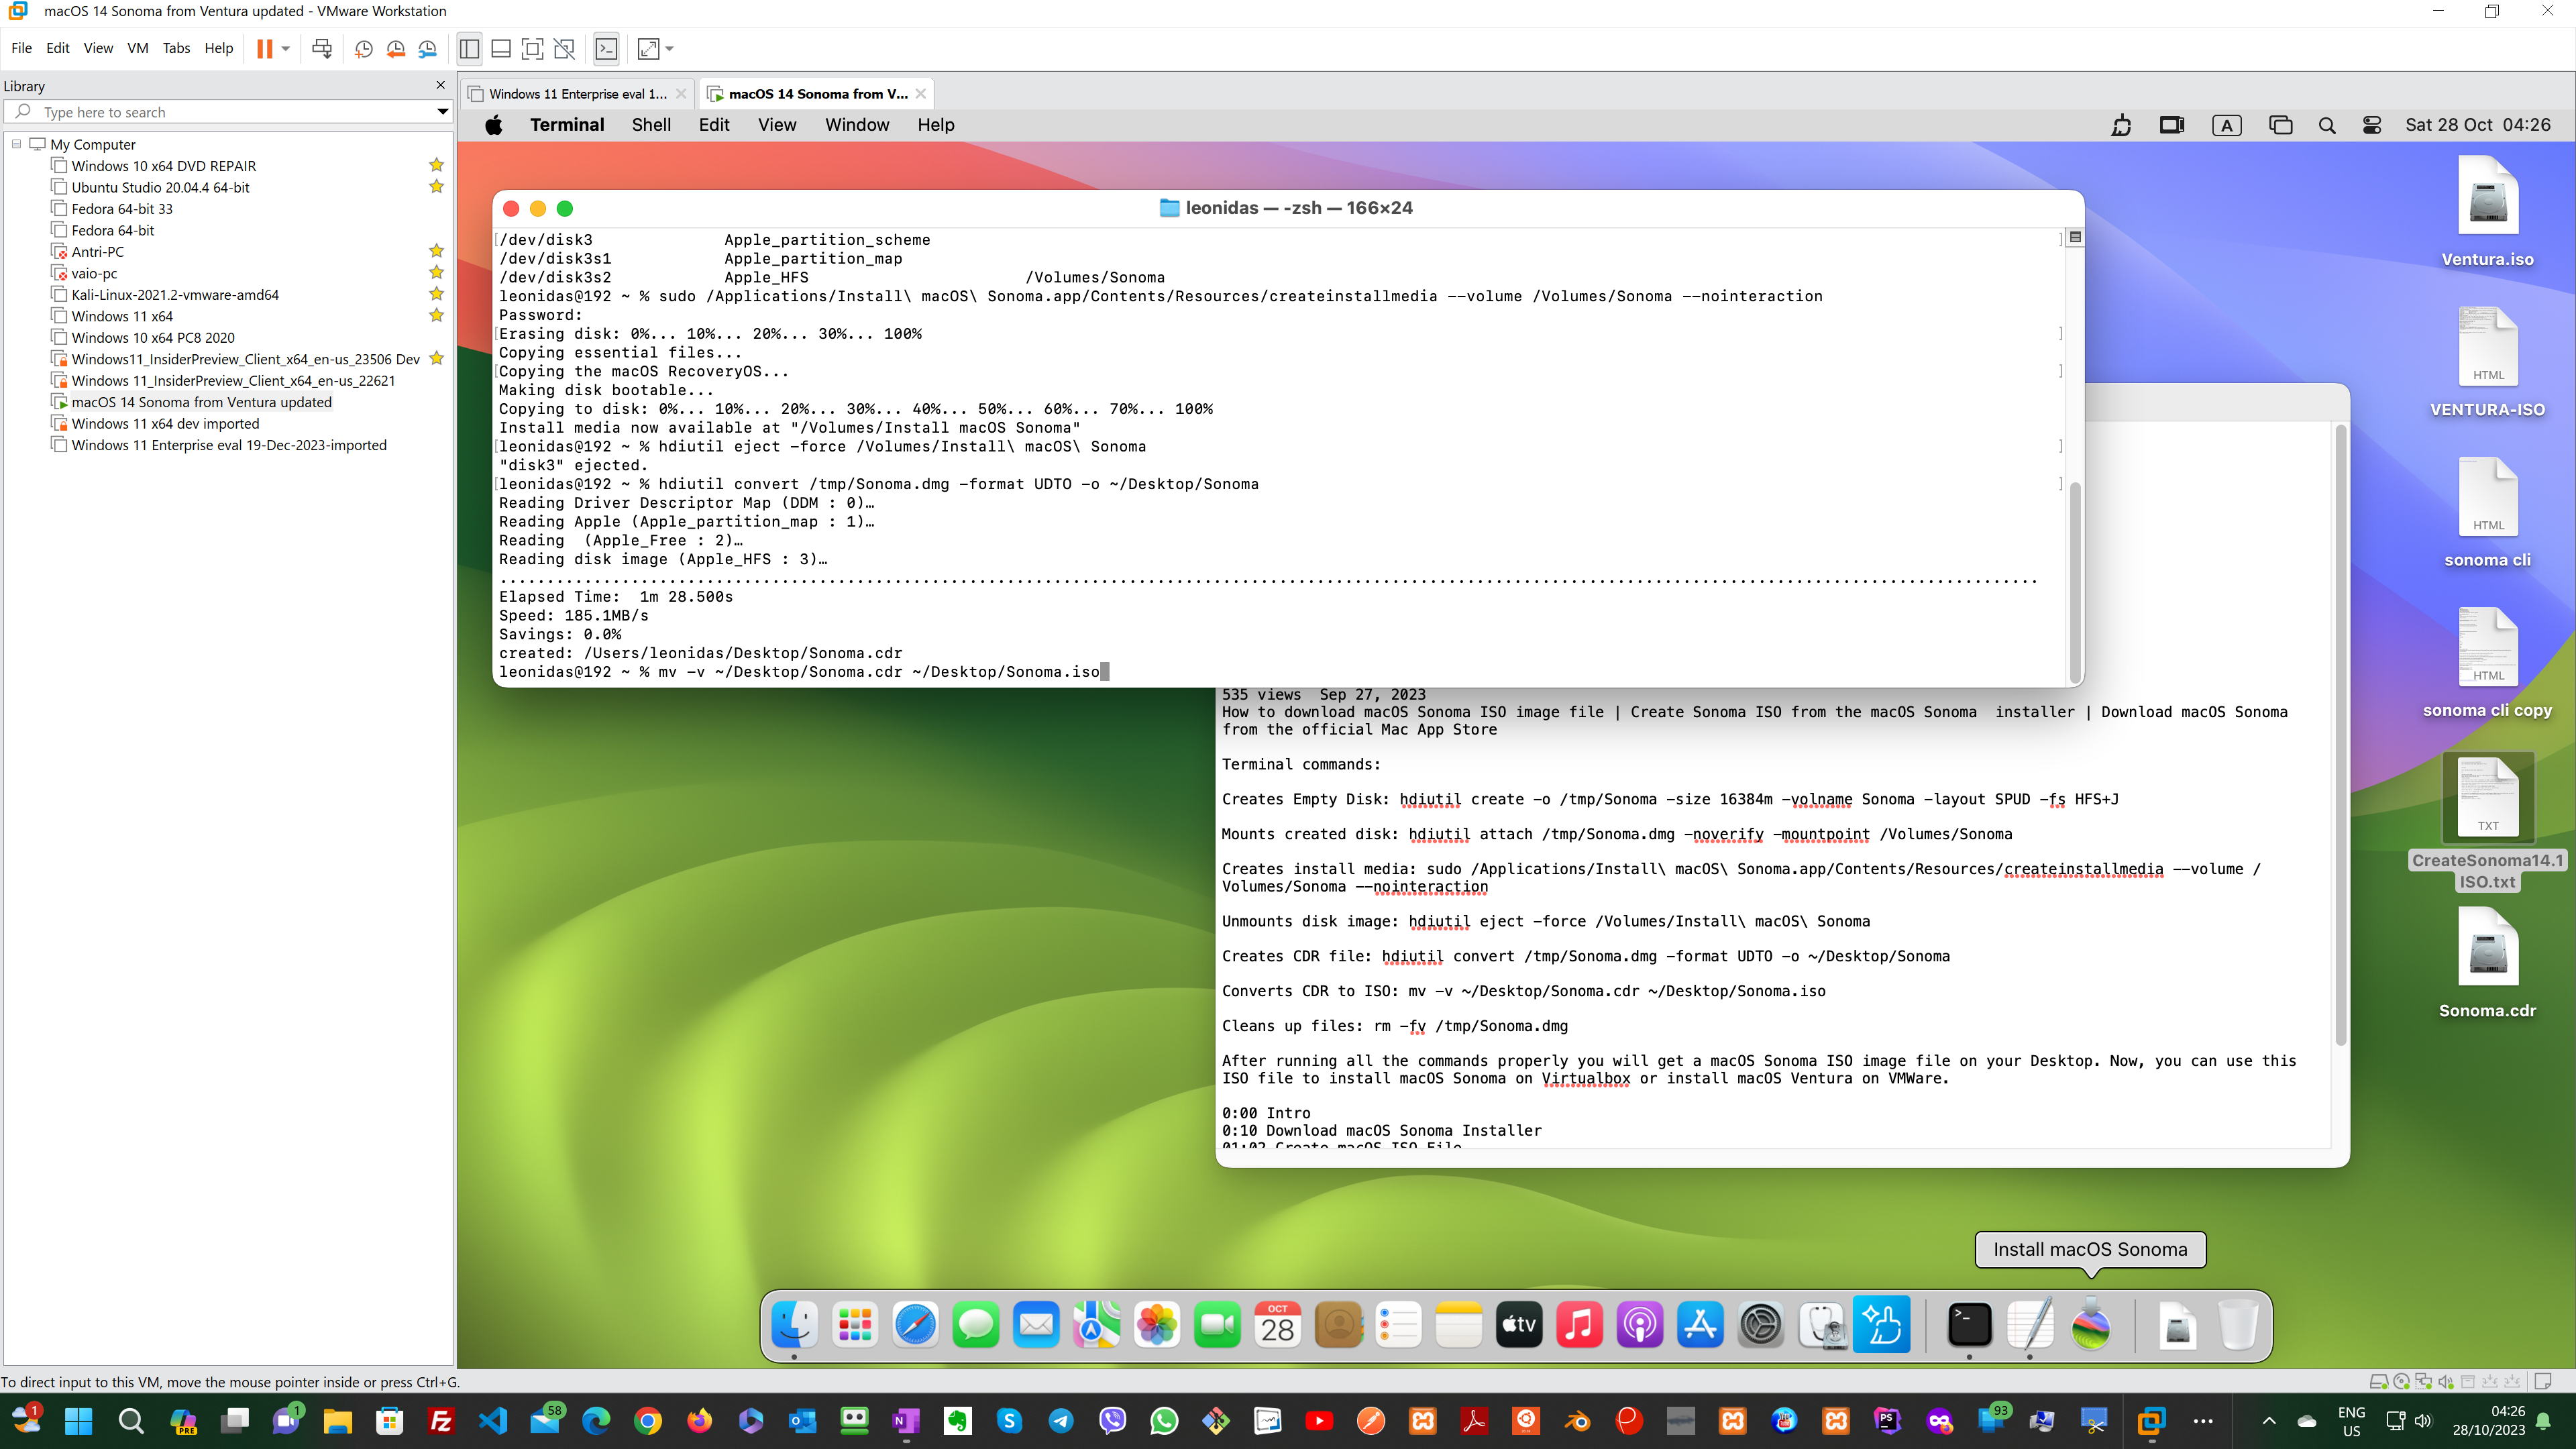
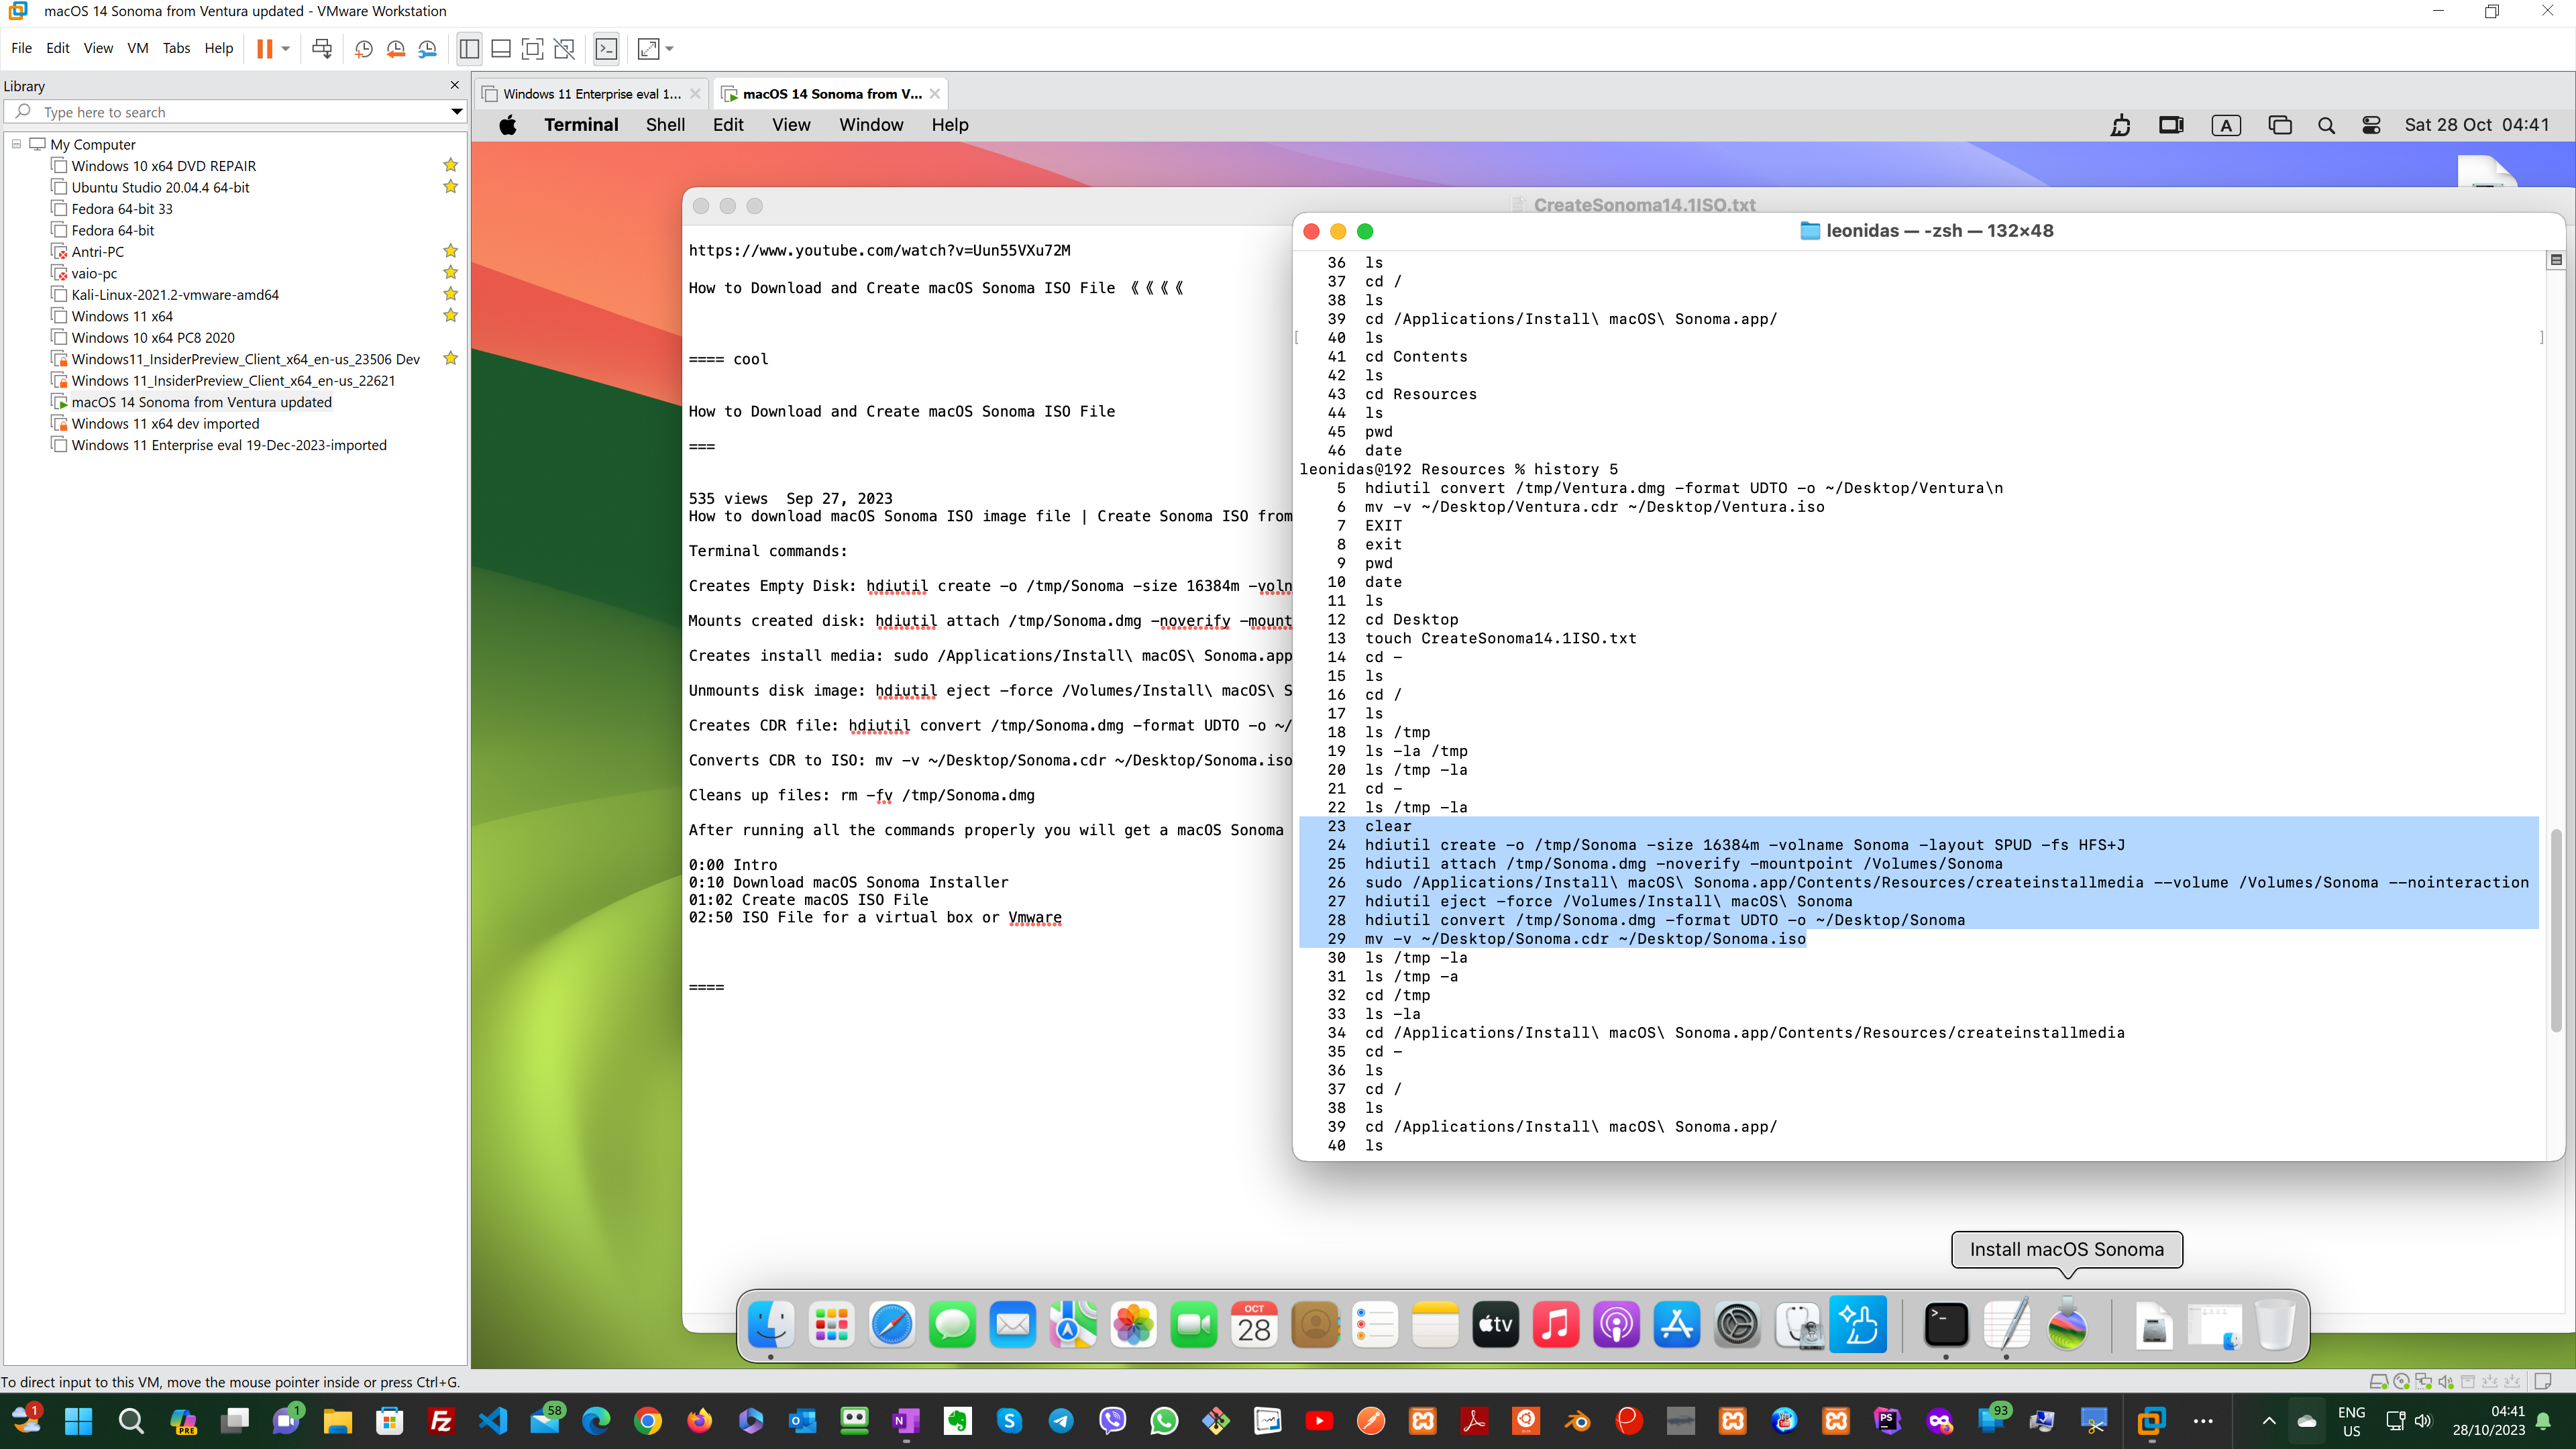
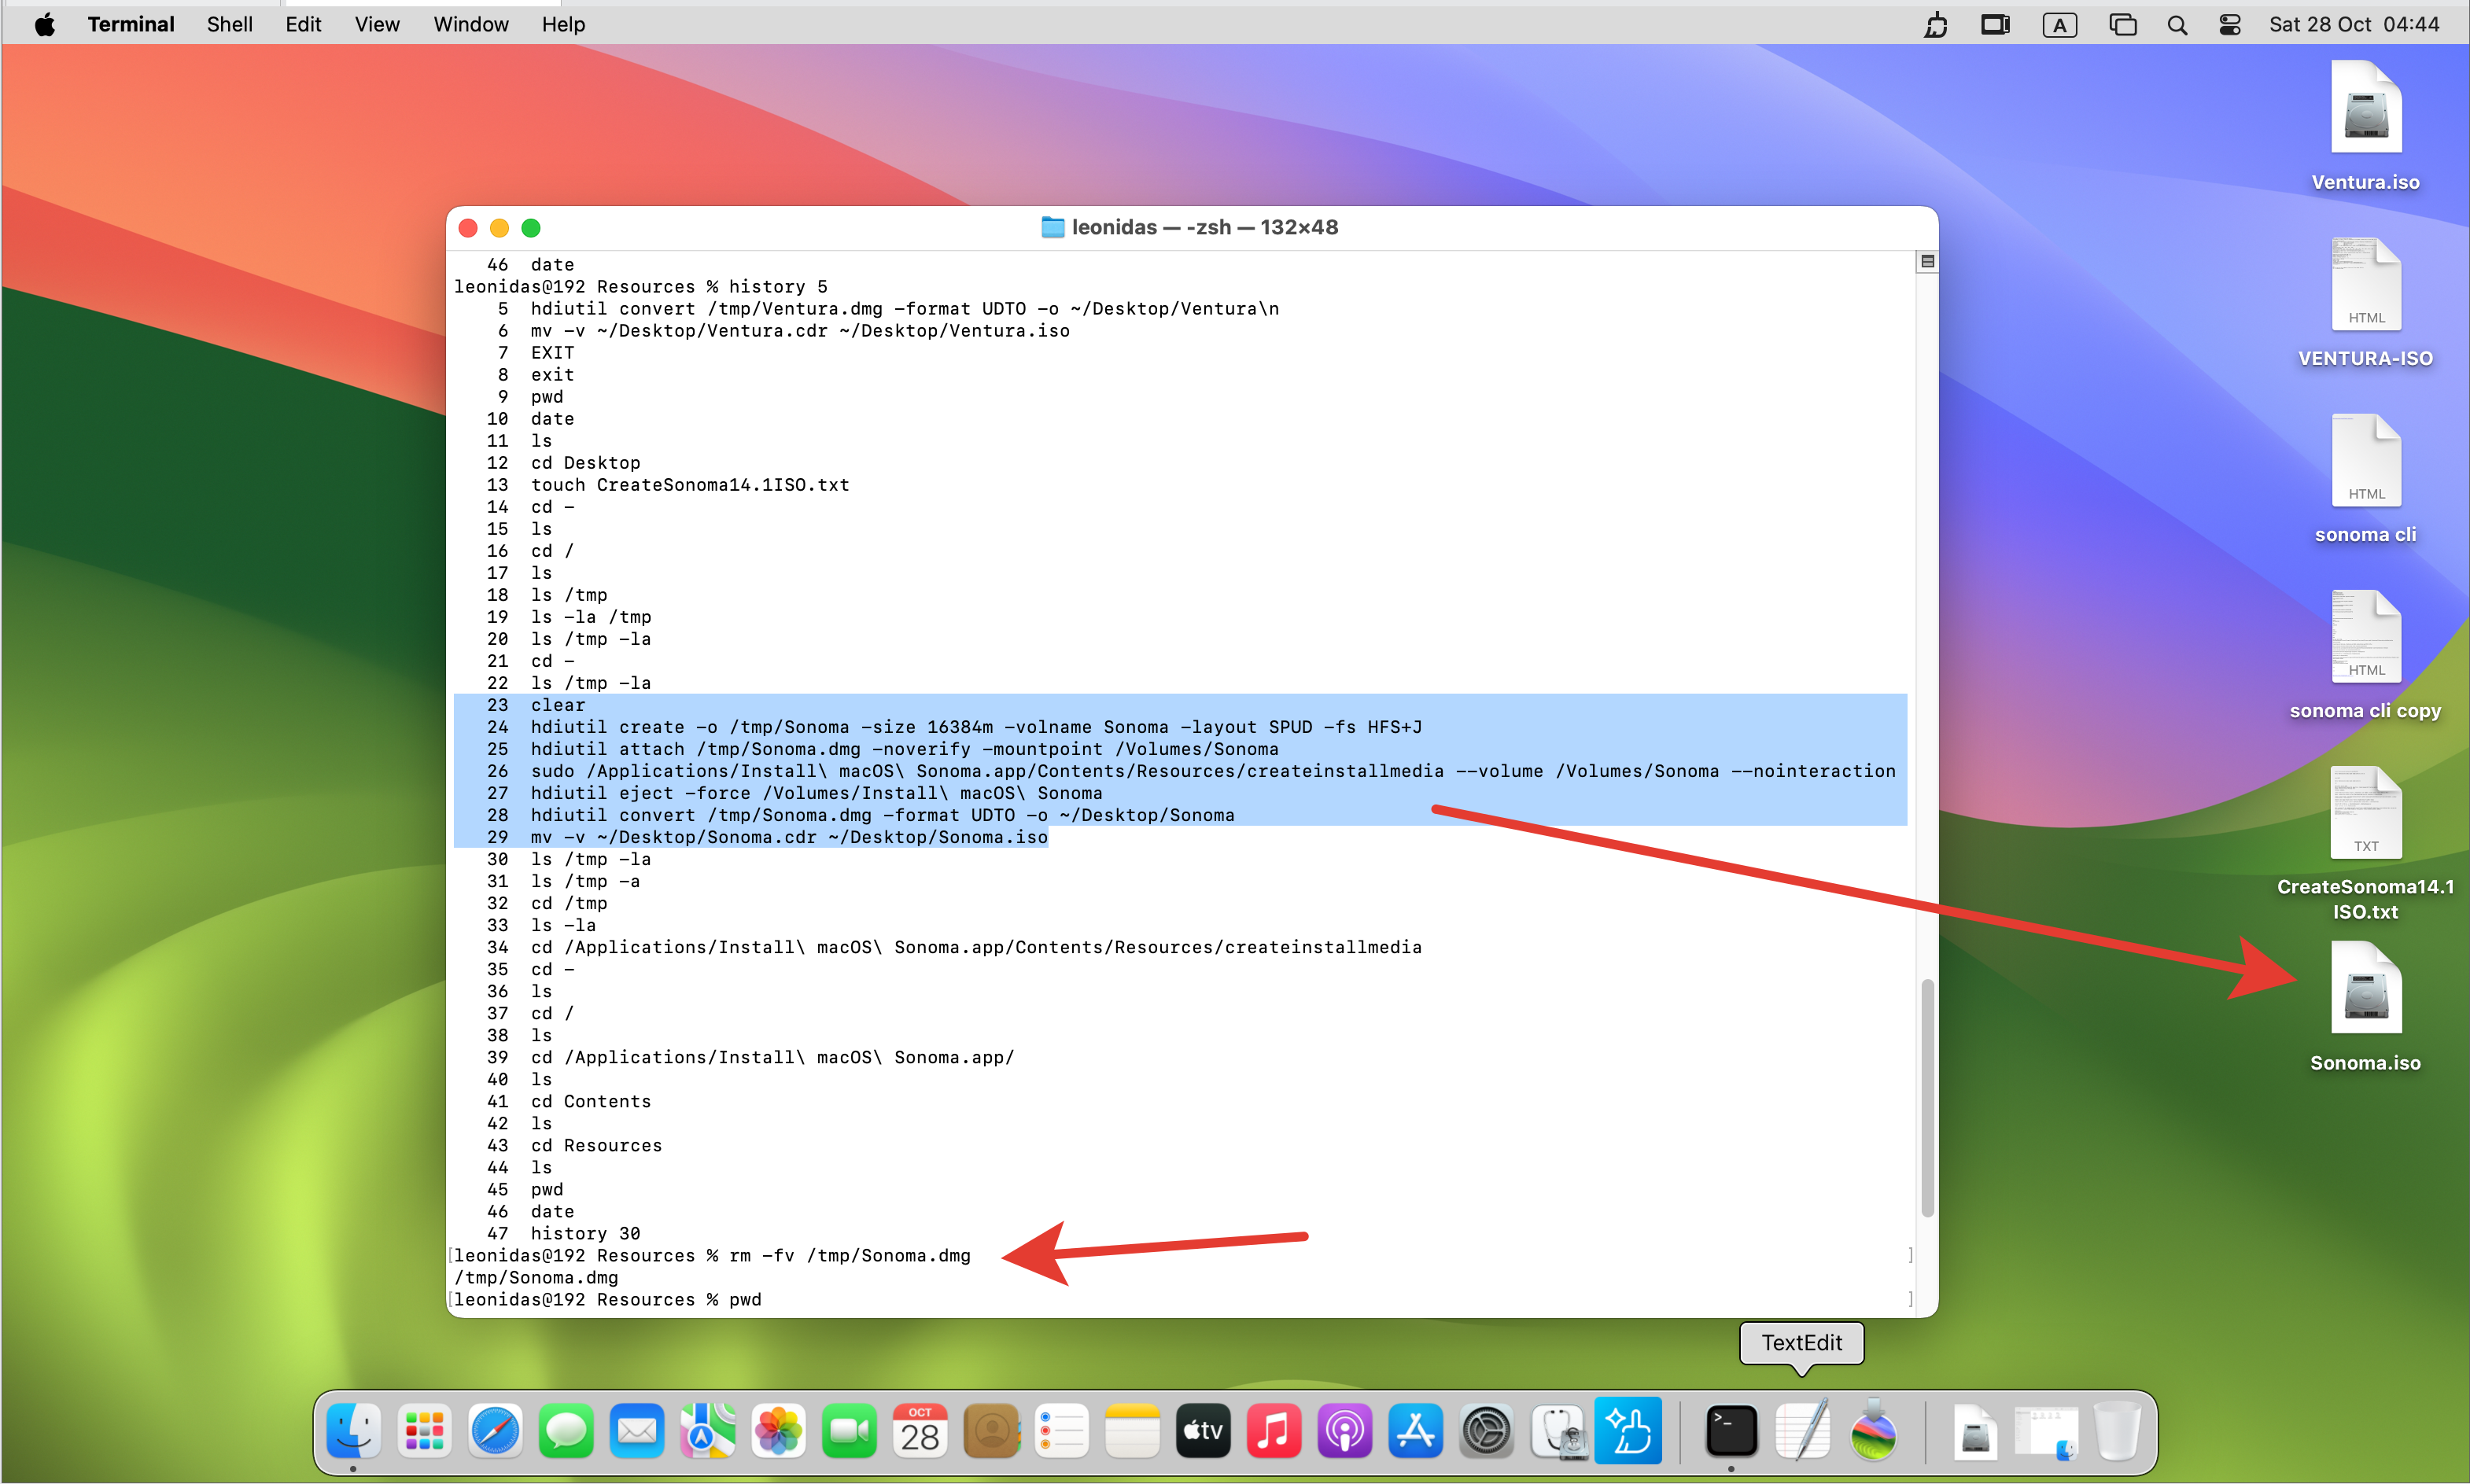
STEP-3: After this the last session is to give some commands from the CLI/Terminal – [see the end of this blog post for the commands]:

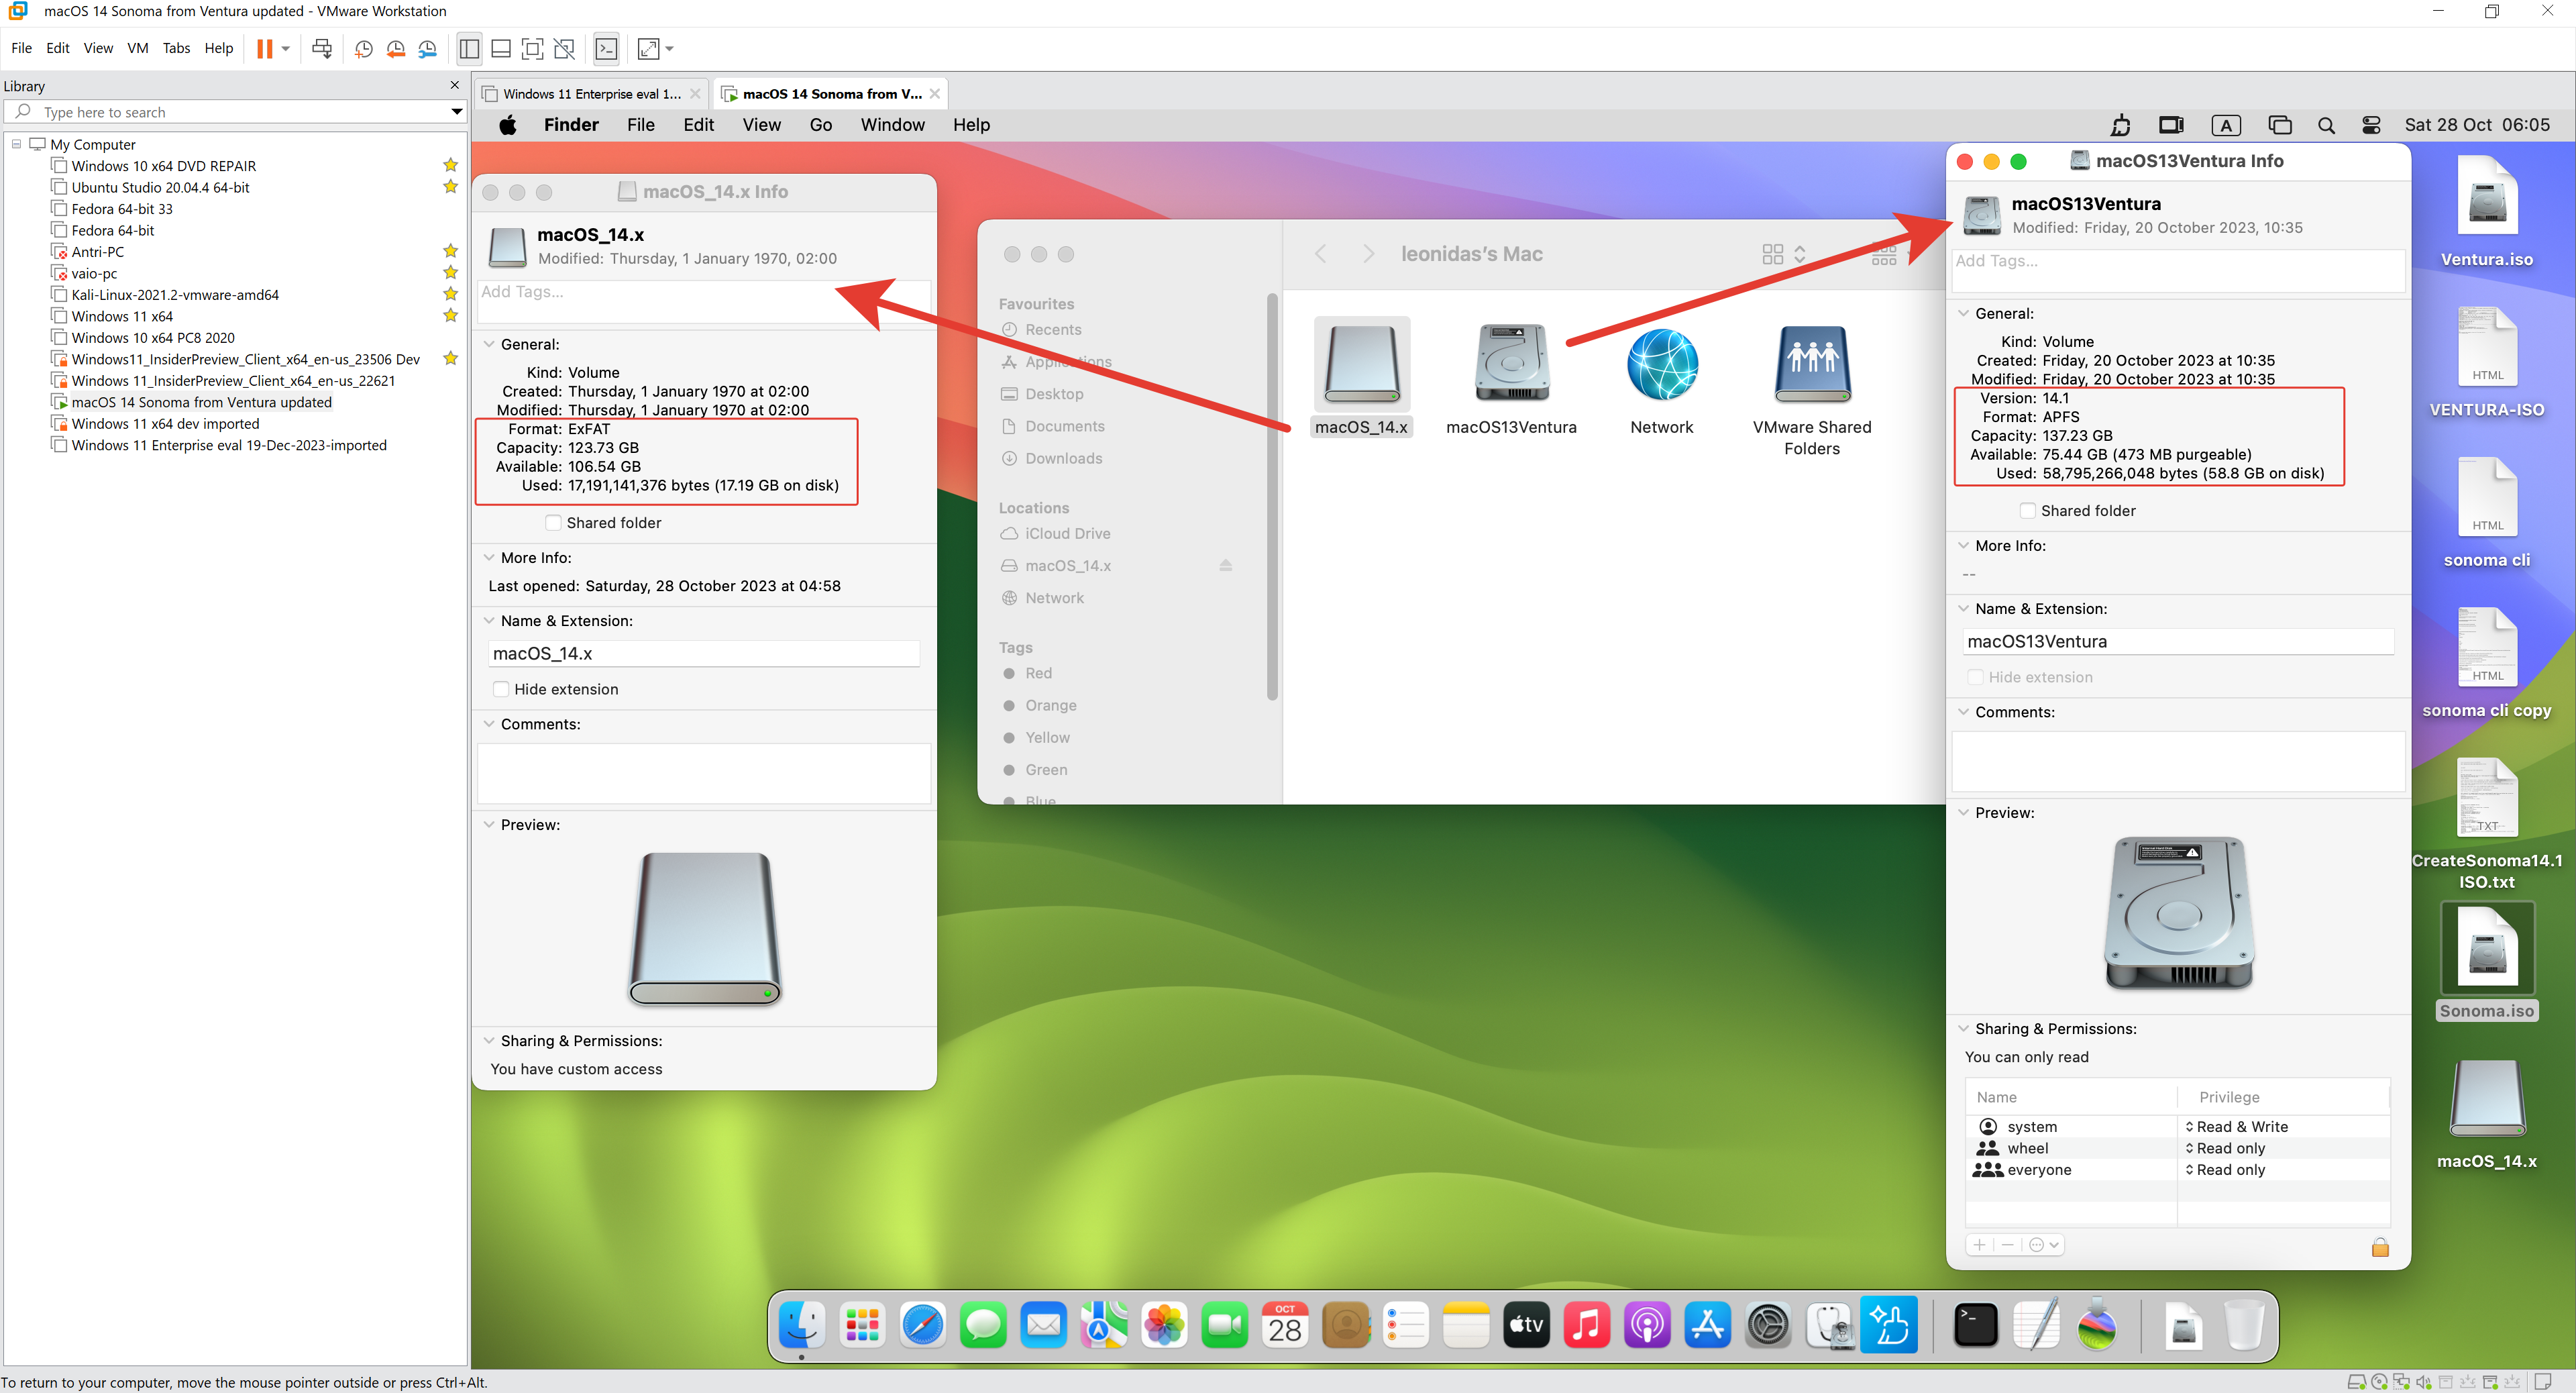
STEP-4: COPY outside the VM

The Sonoma.iso should be in your Desktop of the VM MacOs Sonoma.

You can copy the ISO file to an external USB Stick Storage device:

Sonoma 14.1.iso vs Ventura 13.x.iso:

Code Download for Section 3:

Terminal Commands to Download and Execute here (file.txt file).

If you want the ISO file ready to download – Please send an email to lse.limassol@gmail.com and I will send you the download link….

===

Problems with nested Virtualization in VMware VMs & the Solution worked for me

Host OS: Windows 11 Pro

Guest OS: Windows 11 Pro DEVELOPMENT VM BY MICROSOFT

Guest OS: downloaded from here free Dev Version valid ~3 mo: VMware version:

https://developer.microsoft.com/en-us/windows/downloads/virtual-machines/

After having downloaded unzipped and imported to VMware Workstation Pro 17.0.2.

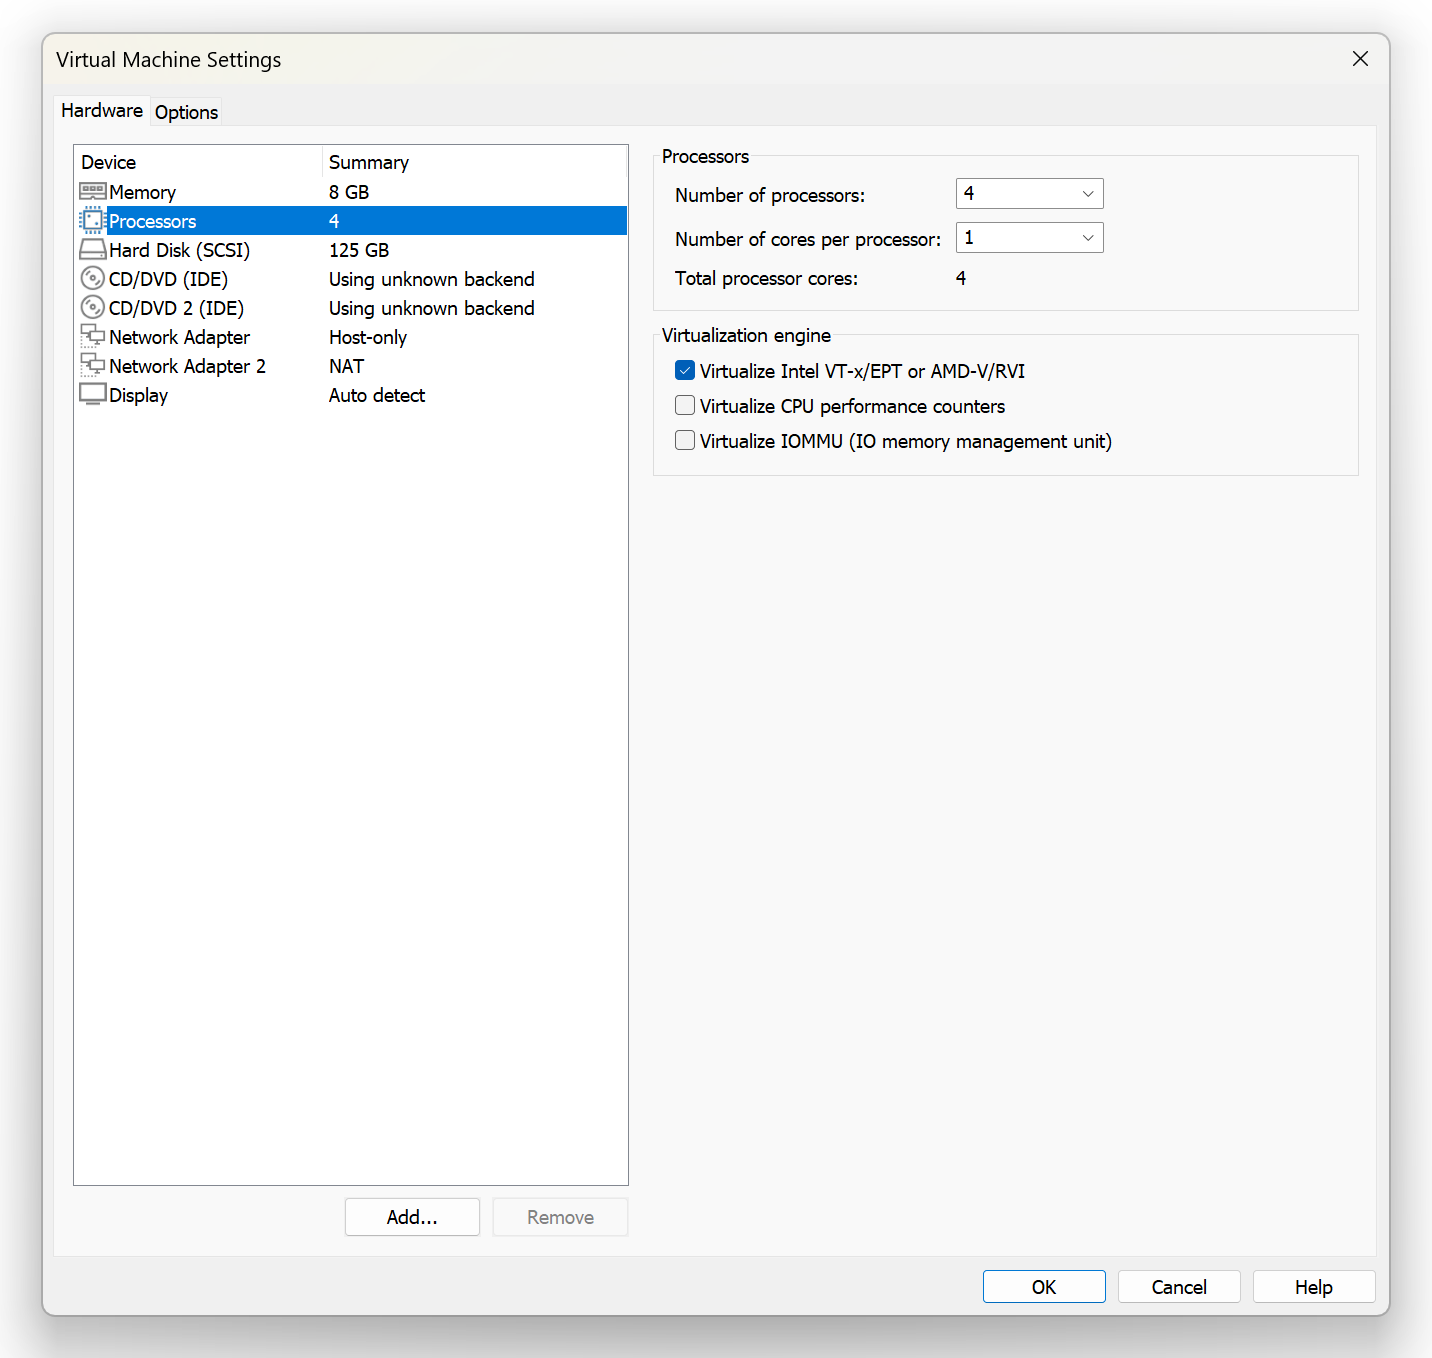
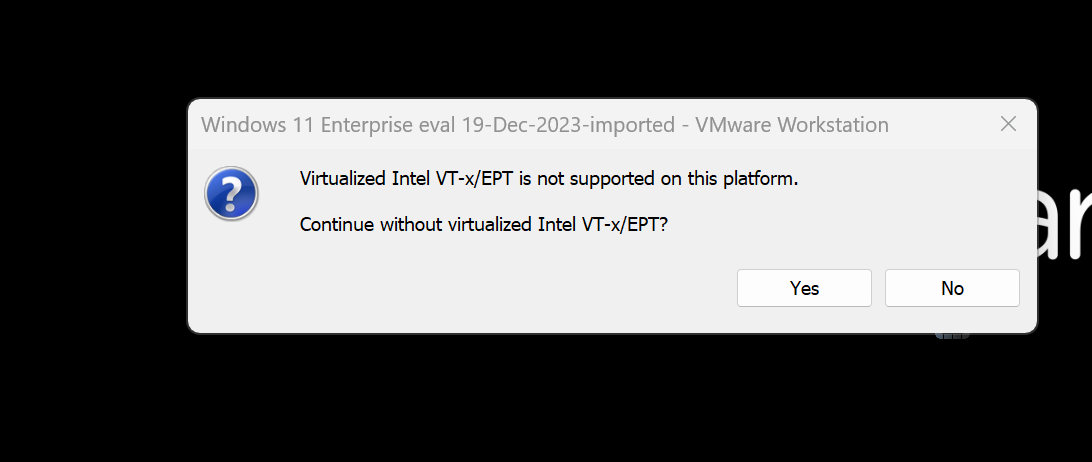
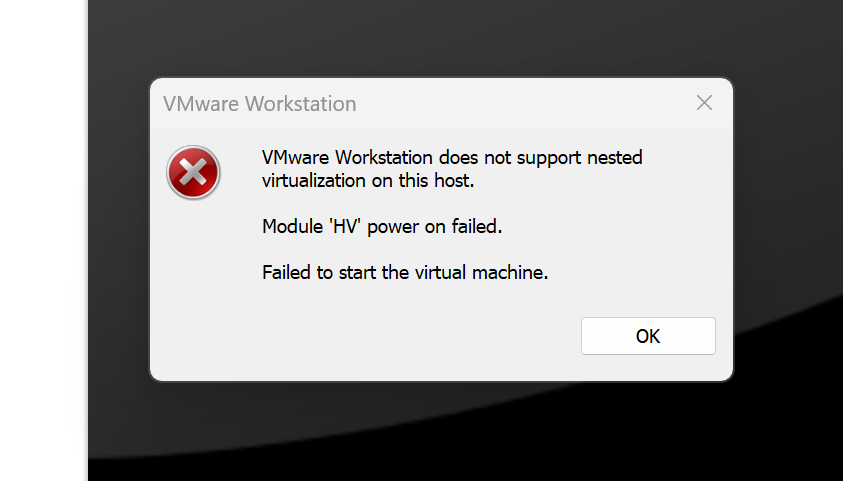
Nested Virtualization problems followed by solution:

SOLUTIONS TO TRY OUT

SOLUTION STEP-1

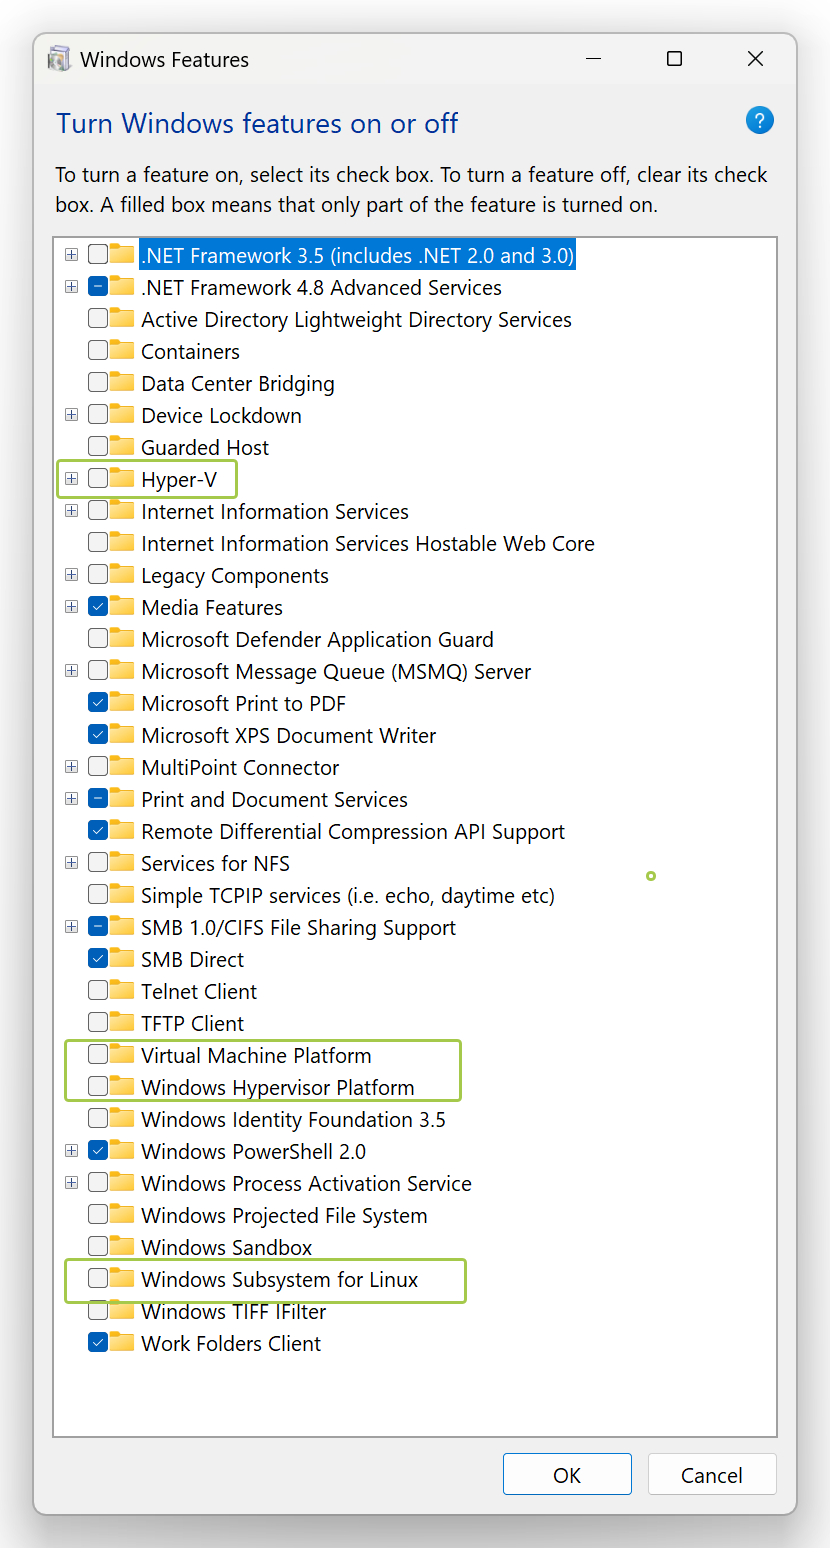
Go to HOST OS: Turn Windows Features On or Off ENSURE THESE 4 GREEN CIRCLED ARE UNCHECKED – IF NOT UNCHECK, AND SAVE AND RESTART.

IF Nested Virtualization problems CONTINUE GO TO STEP 2

===

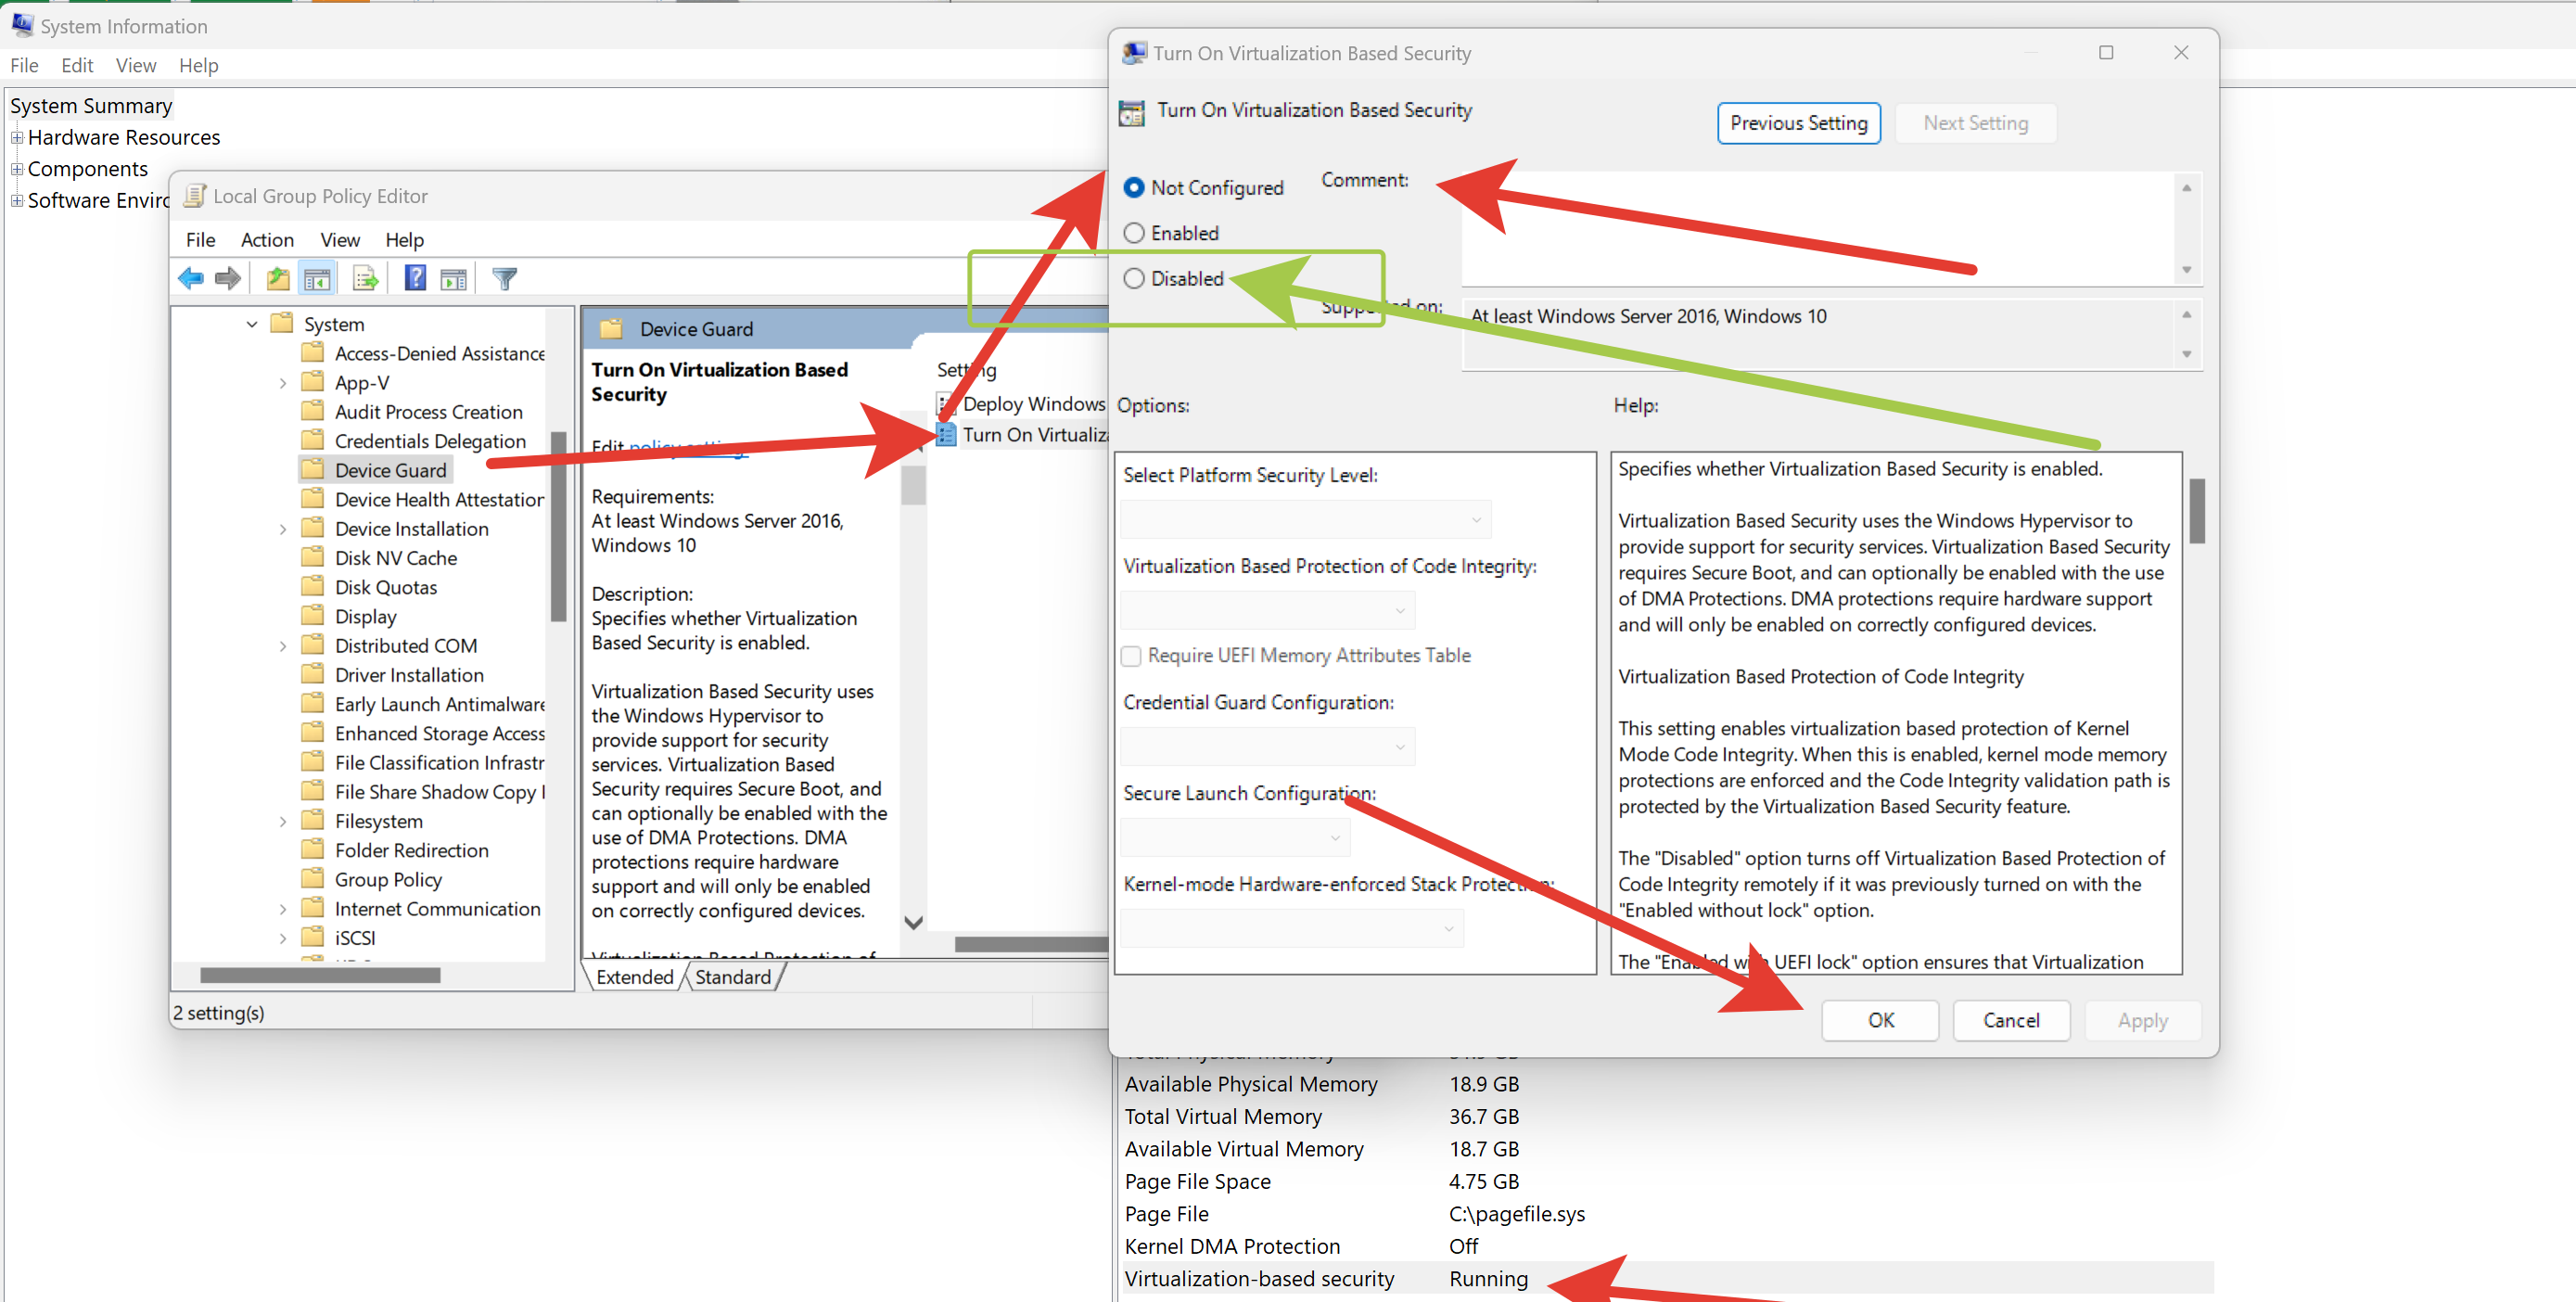
SOLUTION STEP-2 [After Step-1 still not working]

The process to turn off virtualization-based Security:


Below are steps that can be followed to turn off virtualization-based Security for Windows 10 Home & Pro:
For Microsoft Windows 10 Pro & above:

Go To: Edit group policy ( gpedit.msc )
Go to Local Computer Policy > Computer Configuration > Administrative Templates > System
Double-click on Device Guard on the right-hand side to open.
Double Click on “Turn On Virtualization Security” to open a new window
It would be “Not Configured”, Select “Disable” and click “OK”
Close the Group Policy Editor.
Restart the system
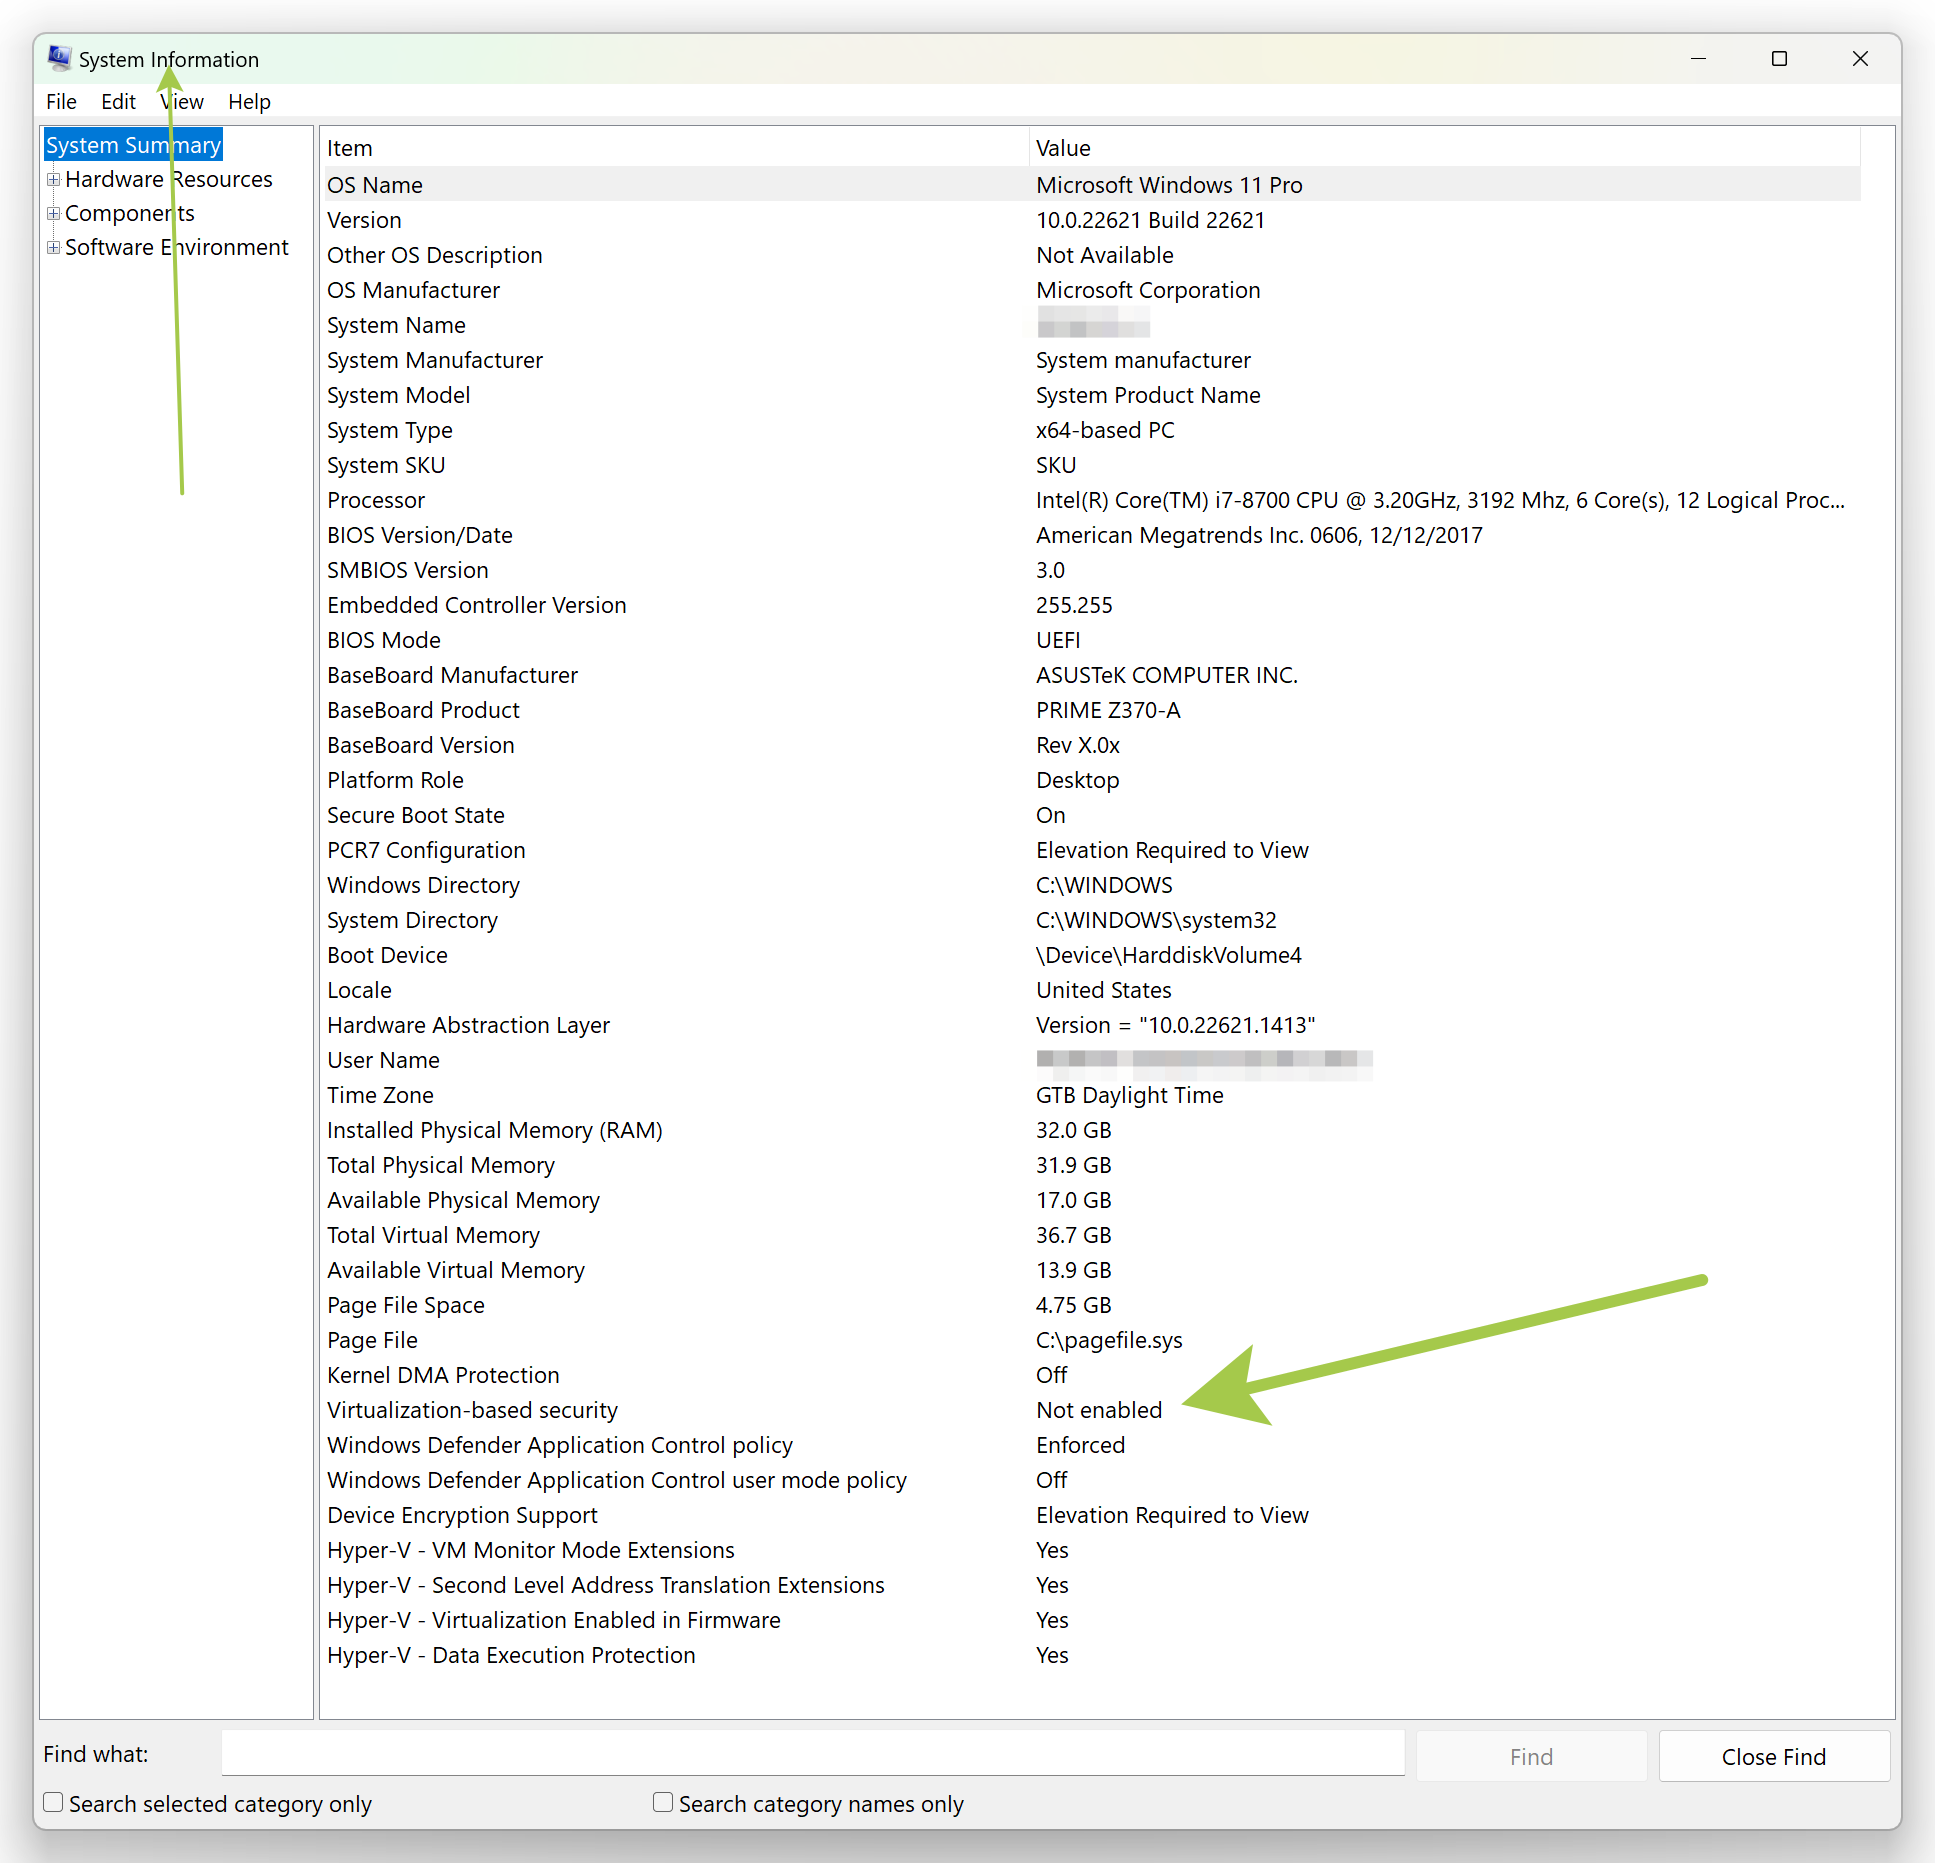
TO BECOME:

If you still having problems put in the article comments and I will reply soon!

Setup Laravel 10.x Homestead in Windows 10/11

Section – 1 [Install Software]

https://laravel.com/docs/10.x/homestead#installation-and-setup

vagrant_2.3.7_windows_amd64.msi – https://developer.hashicorp.com/vagrant/downloads

VirtualBox-6.1.46-158378-Win.exe – https://www.virtualbox.org/wiki/Download_Old_Builds_6_1

VirtualBox 6.1.46 (released July 18 2023) << This and Not the >> VirtualBox 7.0.10 platform packages – ​Windows hosts

According to: https://laravel.com/docs/10.x/homestead#installation-and-setup

Code Editor/IDE: PhpStorm-2023.1.4.exe or VSCodeSetup-x64-1.80.1.exe

Lastly install: Git-2.41.0.3-64-bit.exe – https://git-scm.com/downloads

Section – 2 [ENABLE VT-x in Hardware/BIOS/UEFI if disabled]

http://leonidassavvides.com/blog/2023/07/23/enable-vt-x-in-hp-z640-workstation/

Section – 3 [Installing Homestead]

https://laravel.com/docs/10.x/homestead#installing-homestead

Go To CLI Terminal in IDE/Editor or Windows Terminal or Git Bash Terminal and execute:

git clone https://github.com/laravel/homestead.git D:\htdocs_xampp\Homestead

where D:\htdocs_xampp\Homestead the Homestead directory, after entering this directory:

d:
cd d:\htdocs_xampp\Homestead

Next, execute the bash init.bat command from the Homestead directory to create the Homestead.yaml configuration file. The Homestead.yaml file is where you will configure all of the settings for your Homestead installation. This file will be placed in the Homestead directory: if there is a problem with the

init.bat 

use

./init.bat

Section – 4 [Configuring Homestead]

Follow the instructions at:

https://laravel.com/docs/10.x/homestead#configuring-homestead

For configuring the file: Homestead.yaml

Section – 5 [Launching The Vagrant Box]

After all, the steps above, it is time to:

Launching The Vagrant Box

You must have in mind the 4 most used CLI commands FROM CLI/Terminal at d:\htdocs_xampp\Homestead\:

vagrant up # if error on this - please Section 6 below
vagrant status
vagrant suspend
vagrant ssh

Section – 6 [Configuring SSH Keys]

In case the first attempt of running:

vagrant up

you getting

Please give the command to generate ssh keys in Windows:

ssh-keygen -t rsa -C "username@email.com"

This will create the:

C:\Users\lwdls\.ssh\id_rsa.pub
C:\Users\lwdls\.ssh\id_rsa

Then you have to go to Homestead.yaml and edit the SSH Keys with the correct Keys you have just created:

authorize: C:\Users\lwdls.ssh\id_rsa.pub
keys:
     - C:\Users\lwdls.ssh\id_rsa

Then you return to Section – 5 and give the command: vagrant up

The first time you have to await some time to download the Vagrant VM – Ubuntu Server from the repositories…

After the VM OK is launched go to: http://homestead.test/phpinfo.php to see the webpage of phpinfo():

phpinfo.php

<?php
phpinfo();
?>

if any problem put the phpinfo.php

in

public/phpinfo.php

to stop the VM – shutdown the PC – give

vagrant suspend

To add additional sites:

Adding Additional Sites

https://laravel.com/docs/10.x/homestead#adding-additional-sites

To create a Laravel Site – start with download Laravel files with the:

https://laravel.com/docs/10.x/installation#your-first-laravel-project

At Terminal d:\htdocs_xampp\

composer create-project laravel/laravel example-laravel-app

Composer can be installed from:

https://getcomposer.org/download/

Also, the composer comes preinstalled in Homestead/Vagrant/VM

And, a second way is:

After:

vagrant up 

Give:

vagrant ssh

and from Terminal at /home/vagrant/ give the command:

 composer create-project laravel/laravel example-laravel-app

Any way you choose, be sure to edit the Homestead.yaml and every new website added to run:

vagrant reload --provision

And lastly

To run a new URL locally modify the host file at:

On macOS and Linux, this file is located at /etc/hosts. On Windows, it is located at C:\Windows\System32\drivers\etc\hosts:

192.168.56.56 homestead.test
192.168.56.56 another1.test
192.168.56.56 another2.test

Again, according to

Homestead.yaml

After, download the Laravel 10.x bootstrap code base, view the Laravel homepage accordingly by going to http://another1.test.

Happy Laravel Web Development & Coding…!