Featured

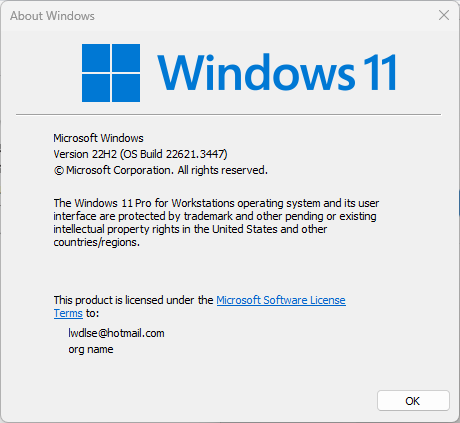
Windows 11 Pro for Workstations Unsupported Upgrade 22H2 ->23H2


For Windows 24H2 go here. For 23H2 Continue.

SOLVED PROBLEMS BY READING THIS ARTICLE:

  1. Download Windows-11-Pro.iso [All versions & Workstations] from Microsoft
  2. My PC from eBay.com a hp z640 – default language: de-de, change to us-en
  3. Bypass Restrictions of Win-11 Pro for WS: upgrade 22H2 to 23H2 *
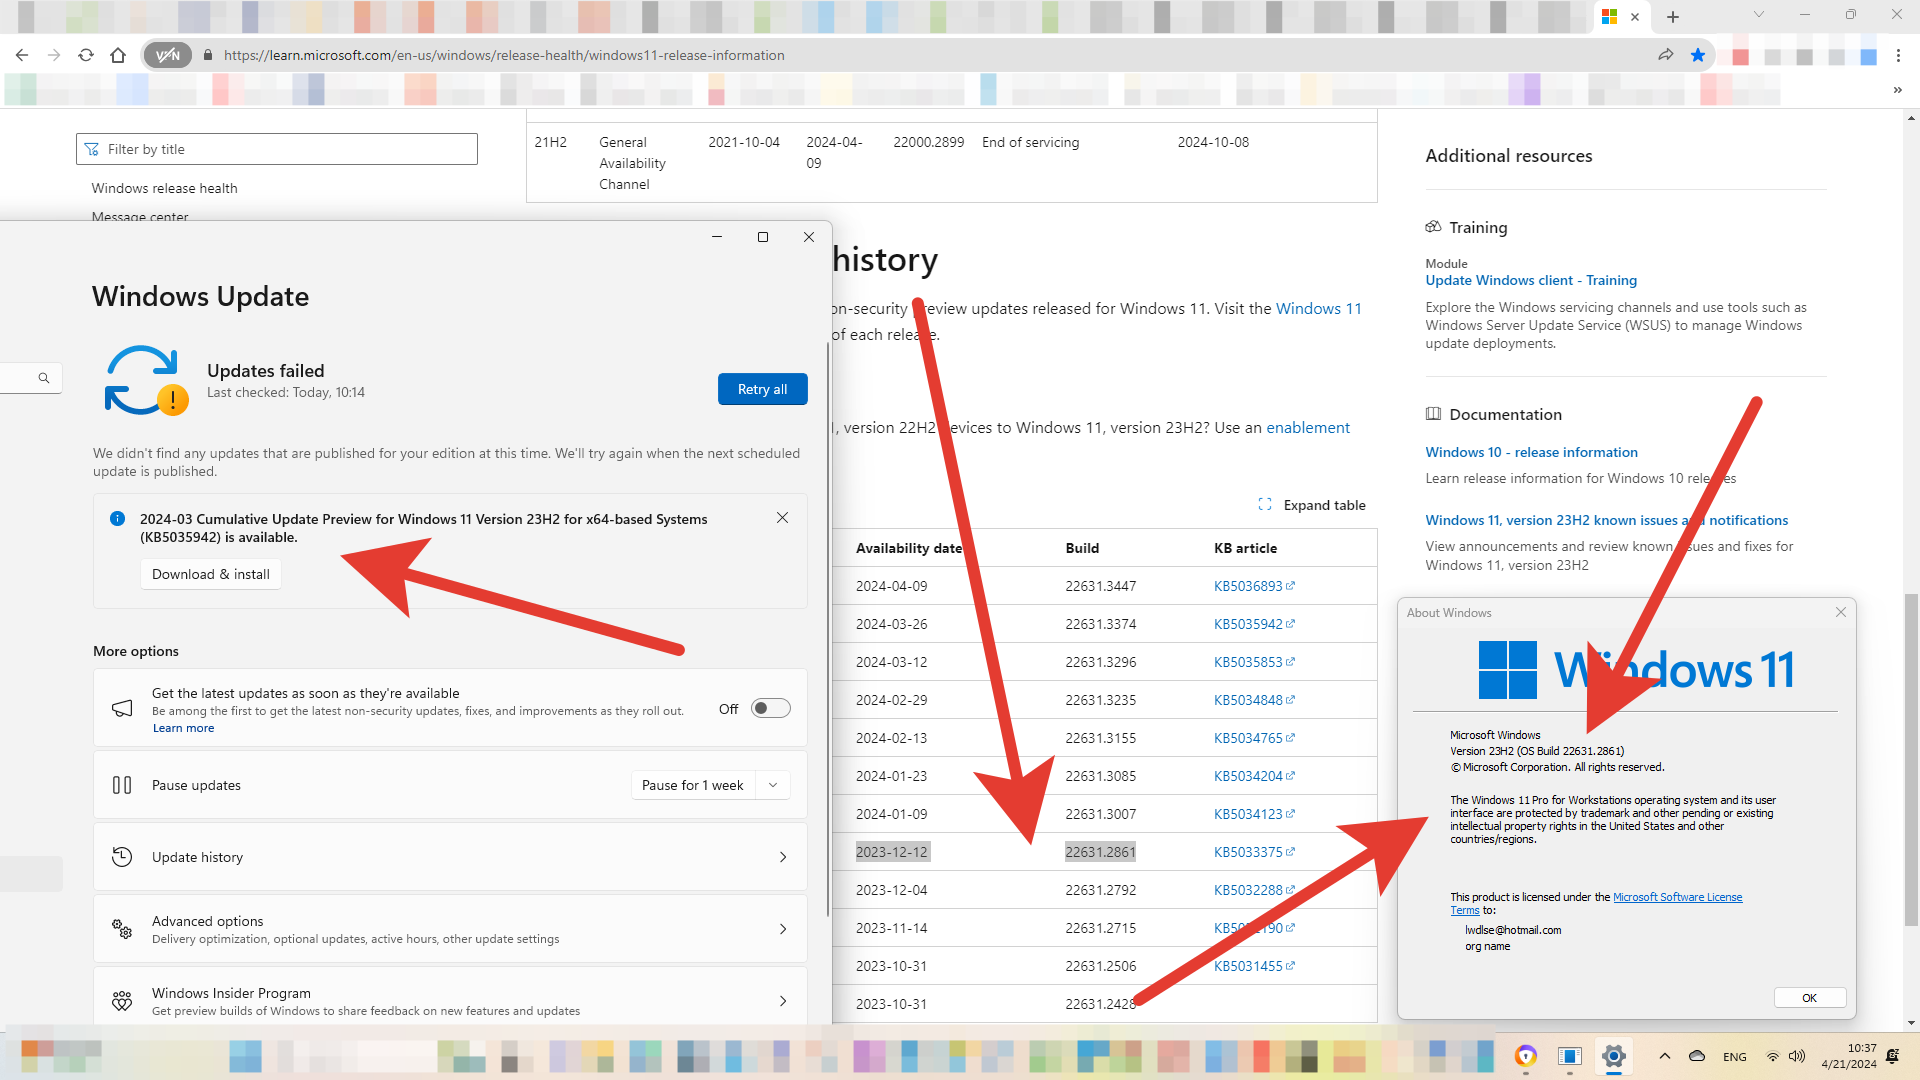
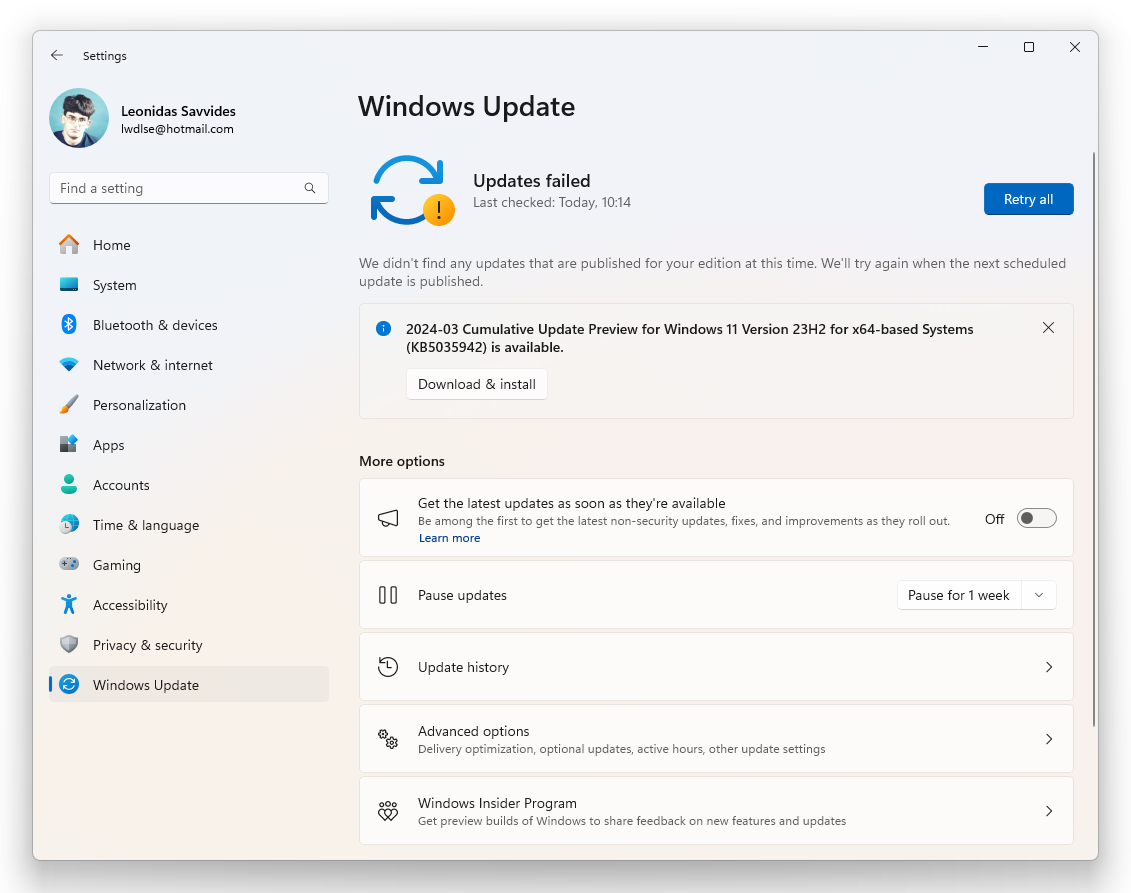
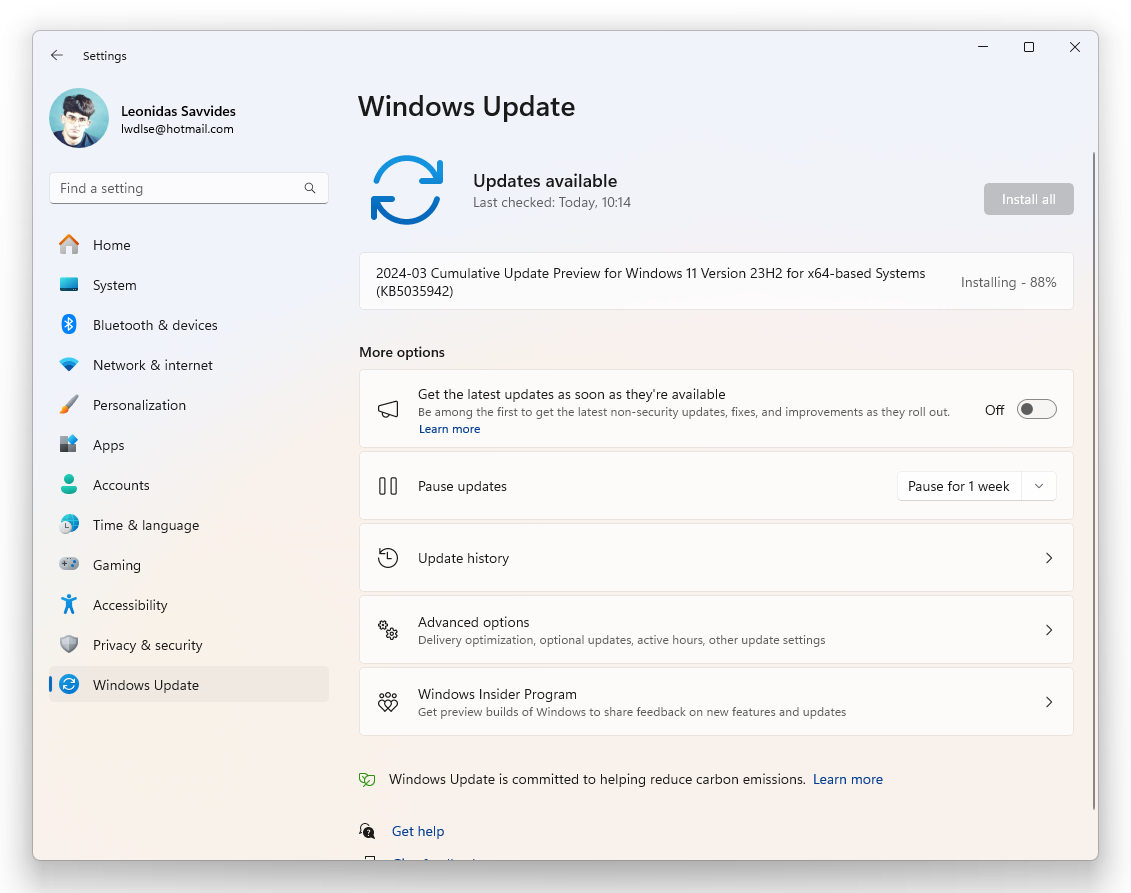
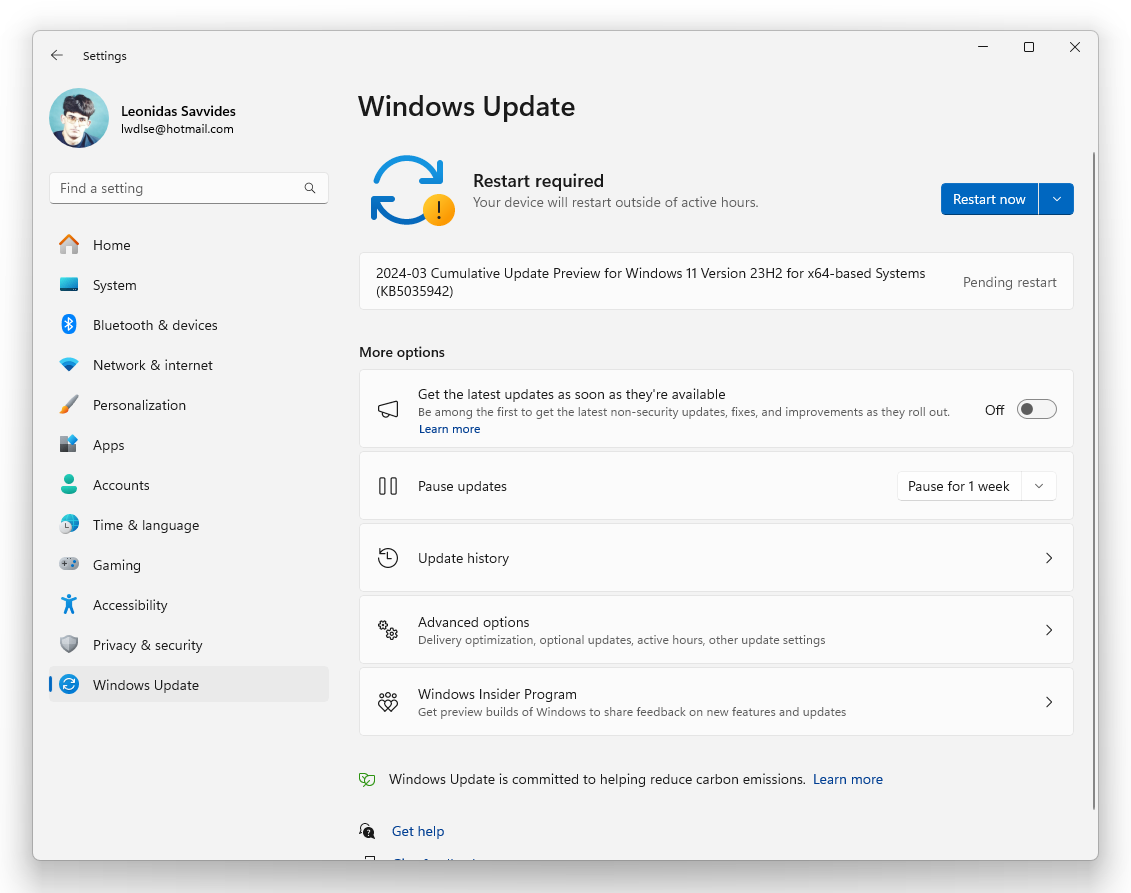
  4. After upgrading from 22H2 to 23H2, Win-11 Pro for Workstations, some minor updates may be needed
  5. Buy Cheap Software keys – Windows 11/10 Pro for Workstations, Windows 11 Pro, Home, etc. **

* Instructions given – This method DOES NOT USE 3rd Party Tools. It does use the Official Windows11.iso from the Microsoft website – download, and some CLI commands – All Safe === All Microsoft…!!!!!!!!!!!!!!!!!!!!!!!!!

** Windows 11/10 Pro for Workstations can be installed on any PC, but to make use of all of its functions and power needed Workstation PC, eg. Intel XEON processor, ECC RAM, Professional Graphics card…etc.


1- Download Windows-11-Pro.iso [All versions & Workstations] from Microsoft

https://www.microsoft.com/software-download

Please go to:

https://www.microsoft.com/software-download/windows11

After in the 3rd section of:

Download Windows 11 Disk Image (ISO) for x64 devices

Choose in the drop-down menu: Windows 11 (multi-edition ISO for x64 devices)

Press the button “Download now”

And after in the appeared Section: Select the product language:

English (United States)

Press the button “Confirm”

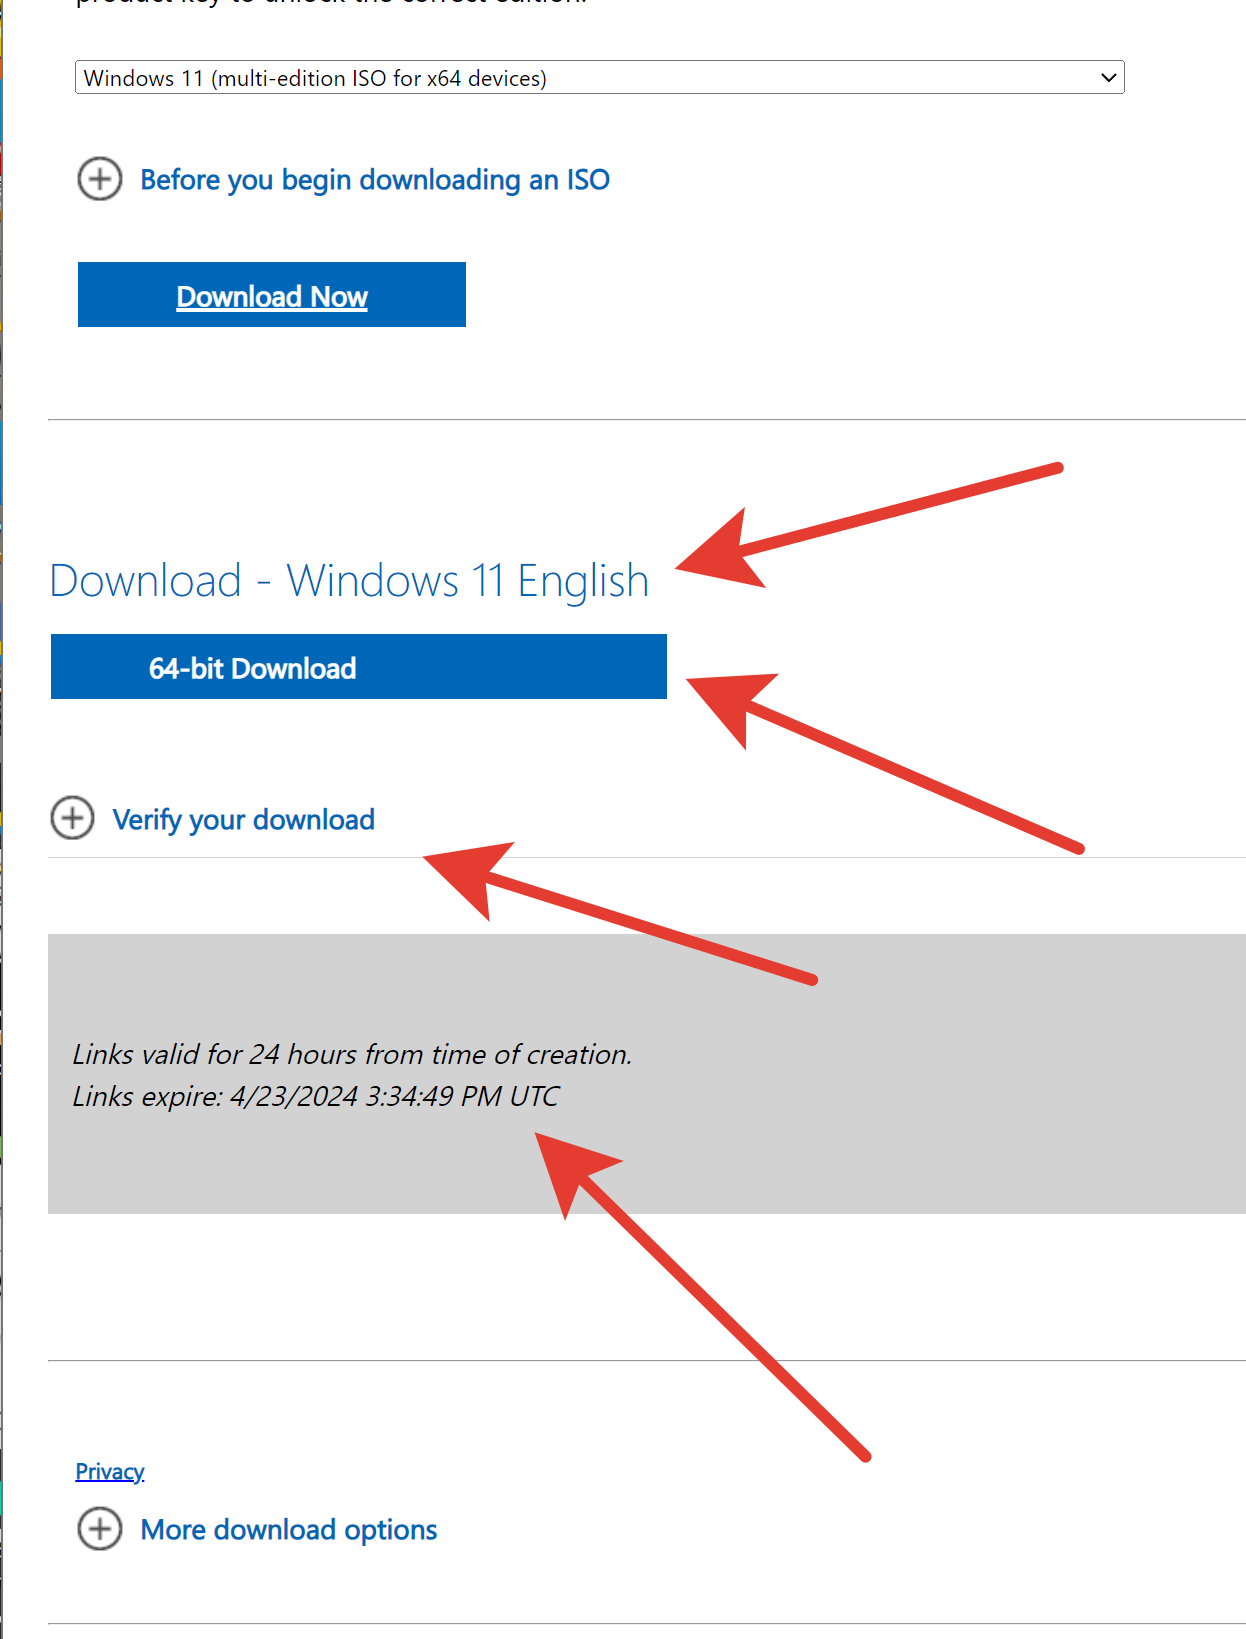
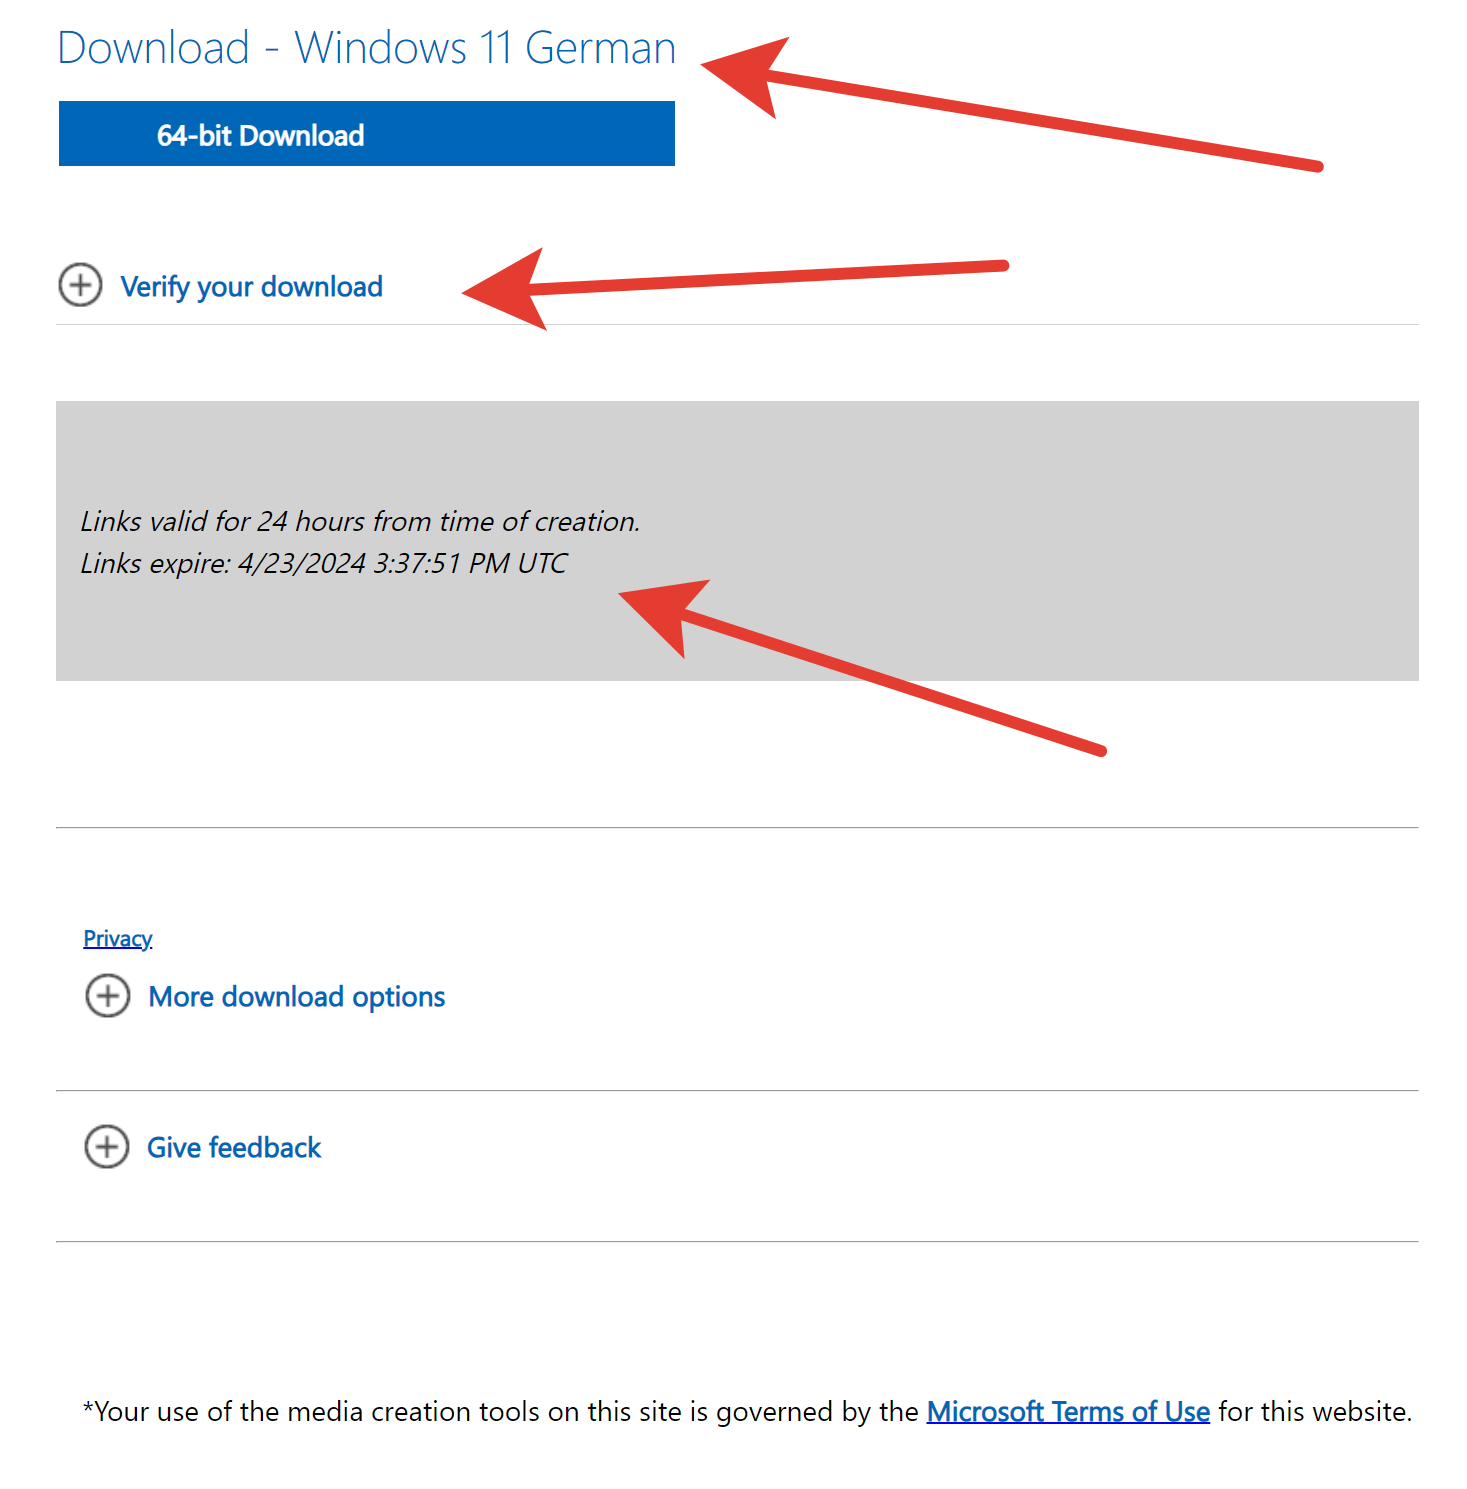
The Section “Download – Windows 11 English” appears

Press the button “64-bit Download”

Save the file in the prompt as: Win11_23H2_English_x64v2.iso

Repeat the Process but this time – we do this because the eBay PC has a base language of German so needs German ISO to upgrade:

And after in the appeared Section: Select the product language:

German

The Section “Download – Windows 11 German” appears

Press the button “64-bit Download”

Save the file in the prompt as: Win11_23H2_German_x64v2.iso

Note-1: these downloads e.g. Win11_23H2_German_x64v2.iso can be used for installing or upgrading any flavor of Windows 11 like:

Windows 11 Home, Windows 11 Pro, Windows 11 Pro for Workstations,…

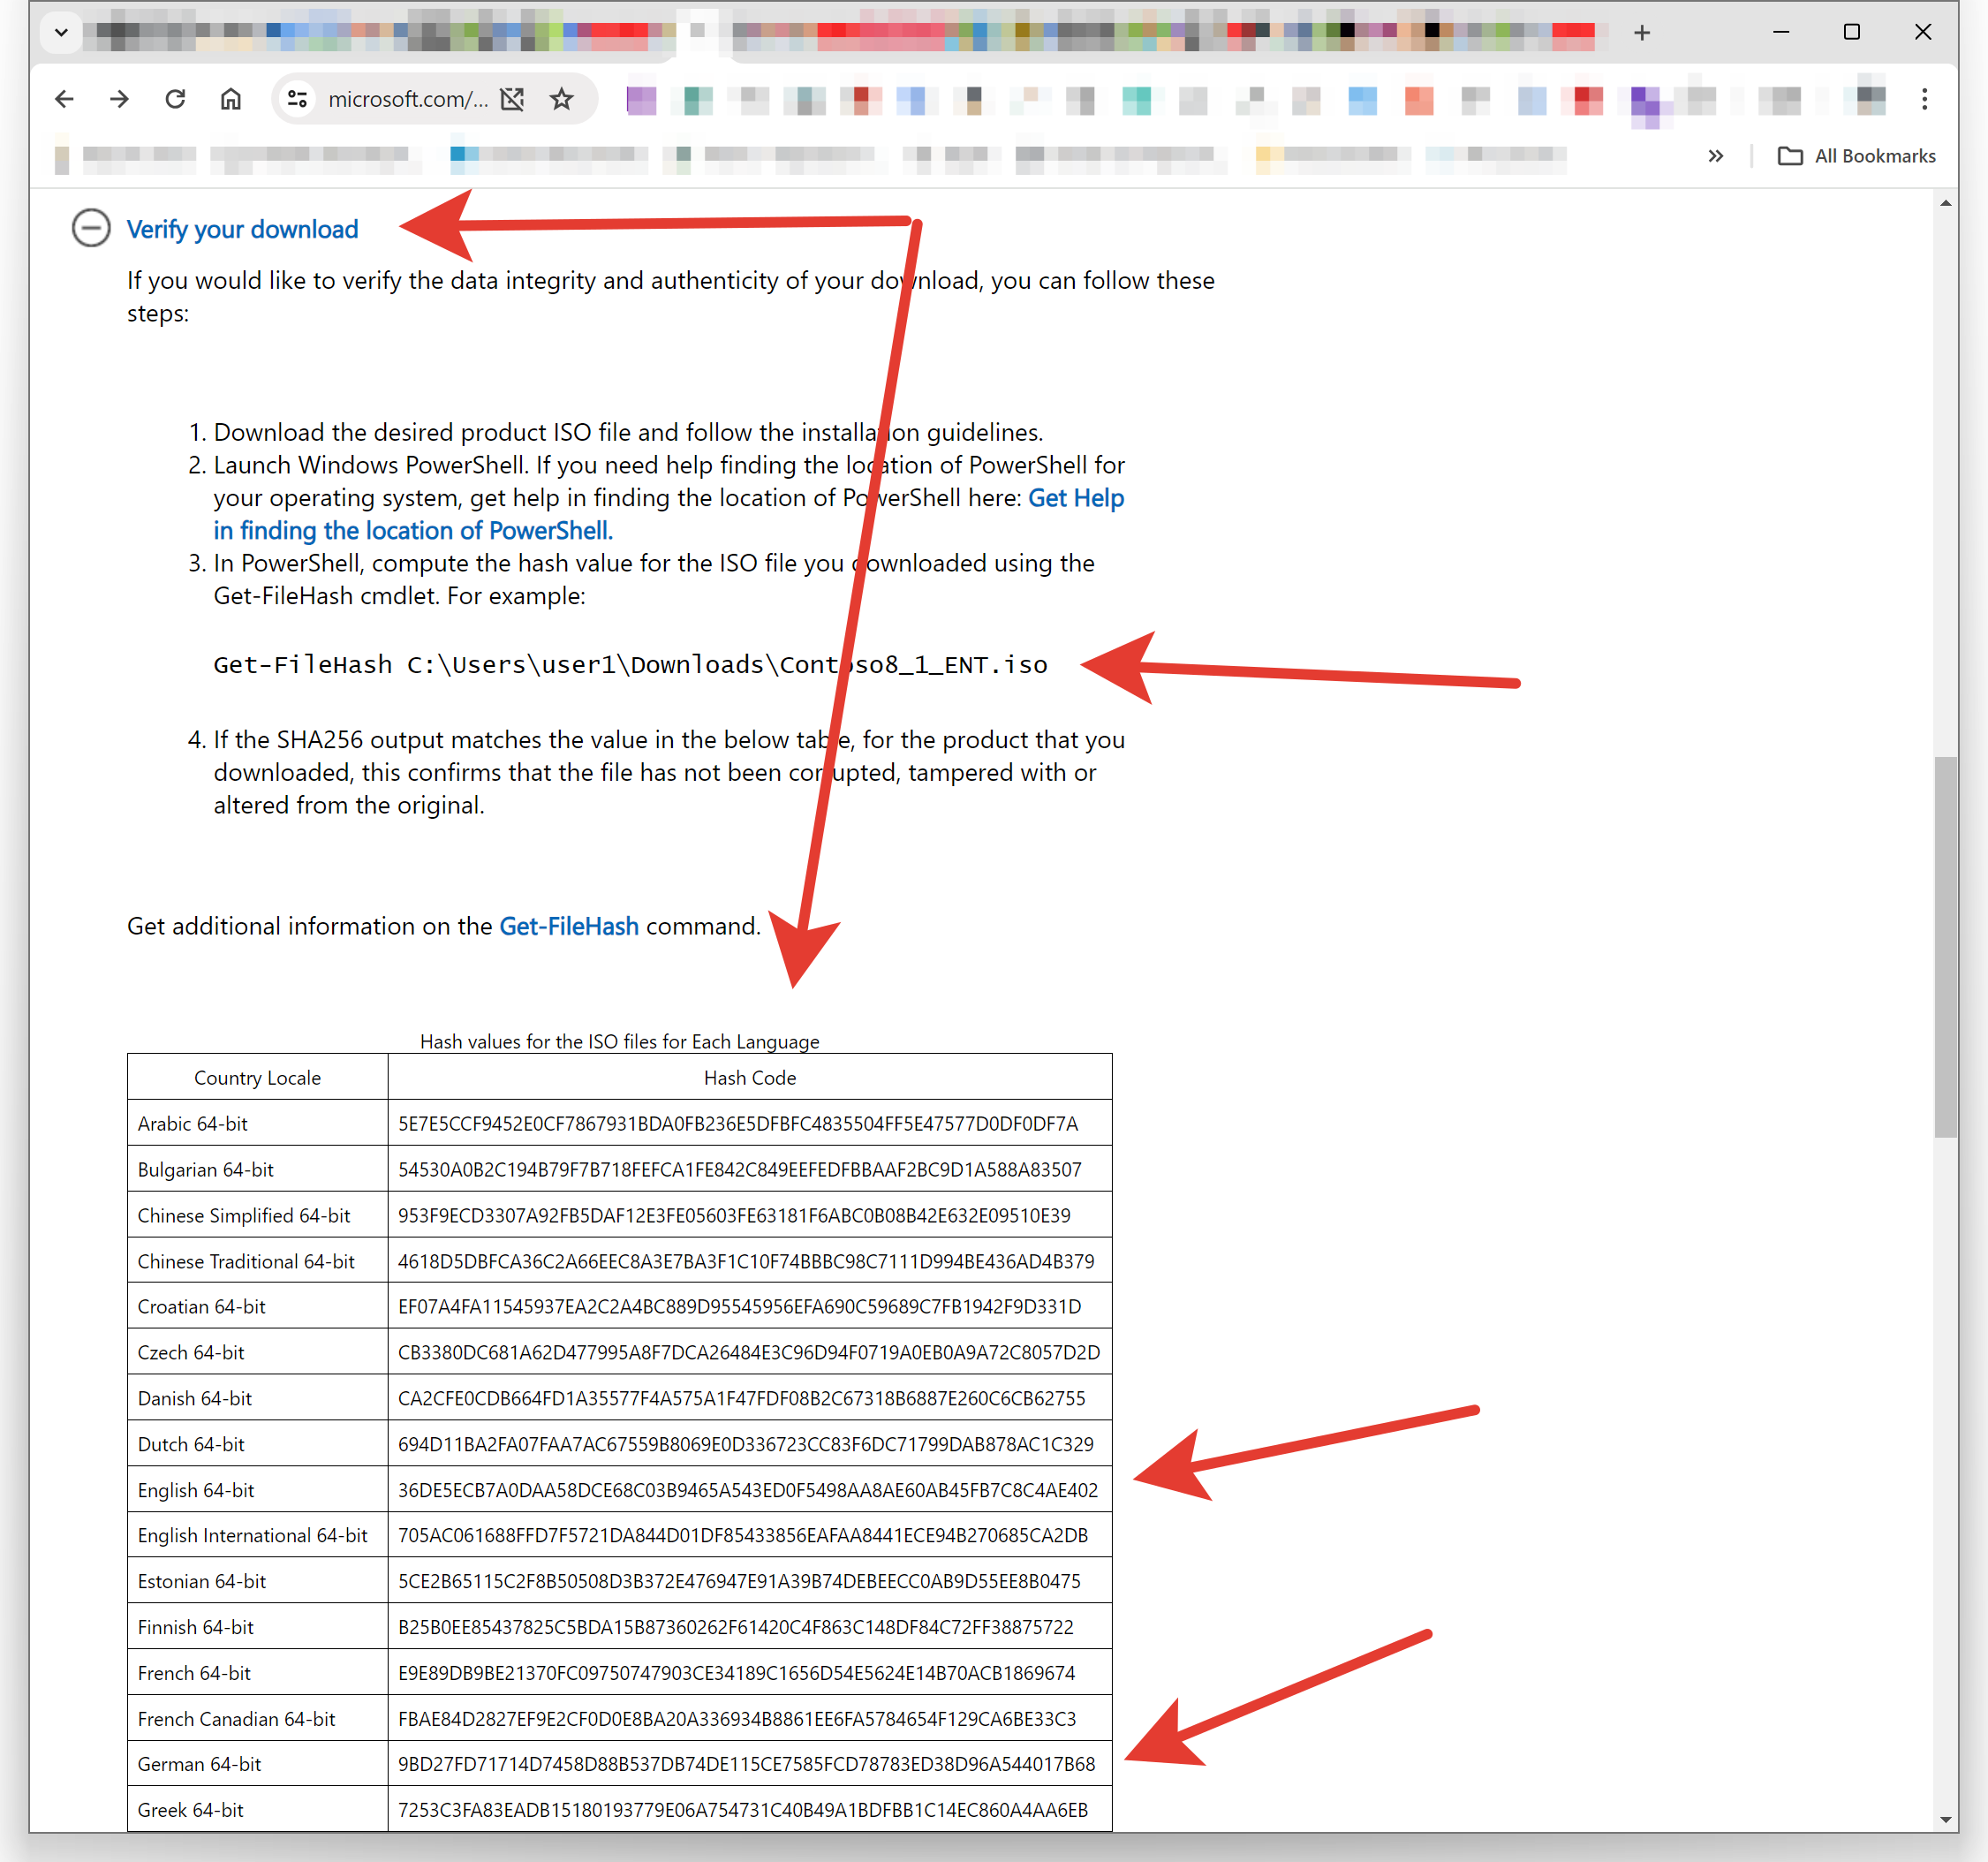
Note-2: Verify your download always to be sure indeed download is from the origin of Microsoft:

Press Verify your download

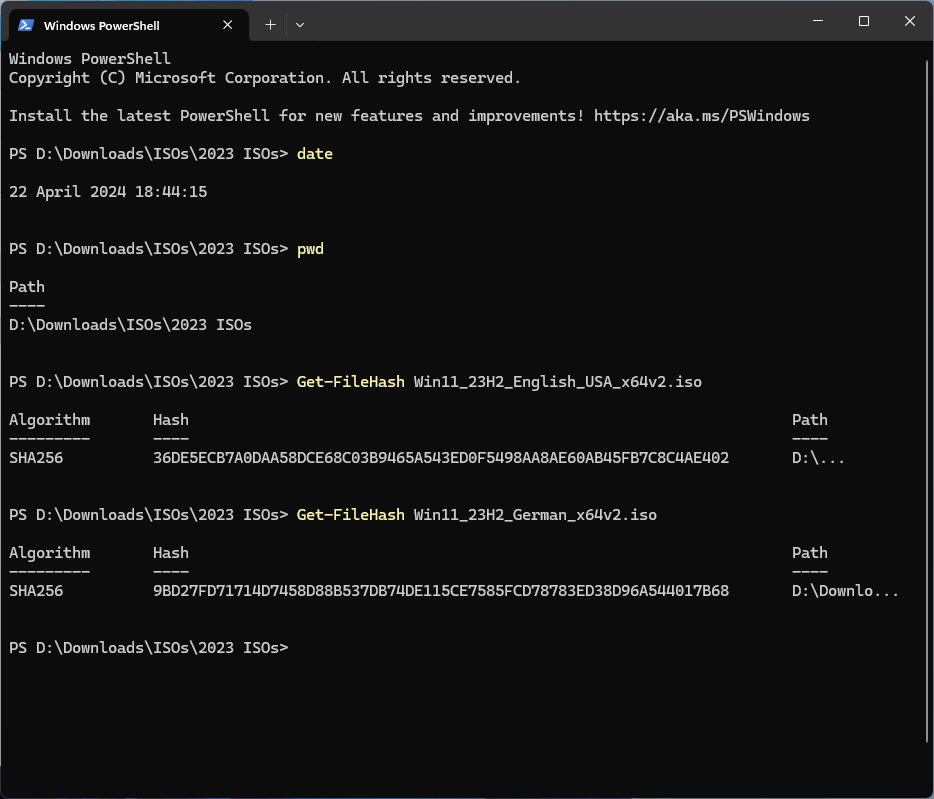
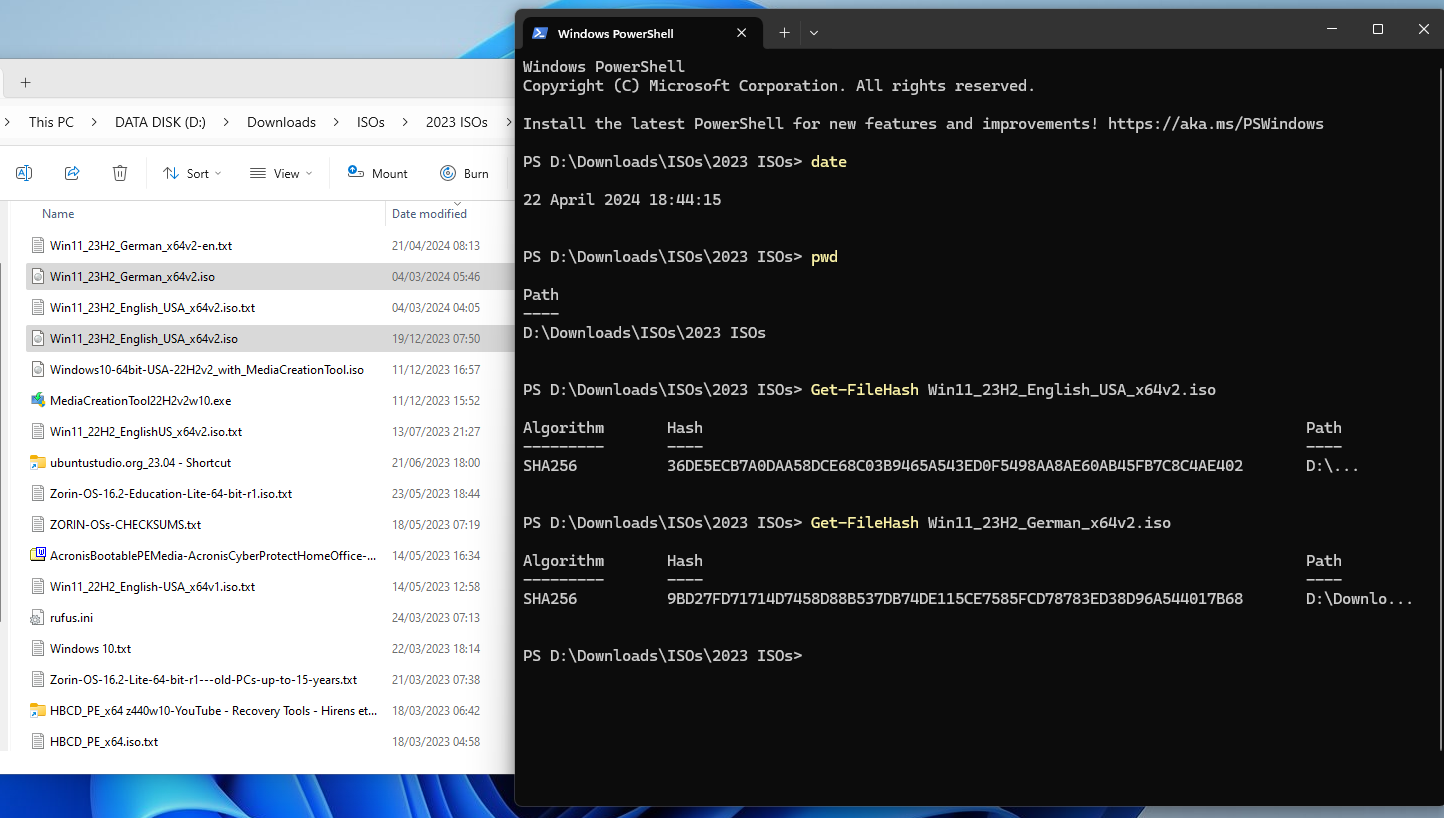
As described go to the CLI CMD PROMPT or PowerShell and type as shown in the pictures below:

Windows PowerShell
Copyright (C) Microsoft Corporation. All rights reserved.

Install the latest PowerShell for new features and improvements! https://aka.ms/PSWindows

PS D:\Downloads\ISOs\2023 ISOs> date

22 April 2024 18:44:15

PS D:\Downloads\ISOs\2023 ISOs> pwd

Path

D:\Downloads\ISOs\2023 ISOs

PS D:\Downloads\ISOs\2023 ISOs> Get-FileHash Win11_23H2_English_USA_x64v2.iso

Algorithm Hash Path
——— —- —-
SHA256 36DE5ECB7A0DAA58DCE68C03B9465A543ED0F5498AA8AE60AB45FB7C8C4AE402 D:…

PS D:\Downloads\ISOs\2023 ISOs> Get-FileHash Win11_23H2_German_x64v2.iso

Algorithm Hash Path
——— —- —-
SHA256 9BD27FD71714D7458D88B537DB74DE115CE7585FCD78783ED38D96A544017B68 D:\Downlo…

PS D:\Downloads\ISOs\2023 ISOs>

====

Now compare the SHA256 CHECKSUM with Microsoft web site at

https://www.microsoft.com/software-download/windows11 .

If they match you are good to proceed.

====


2- My PC from eBay.com a hp z640 – default language: de-de, change to us-en

If proceed with Upgrade from 22H2 to 23H2:

Normally will run the file setup.exe in the root file structure of the ISO. BEFORE DO THIS the ISO file gets burned on DVD, mounted to a drive, or extracted from ISO to a USB Stick location. You have to do this for both ISOs

Win11_23H2_German_x64v2.iso and Win11_23H2_English_USA_x64v2.iso

There are 2 problems Language should be de-de/German and hardware restrictions.

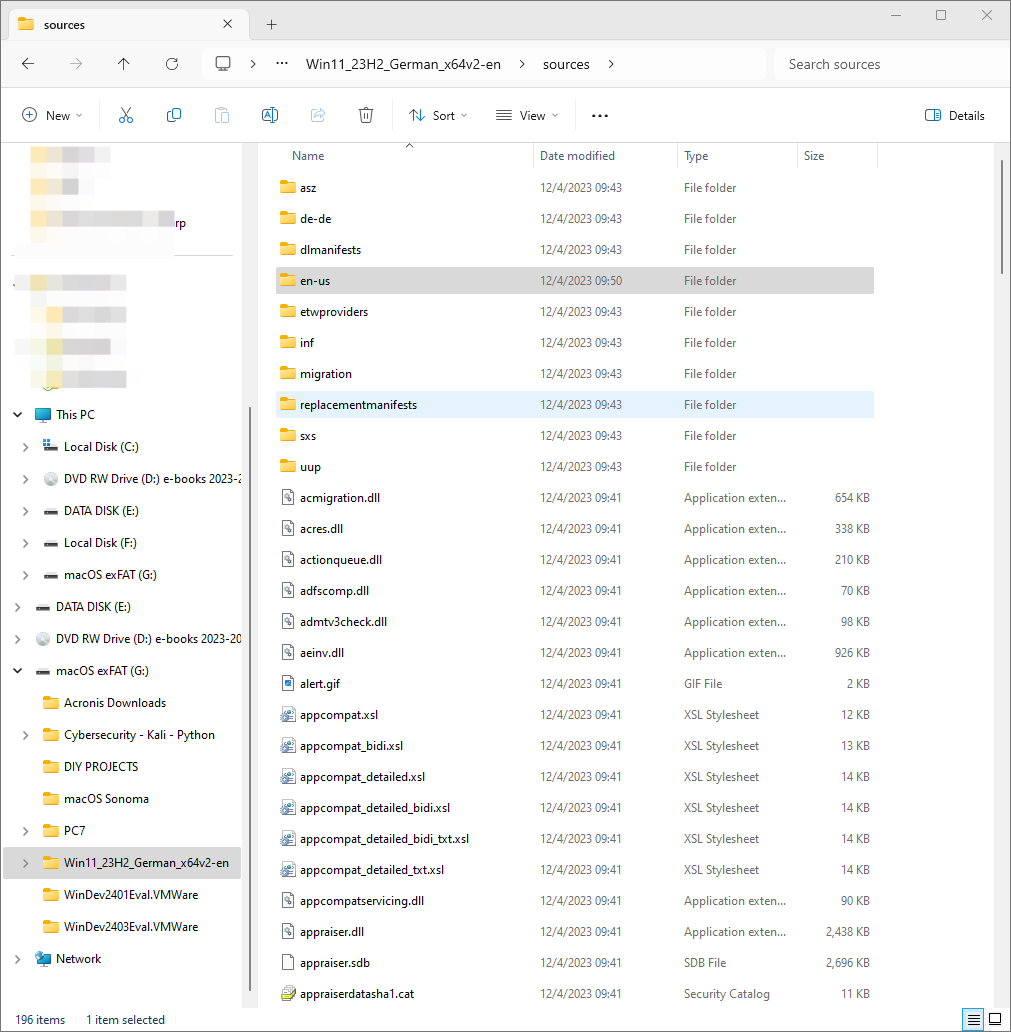
To bypass the language in the Win11_23H2_German_x64v2.iso extraction replace the folder:

G:\Win11_23H2_German_x64v2-en\sources\de-de

with

Win11_23H2_English_USA_x64v2\sources\en-us\

We proceed as follows: copy the Win11_23H2_English_USA_x64v2\sources\en-us\ to G:\Win11_23H2_German_x64v2-en\sources\

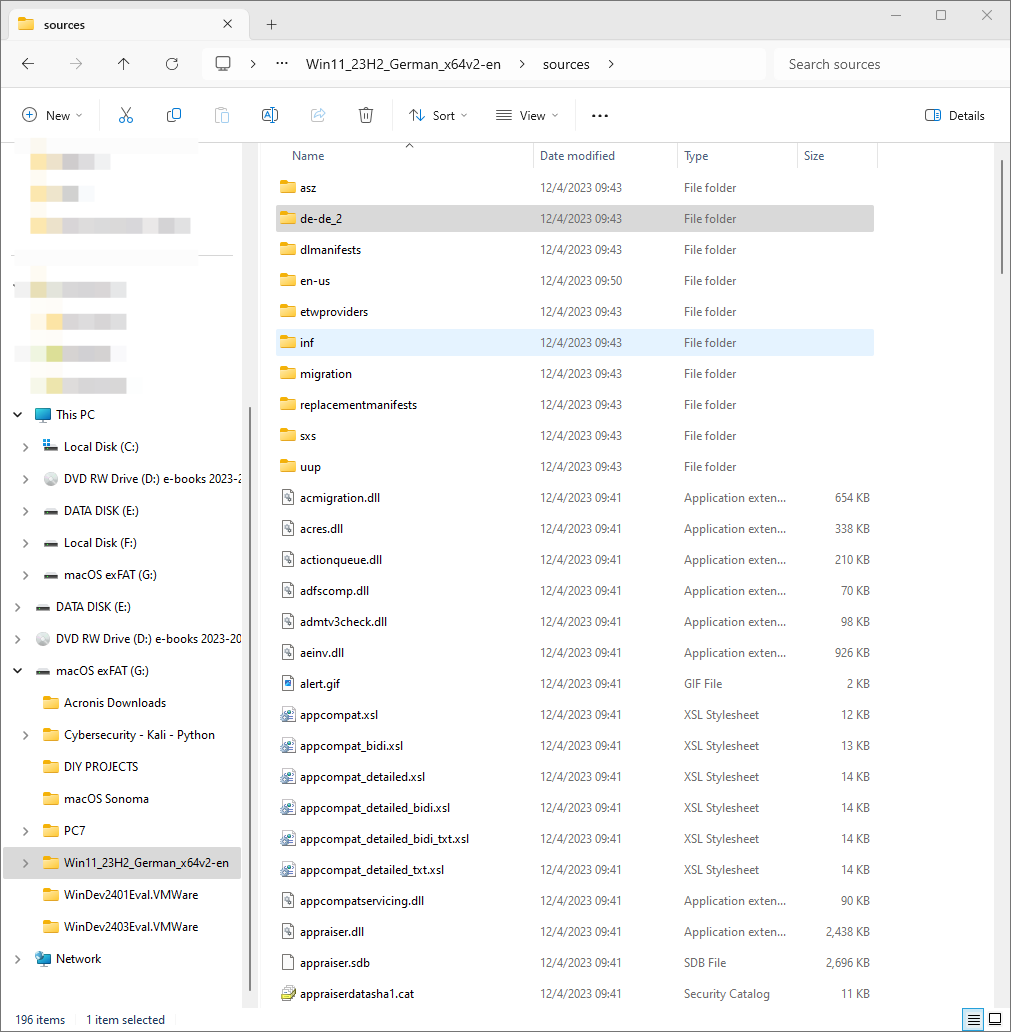
Rename the:

G:\Win11_23H2_German_x64v2-en\sources\de-de\

to

G:\Win11_23H2_German_x64v2-en\sources\de-de_2\

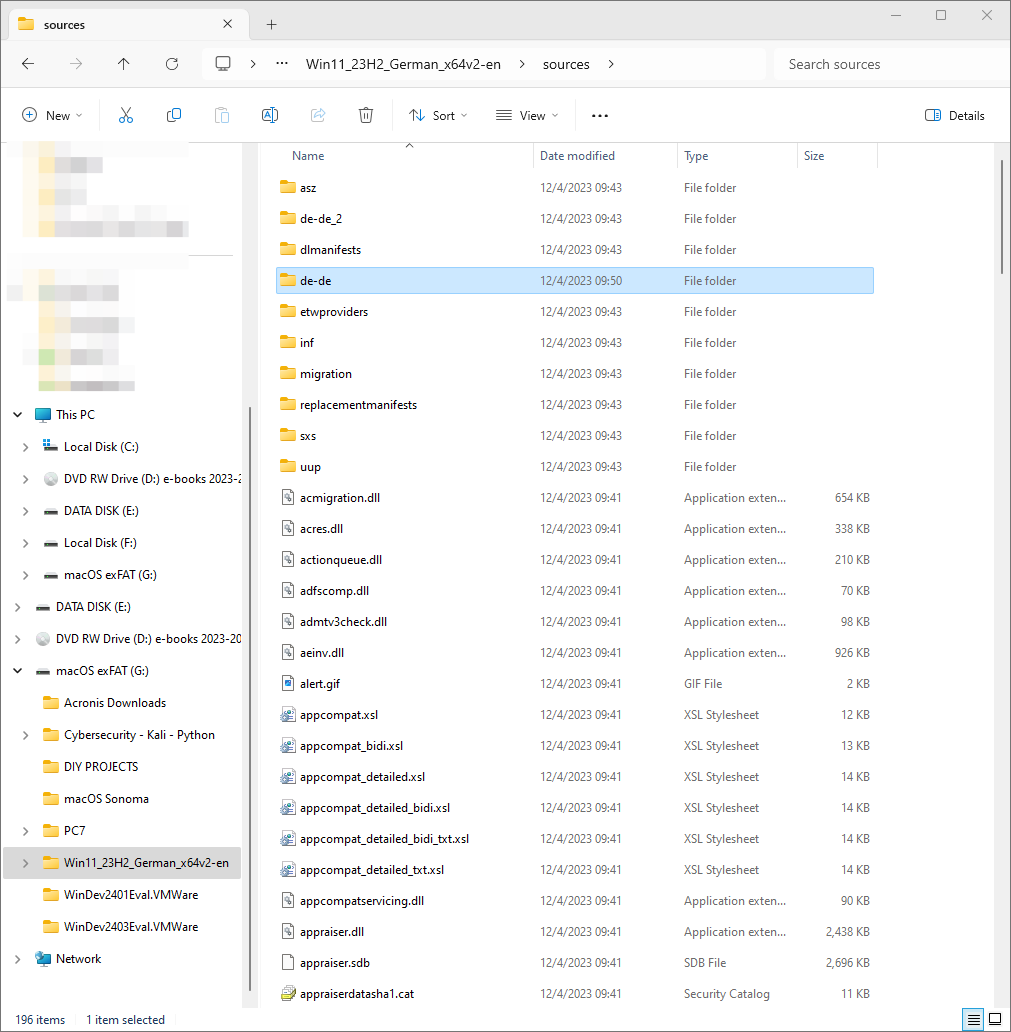
and the H:\Win11_23H2_German_x64v2-en\sources\en-us\ to G:\Win11_23H2_German_x64v2-en\sources\de-de\ .

This way I can follow in ENGLISH during the upgrade as I do not know German, see screenshots:


3- Bypass Restrictions of Win-11 Pro for WS: upgrade 22H2 to 23H2 *

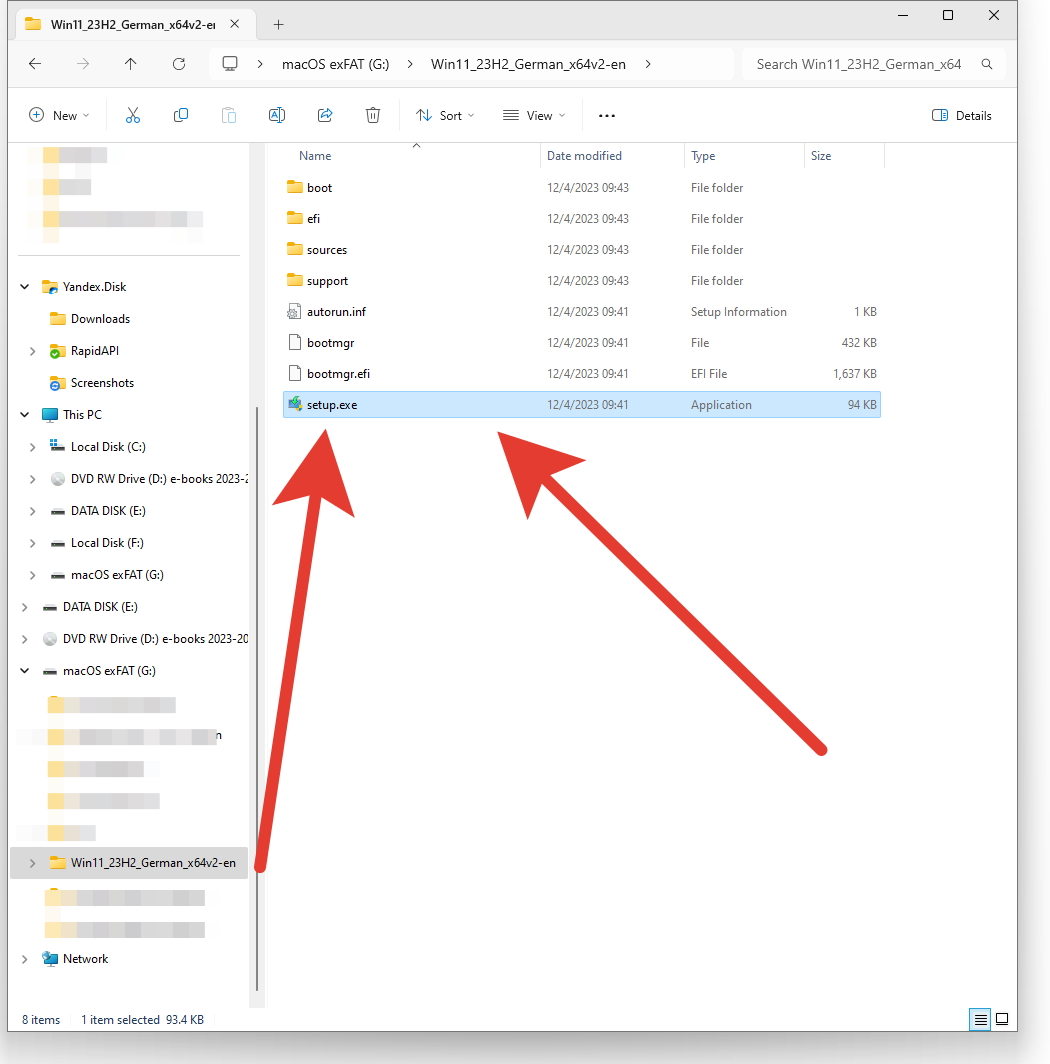
The last step is to start the Upgrade process from 22H2 to 23H3. If the hardware supports Windows 11, we proceed to run the:

“G:\Win11_23H2_German_x64v2-en\setup.exe”

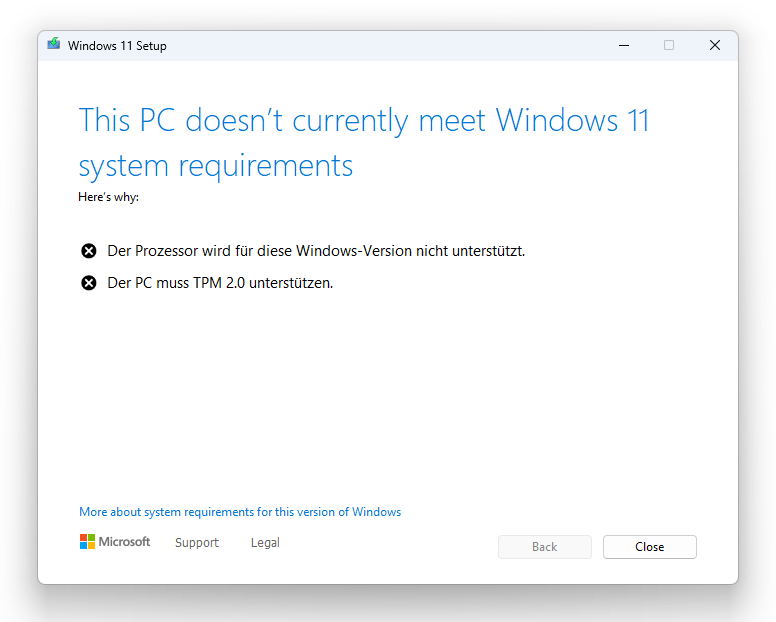
But the hardware is unsupported:

So, we proceed as follows:

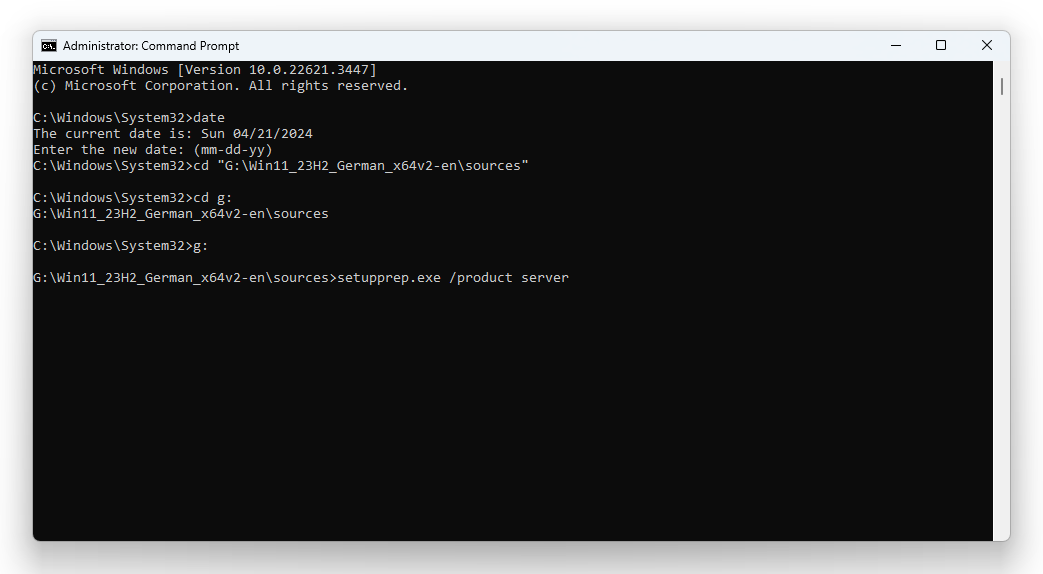
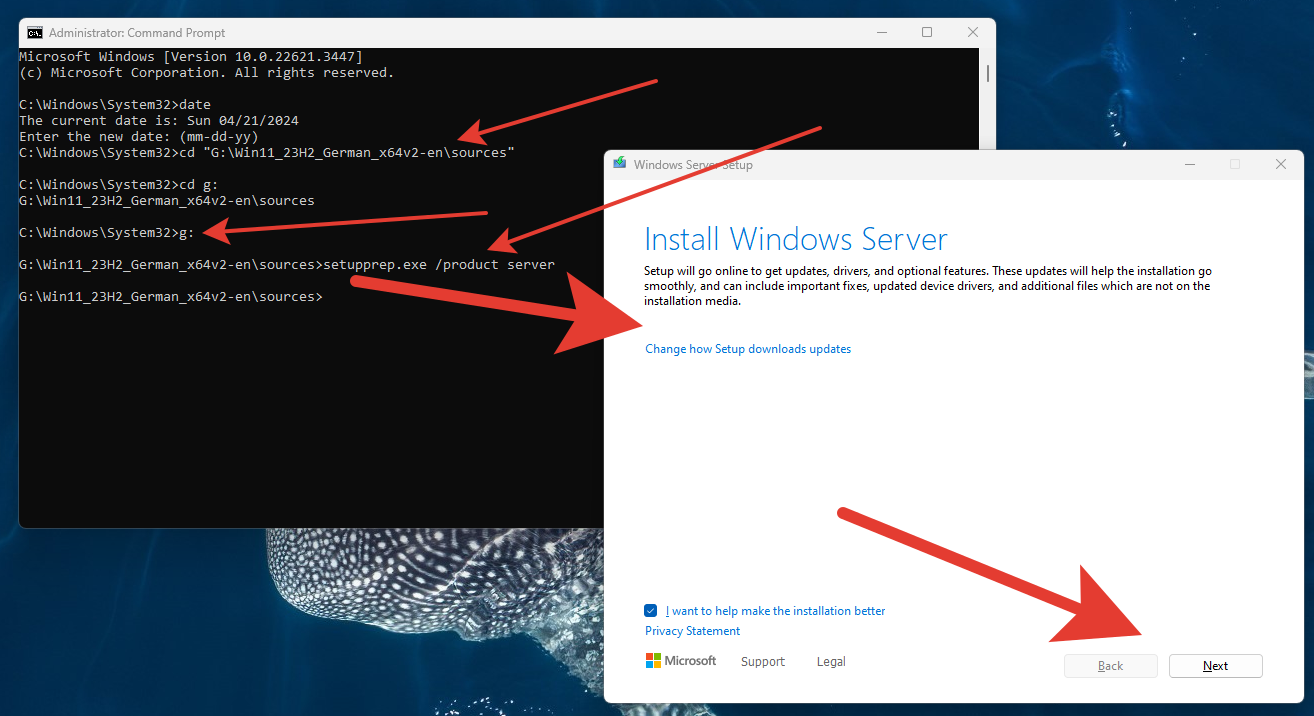
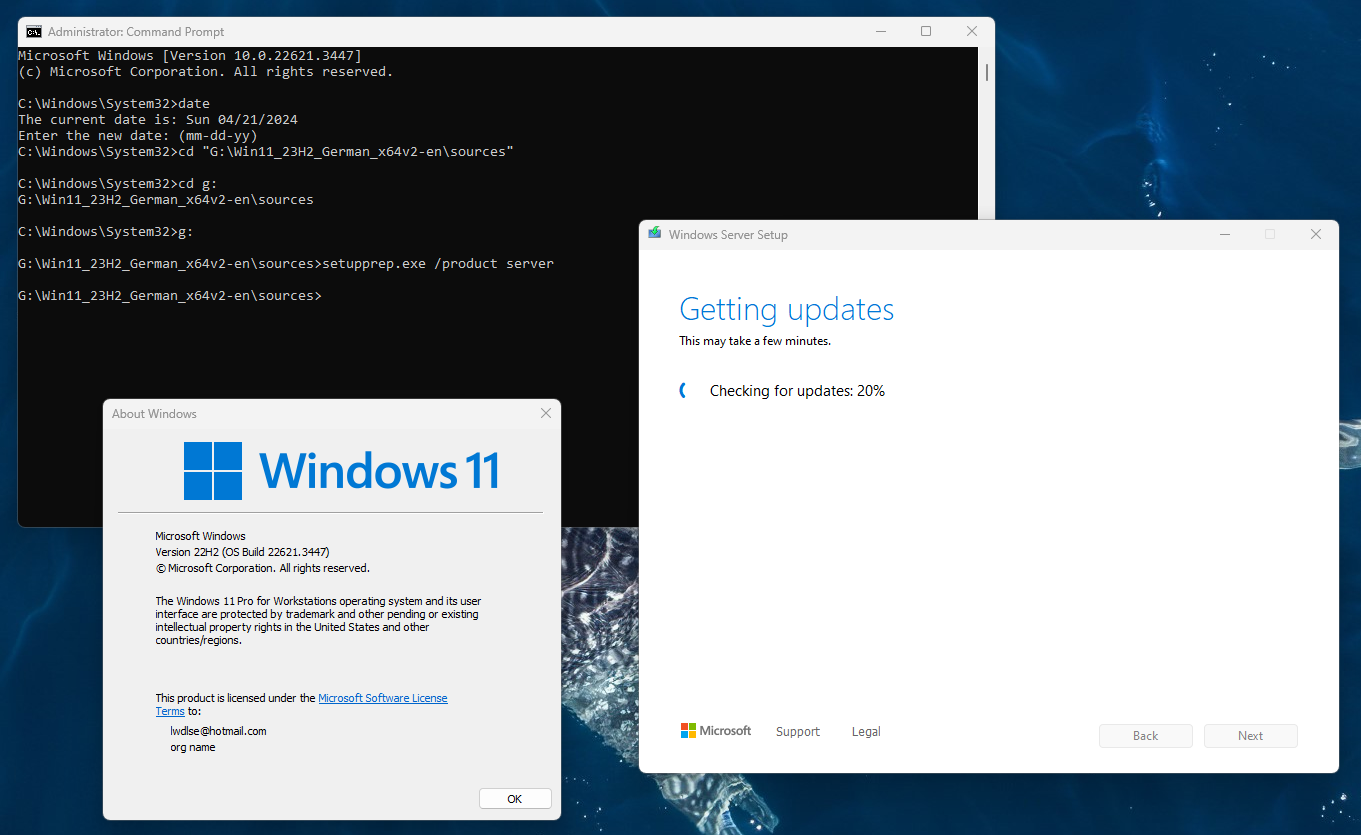
Open CLI as Administrator and go to the folder:

G:\Win11_23H2_German_x64v2-en\sources\

THEN WE GIVE THE COMMAND:

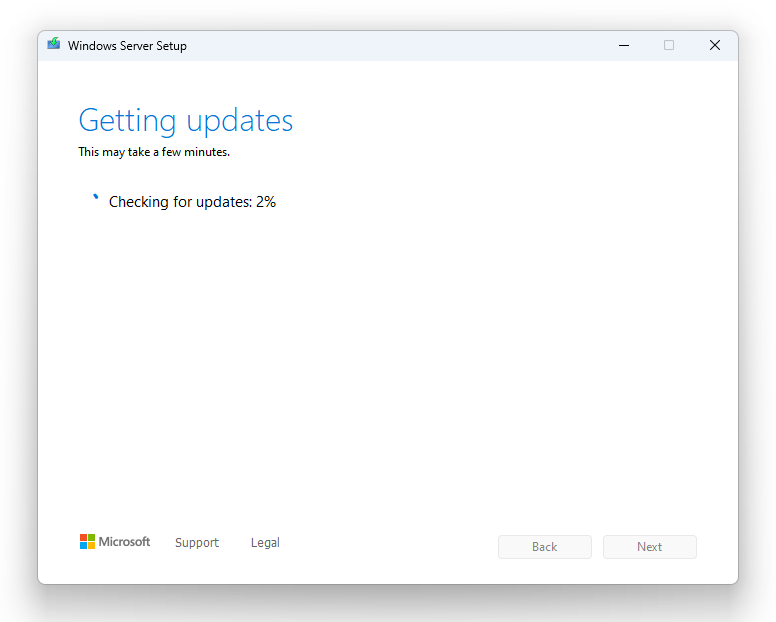
setupprep.exe /product server

This will start the upgrade process ignoring the Hardware Restrictions of Windows 11.

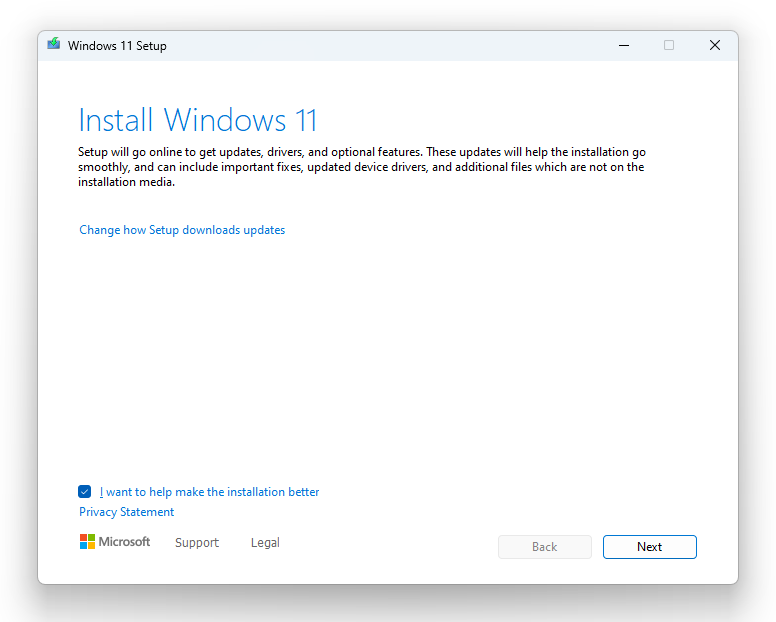
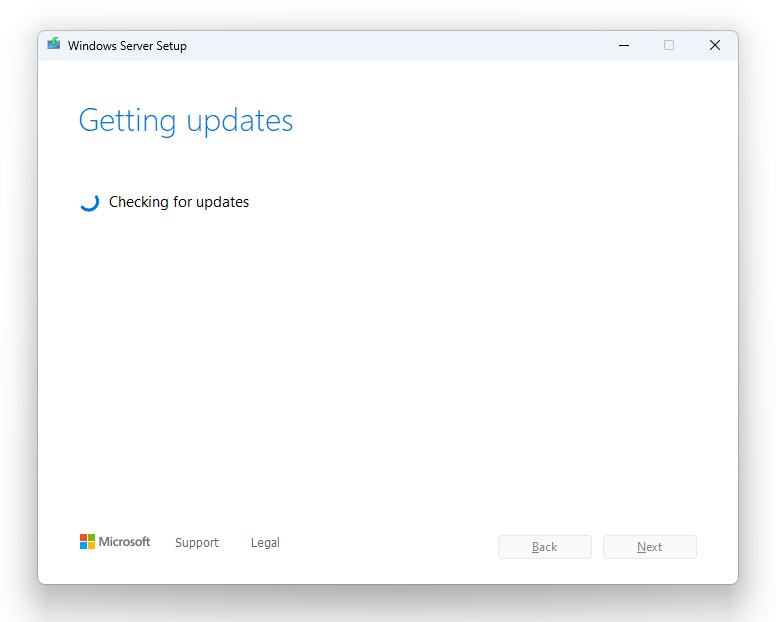
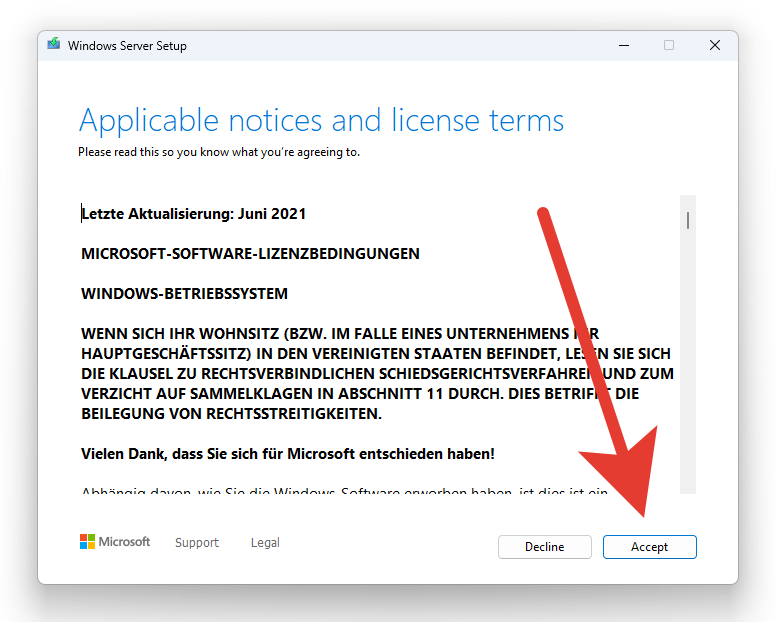
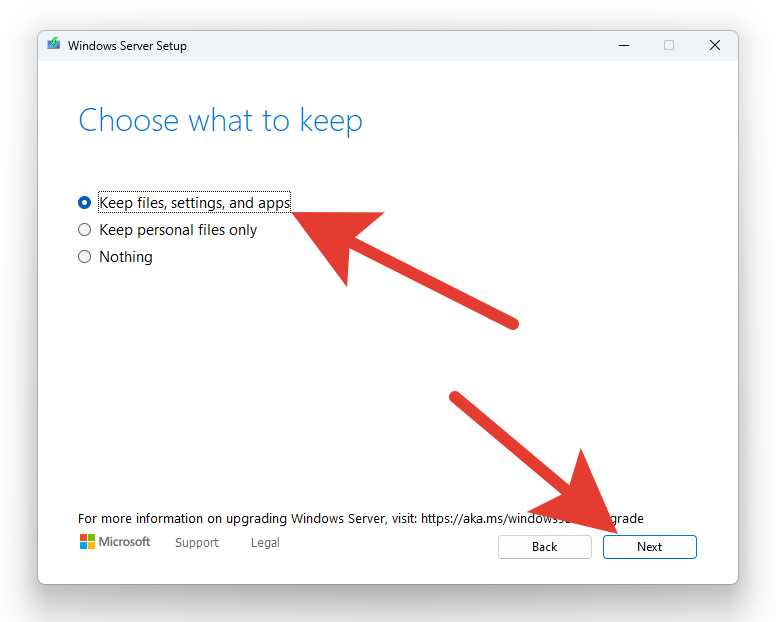
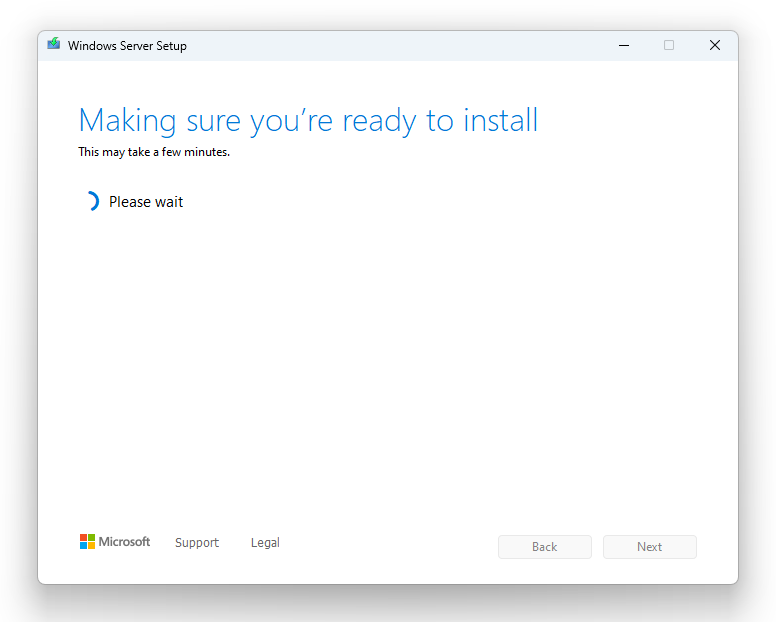
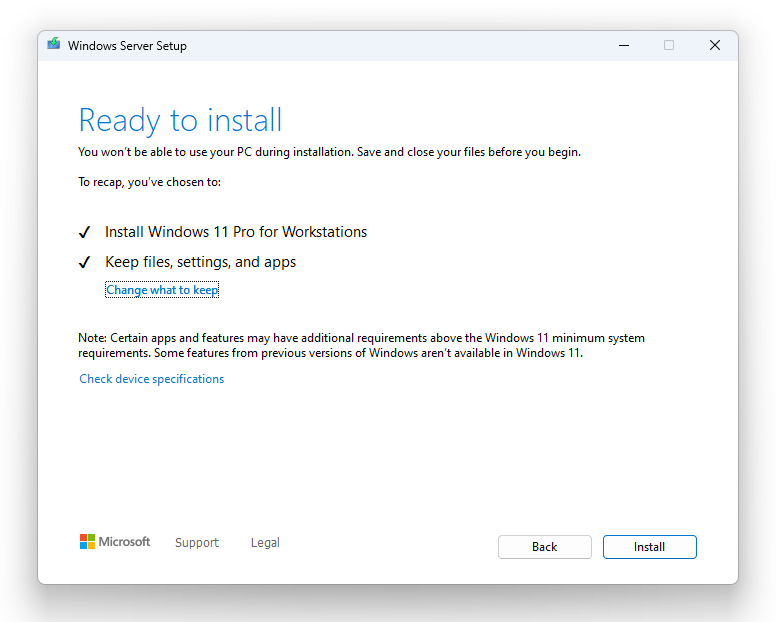
Please ignore the “Install Windows Server” – It does not matter – it is upgrading the OS in which you run it, in our case Windows 11 Pro for Workstations – but, can also be Windows 11 Home, Windows 11 Pro, if e.g. Home or Pro, Windows 11.

Press “Next”

Press “Accept”

Press “Next”

Press “Install”.
[If you use a PC I recommend a UPS or if you use Laptop Plug-in the power cord]


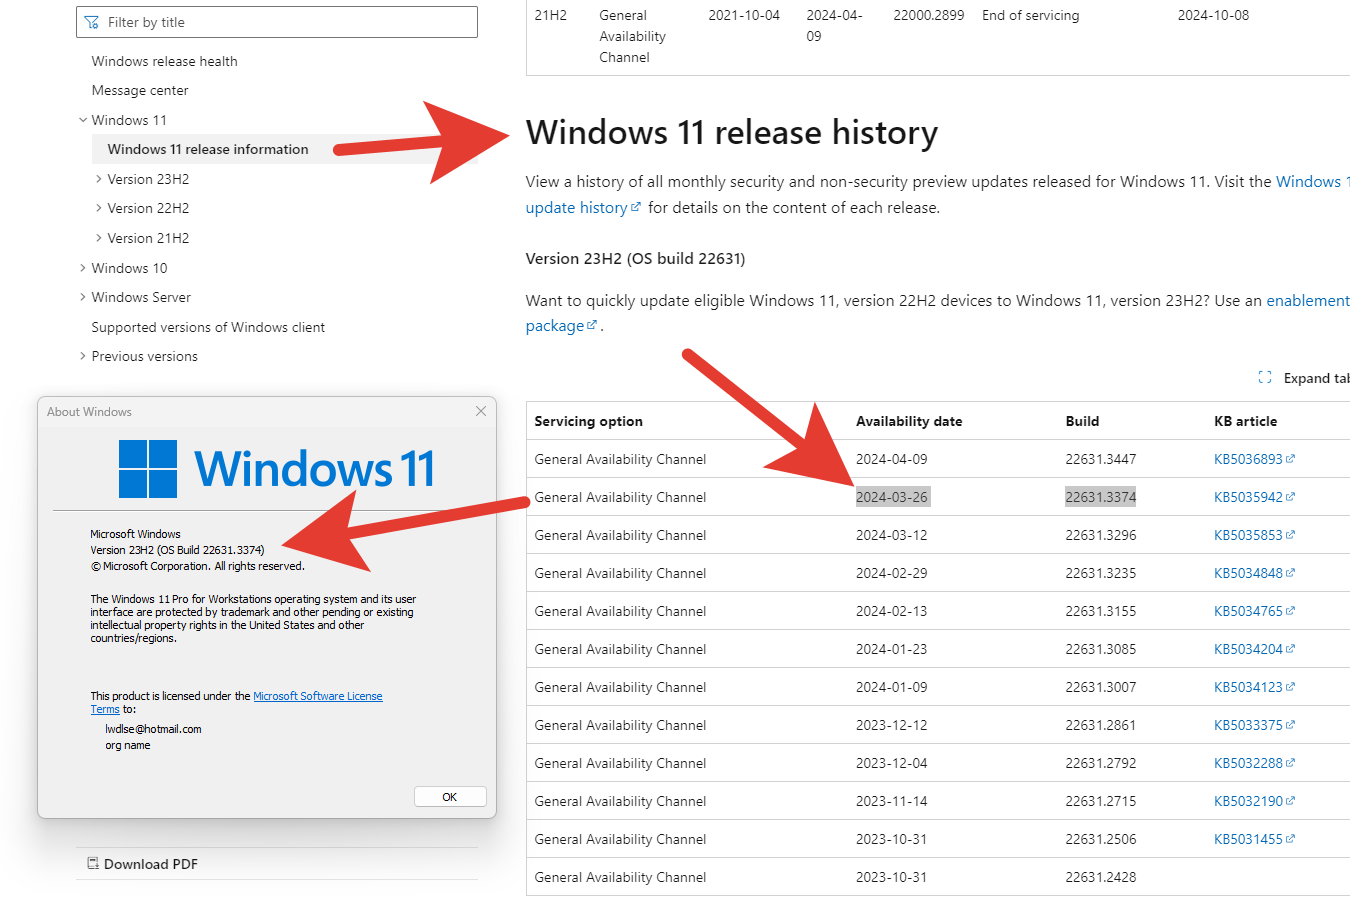
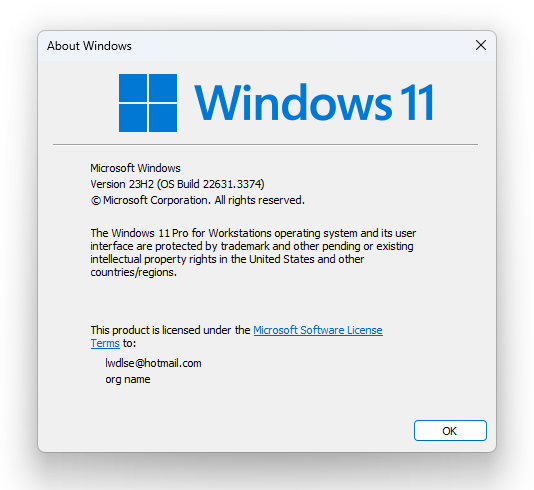
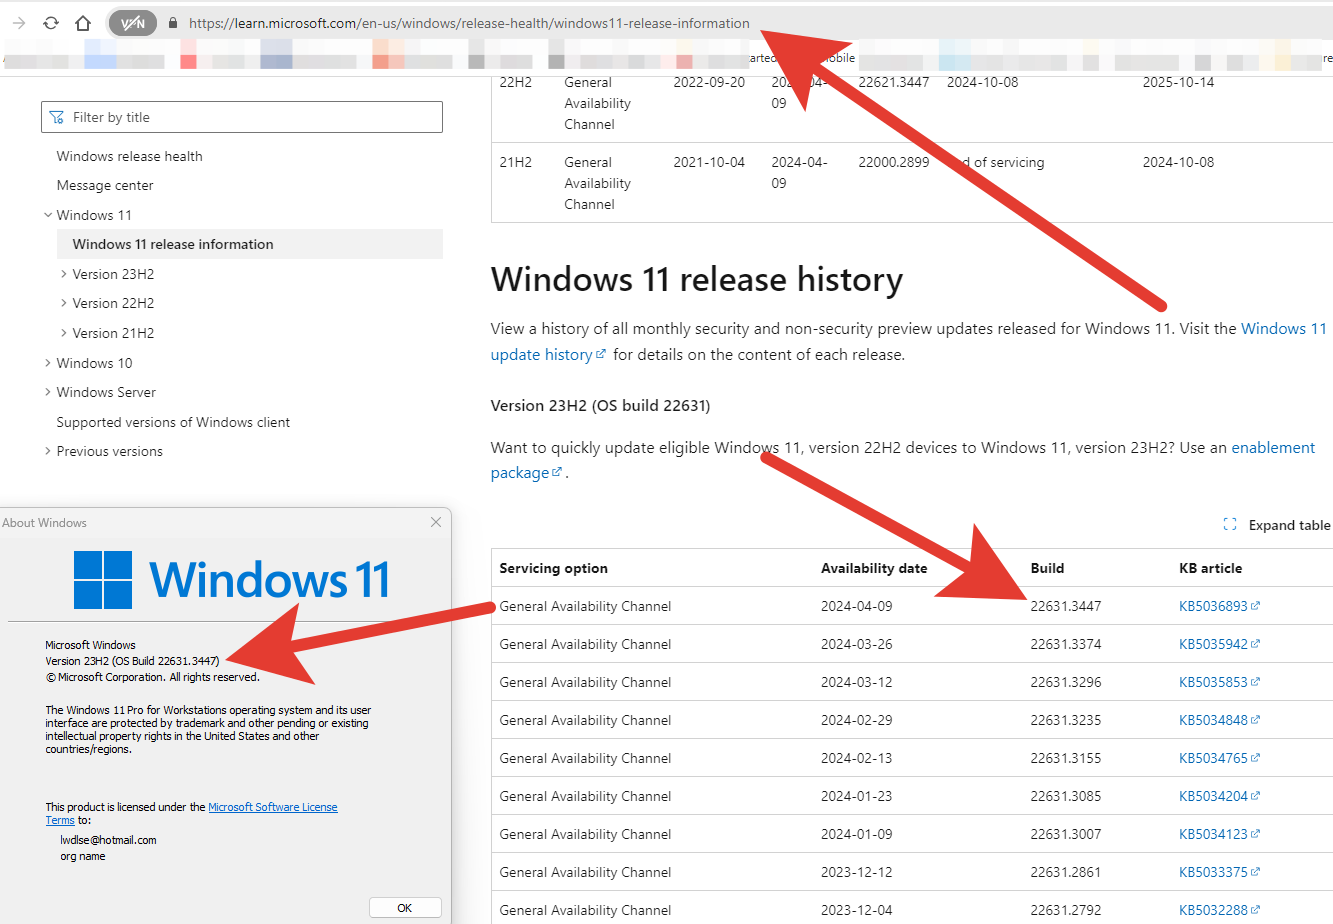
4- After upgrading from 22H2 to 23H2, Win-11 Pro for Workstations, some minor updates may be needed

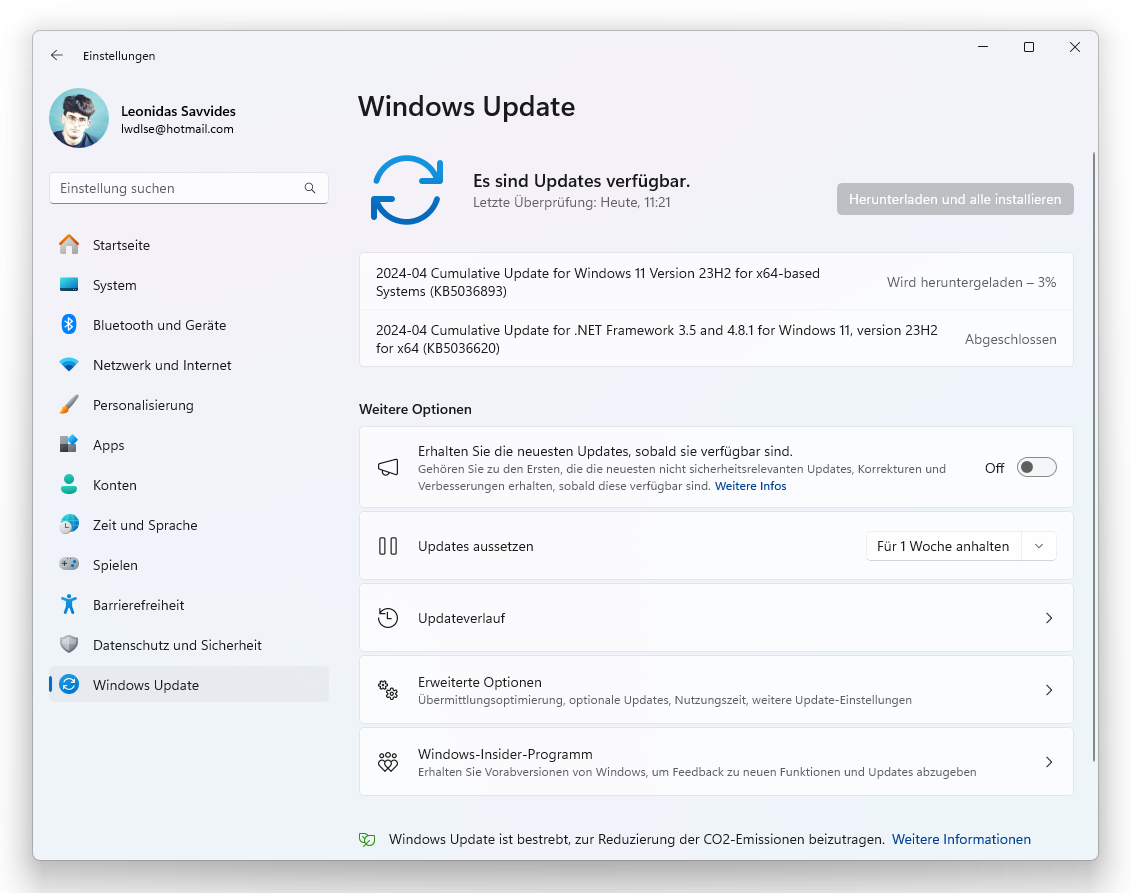
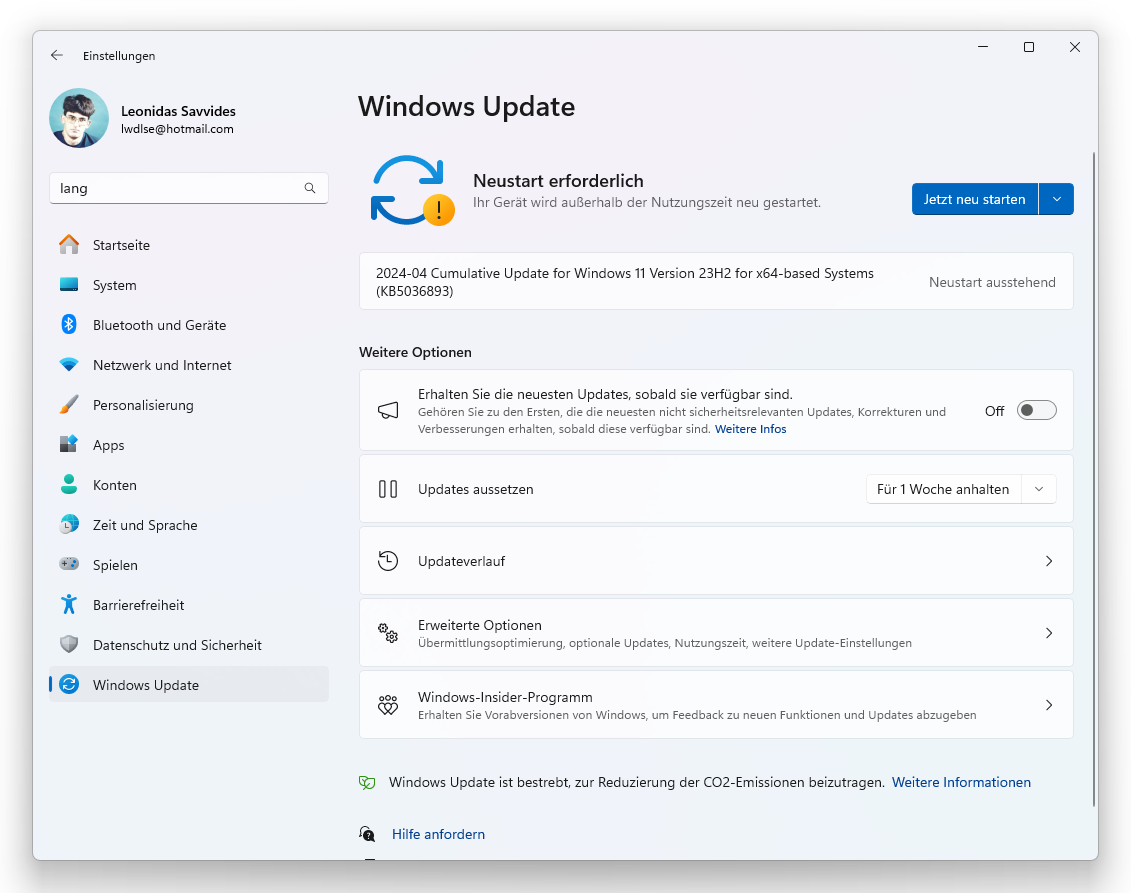
You proceed normally for minor updates – there is no check for unsupported hardware. See below shots:

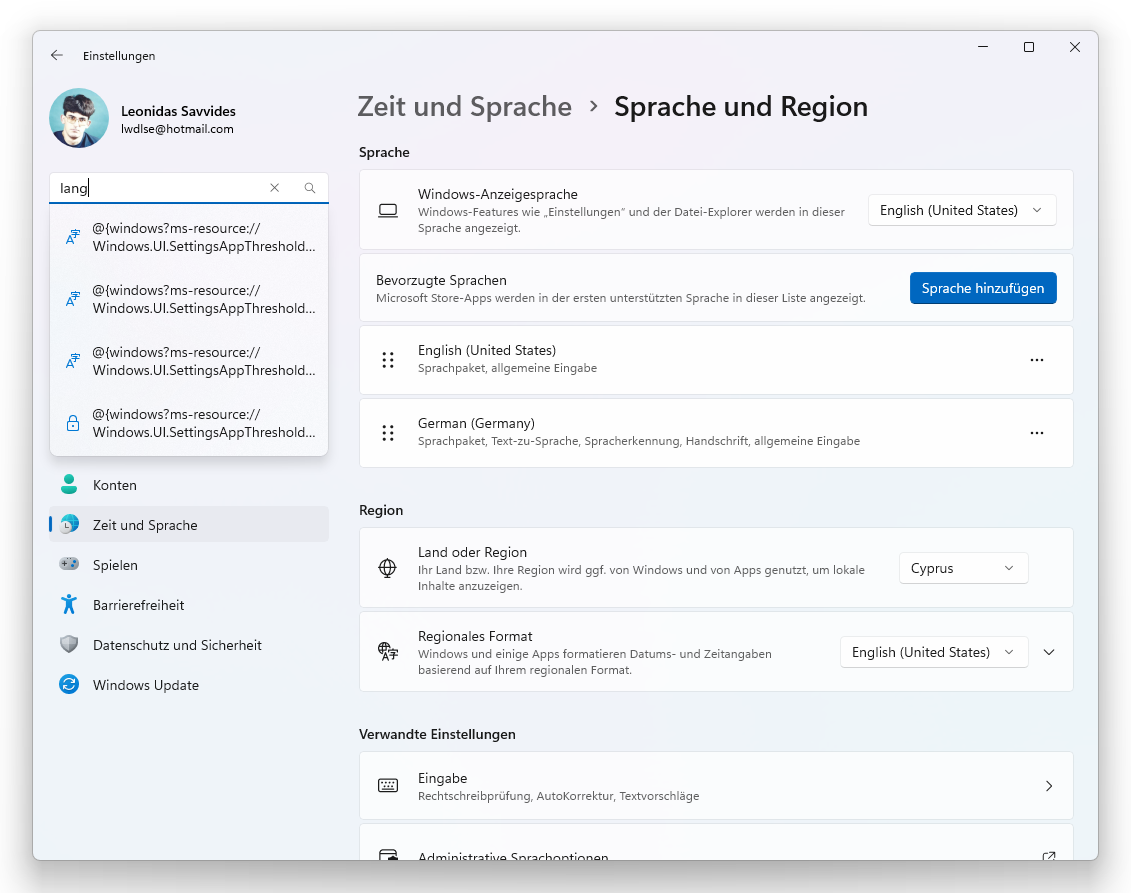
here are some German words involved, for unknown reason:

You can search in Settings for “lang”, normally if you log out, re-login, or restart the PC, when prompted – some of the screen words may be in German but you will understand the RESTART Button is self-explanatory.

====

Thank you!

Please share this article with your friends on Social Media!


5- Buy Cheap Software keys – Windows 11/10 Pro for Workstations, Windows 11 Pro, Home, etc. **

Windows 11 Pro for Workstations – $13.99 just

Windows 10 Pro for Workstations – $13.41 just

Windows 11 Pro

Windows 10 Pro

Windows 11 Home

Windows 10 Home

Windows 11 Pro + Office 2021 Pro Plus

Windows 10 Pro + Office 2021 Pro Plus


Websites for sale — without domain only web files: HTML, CSS, JS, PHP, images … etc.

====

Solar Panels – Photovoltaic installation

http://92.205.59.115/~photovoltaicsys/

====

Polis Town Property Management & Cleaning

http://92.205.59.115/~polispropertyman

====

Jenny’s Private English Institute

http://92.205.59.115/~jennysprivate/

====

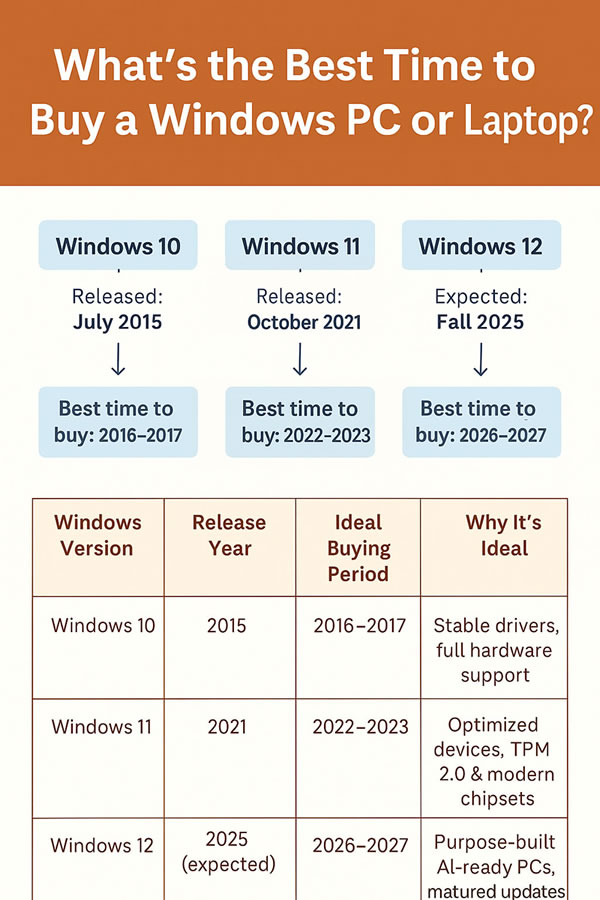
What’s the best time to buy a Windows PC or Laptop?

What’s the Best Time to Buy a Windows PC or Laptop?
— A Seasoned Buyer’s Perspective

If you’ve ever asked yourself “When’s the best time to buy a new Windows PC or laptop?”, you’re not alone. With the constant cycle of hardware upgrades, OS versions, and flashy marketing, it’s easy to get caught up in the excitement of new releases. But after years of observation, I’ve found that the smartest time to buy a Windows computer is actually two years after a major Windows release.

Let me explain.


A. The 2-Year Rule: Why Timing Matters

In 2016, one year after Windows 10 launched (July 2015), we began seeing laptops and desktops fully optimized for the new OS—free from early compatibility bugs and bundled with drivers and firmware that matched the system perfectly. By 2016, Windows 10 PCs were stable, refined, and manufacturers had ironed out most quirks.

Fast-forward to 2022. Windows 11 was officially released in late 2021. Again, by 2022, we started seeing Windows 11-native devices hitting their stride—designed with TPM 2.0, proper Intel 12th/13th Gen support, AMD Ryzen 6000/7000 compatibility, and smarter AI-enhanced features.

Now it’s 2025, and Windows 12 is set to release in Fall 2025. If history repeats itself—and it usually does—the best time to buy a new Windows 12 PC will be in 2026. Here’s why:


B. Why You Should Wait for 2026 to Buy a Windows 12 PC

  1. Better Optimization
    Early adopters often face driver issues, performance bugs, and even compatibility problems with apps and hardware. Waiting a year or two allows time for Microsoft and OEMs to fine-tune the OS for real-world use.
  2. Purpose-Built Hardware
    Devices released in 2026 will be built from the ground up for Windows 12, taking full advantage of its AI capabilities, power optimizations, and any new security or productivity features baked into the OS.
  3. Longer Support Lifecycle
    A PC purchased in 2026 will receive updates and security patches for the full life cycle of Windows 12. Buying late in the Windows 11 era could mean a shorter support window.
  4. Lower Cost, More Value
    Prices tend to stabilize about a year after a major Windows launch. You’ll likely get better value for money in 2026 with more powerful hardware, refined design, and greater energy efficiency.

C. Final Thoughts: Don’t Buy Too Soon—Buy Smart

While it’s tempting to jump on the latest release the moment it drops, patience pays off—especially in the world of Windows PCs. By waiting for the second wave of machines—typically arriving a year or two post-launch—you’ll end up with a faster, more stable, longer-lasting computer.

So if Windows 12 launches in Fall 2025, circle mid-to-late 2026 on your calendar. That’s when you’ll find the sweet spot: matured software, optimized hardware, and the best value for your investment.

In short:
Don’t just buy the newest—buy the right (time) newest.


Pinterest Link

HOW-TO RESET WINDOWS PASSWORD | Hirens-BootCD

I think this the easiest method to reset password in Windows 10/11.


You need to know the shortcut to go to Boot Menu to choose the CD or USB with Hirens-BootCD created with.

To reset a forgotten Windows 11 password using Hiren’s BootCD PE, follow these steps. This method works for both local and Microsoft accounts.

Instructions How-To create bootable media see further below at the end.


  • Boot your computer with Hiren’s BootCD PE — DVD/Optical Disk or USB
  • Go to Start Menu -> Security -> Passwords -> NT Password Edit
  • Open your SAM file (It is usually located in C:\Windows\System32\config\SAM)
  • Click your username and the click ‘Change password’. To set a password, type your password both ‘New password’ and ‘Verify’ fields and then click to ‘OK’. To remove the password, leave both ‘New password’ and ‘Verify’ fields blank and then click to ‘OK’.


🔧 What You’ll Need

  • A USB flash drive (at least 8 GB)​ or a DVD-R/-RW/DL
  • Access to another working PC to create the bootable USB​
  • The latest Hiren’s BootCD PE ISO file​
  • Rufus (a tool to create bootable USB drives) ​ Or DVD Burner Software & DVD Burner Drive – e.g. Ashampoo Burning Studio FREE

🛠️ Step-by-Step Guide

1. Download Hiren’s BootCD PE

  • Visit the official site: hirensbootcd.org
  • Download the latest ISO file (e.g., HBCD_PE_x64.iso)​

2. Create a Bootable USB with Rufus

  • Download Rufus from rufus.ie
  • Insert your USB drive into the working PC​
  • Open Rufus and select your USB under “Device”​
  • Under “Boot selection,” choose the Hiren’s ISO file​
  • Click “Start” and wait for the process to complete​

3. Create a Bootable DVD DISK with Ashampoo Burning Studio

  • Download Ashampoo Burning Studio FREE from https://www.ashampoo.com
  • Insert your DVD Disk in the DVD RW drive into the working PC​
  • Open Ashampoo and select your Disk Image > ​Burn Image
  • Under “Disc Image Path” choose the Hiren’s ISO file​
  • Click “Next” after choose your Burner DVD-RW/-R Drive and “Write” and wait for the process to complete​

4. To boot to the Boot Menu

(also known as the One-Time Boot Menu) — without entering BIOS Setup or changing permanent boot order — you need to press a specific key at startup for your PC brand. Here’s a list of common brands and their Boot Menu keys:

Boot Menu Keys by Manufacturer (for one-time boot device selection)

Brand Boot Menu Key Notes
Dell F12 Tap during POST (when Dell logo shows).
Lenovo F12 or Fn + F12 Some models use the Novo Button (small pinhole button).
HP Esc → F9 First press Esc, then F9 for Boot Menu.
ASUS F8 Sometimes Esc is used instead.
Acer F12 May require enabling F12 Boot Menu in BIOS first.
MSI F11 Tap at splash screen.
Gigabyte F12 Standard across motherboards.
ASRock F11 Tap during splash screen.
Microsoft Surface Volume Down + Power Hold Volume Down, press Power, release when logo appears.
Samsung Esc or F12 Depends on model.
Toshiba F12 Tap at startup.
Sony VAIO Assist or F11 Newer models have a physical “Assist” button.

💡 Tips:

  • Press the Boot Menu key immediately after turning on the PC — start tapping it every second.
  • If you see the OS loading, you missed the timing — restart and try again.
  • On laptops with Fn Lock, you may need to hold Fn along with the function key (e.g., Fn + F12).

===